
Clean, customizable dependency management for every Jira project.
With Advanced Link Manager For Jira, you gain full control over your Jira linked issues, Jira link types, and project-specific dependencies.
Define only the relationship types your team actually uses, and keep your Jira issue links clean, organized, and perfectly aligned with your workflow.
No more cluttered dependency lists or irrelevant link types just a clear, structured, and efficient Jira dependency management experience tailored to every project. 💡
⚠️ Important Notice
Only Jira Administrators can create global Issue Link Types in Jira.
If you need to configure a global link type, please refer to Atlassian’s official documentation.
However, with Advanced Link Manager For Jira, you gain the flexibility to control which issue link types are available at the project level without modifying global Jira settings.
This gives your team more freedom to tailor Jira linked issues, reduce clutter, and keep relationships relevant to your workflow.
✅ This also helps address the long-standing limitation reported in JIRA-16325.
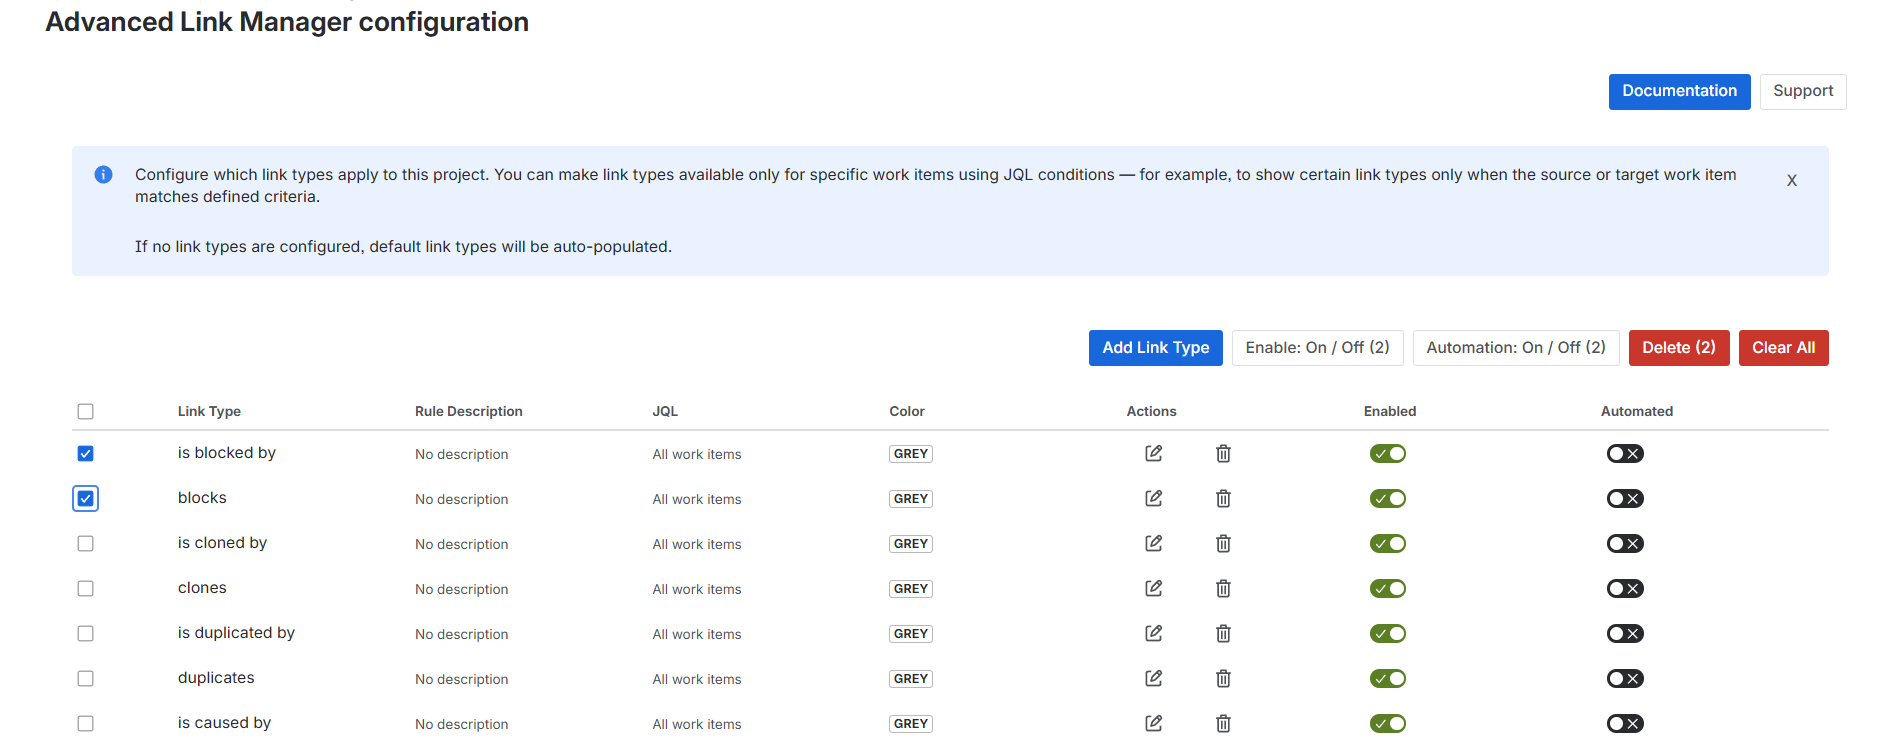
Default Link Types Behavior
-
When Advanced Link Manager for Jira is installed, all default Jira issue link types are automatically added as soon as you open the Link Manager configuration. No setup or action is required from the user.
-
You can then customize these link types freely by configuring rules, enabling or disabling them, or deleting link types that are not needed for your project.
-
If you want to return to the default configuration after modifying or deleting some link types, simply click Clear all. All custom settings will be removed, any deleted link types will be restored, and the configuration will return to its original default state.
Add link type
-
As Project Administrator go to your Jira project
-
Click on Project Settings and Click on Apps
-
Click on Link Manager configuration

-
Based on your choice, if you want to add a customizable link, click on Add link type. If you prefer to add the default link types, simply click on Add default links .
-
Start by clicking on Add link type
-
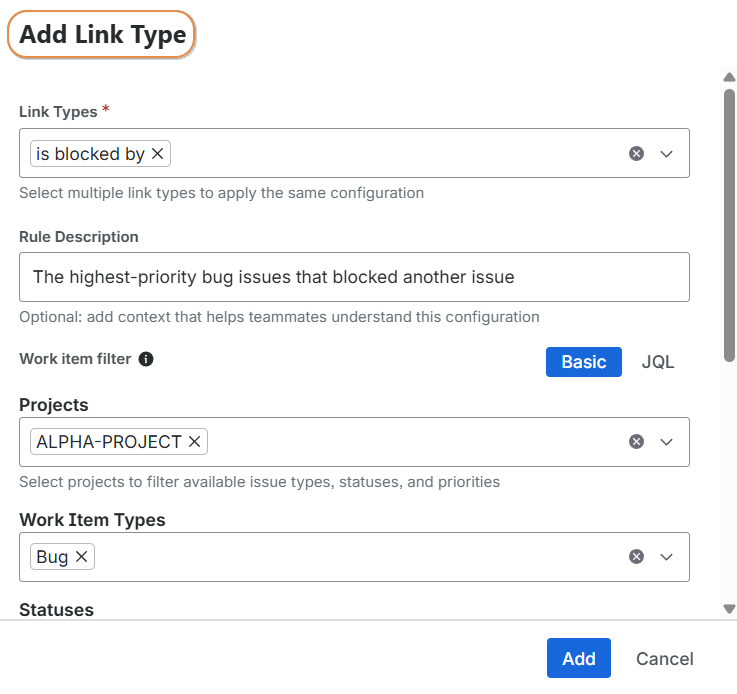
Configure Your Project-Specific Link Types
When adding a Jira link type rule in Advanced Link Manager For Jira, fill in the following fields to define how your Jira issue links should behave:
-
Link Types : Select one or multiple Jira link types that will follow this configuration.
This lets you control and customize how dependencies are handled for your project. -
Rule Description : Add a clear description explaining the purpose of this link rule.
(Optional) Provide context to help teammates understand when and how to use this configuration. -
Work Item Filter :Filter the issues to which this rule applies.
-
Projects
Choose the projects to restrict available issue types, statuses, and priorities. -
Issue Types
Select which issue types are affected by this rule. -
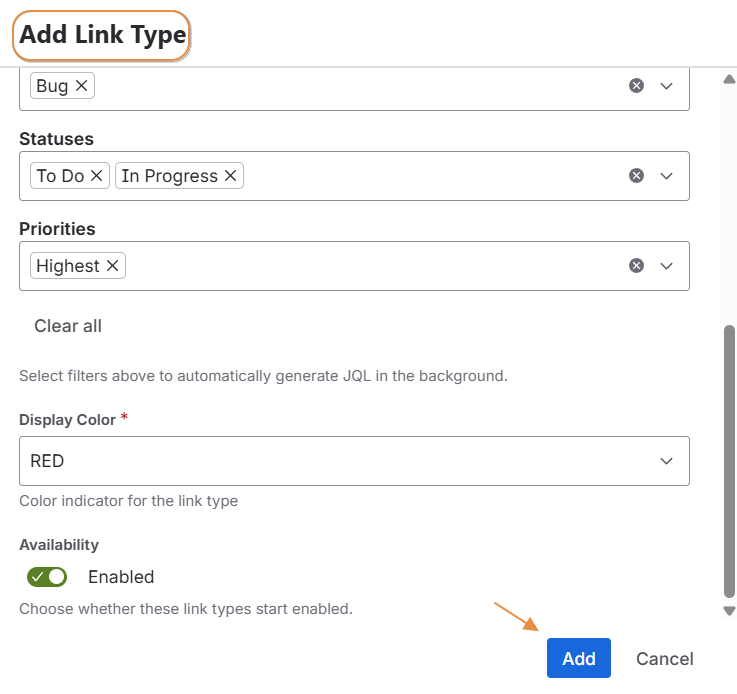
Statuses
Pick the Jira statuses the rule applies to. -
Priorities
Choose the relevant priorities for your Jira linked issues.
-
-
A Clear all option lets you quickly reset your selections. Filters automatically generate the background JQL for you.
-
Display Color : Choose a color label (default: Grey). This helps visually distinguish link types in your Views and Link Manager configuration table.
-
Availability : Enable or disable the link types by default.This controls whether your selected Jira link types are available immediately for use.
-
-
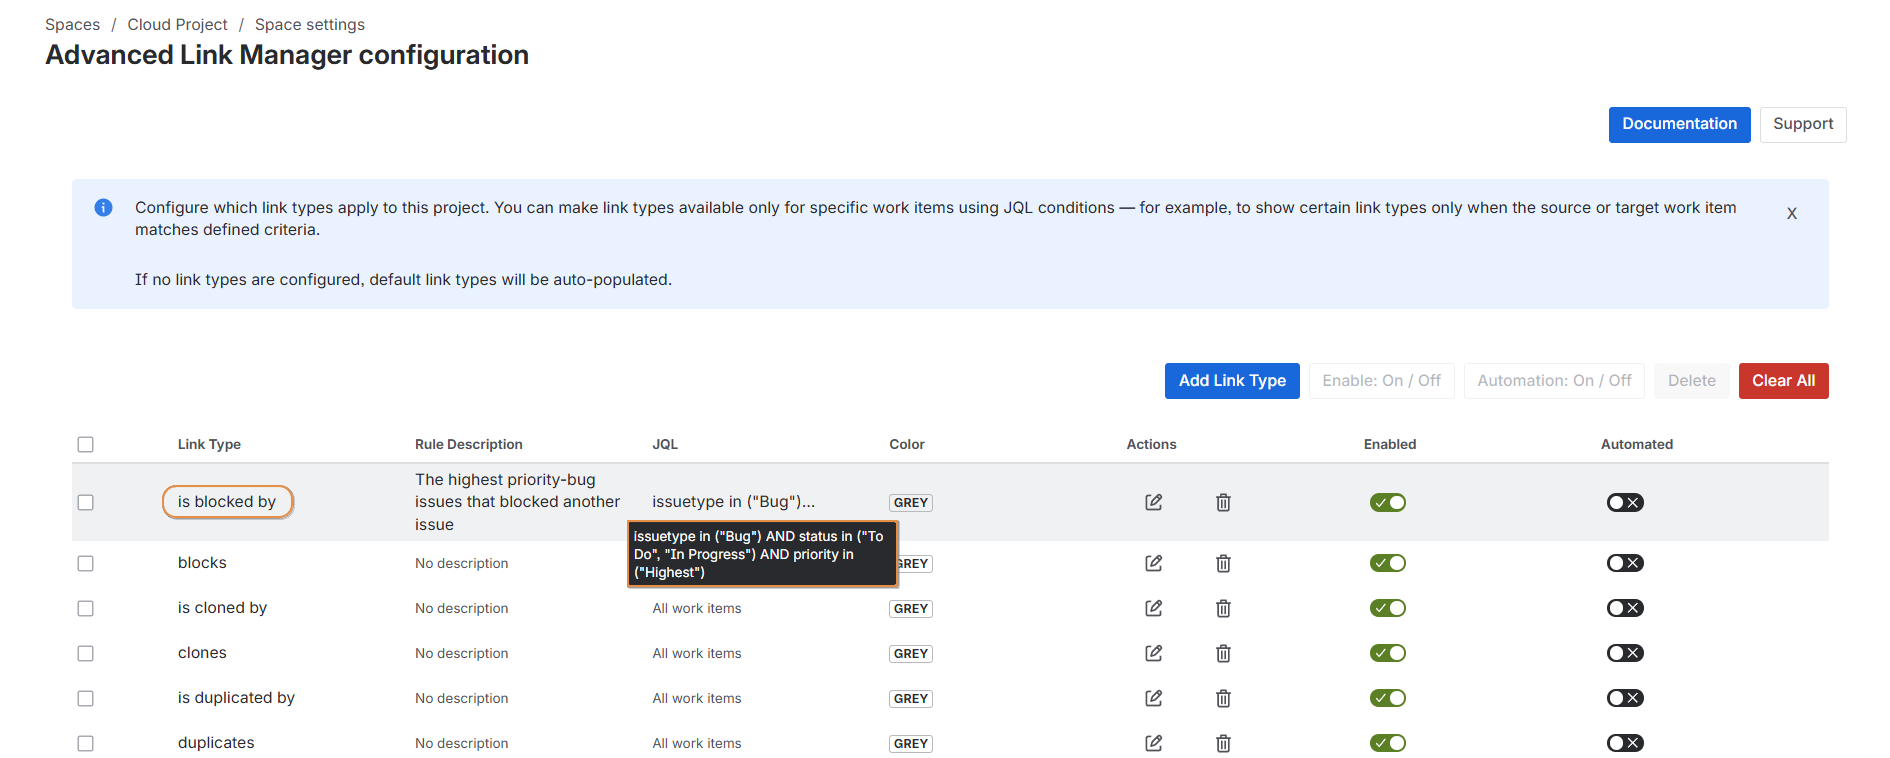
These screenshots show the details and fields filled in for an example configuration :
-
-
This screenshot also shows the link added successfully :
Manage a Jira Link Type
-
Once your Jira link types are created in Advanced Link Manager For Jira, you can easily update, delete, or change their availability.
-
This allows you to keep your Jira issue links, dependencies, and configurations clean and fully controlled at the project level.
Edit a Link Type
To edit an existing Jira link type rule:
-
Click the pencil icon next to the link type you want to modify.
-
Update the fields you need (description, filters, color, availability, etc.).
-
Click Save to apply your changes.
This helps you keep your Jira linked issues and rules up to date as your workflow evolves.
Delete a Link Type
To remove a link type configuration:
-
Click the delete icon.
-
Confirm by clicking the check icon in the confirmation popup.
Once deleted, this link type rule will no longer apply to your project.
Enable or Disable a Link Type
You can toggle the availability of each link type:
-
Enabled → The link type appears in the list when creating or editing Jira issue links.
-
Disabled → The link type is hidden and cannot be selected by users.
This lets you control which Jira link types are active for your project, helping reduce clutter and avoid invalid or unused dependencies.
Enable or Disable Automation
You can control the automation behavior for each link type by toggling its availability.
-
Enable Automation : When enabled, any linked issue created from an external tool (such as an app or automation rule) will be marked as Automated in the Matrix View.
-
Disable Automation : When disabled, even if a linked issue is created from an external tool, it will not be marked as Automated.
This setting allows you to decide which Jira link types should display the automated indicator and which ones should ignore it.

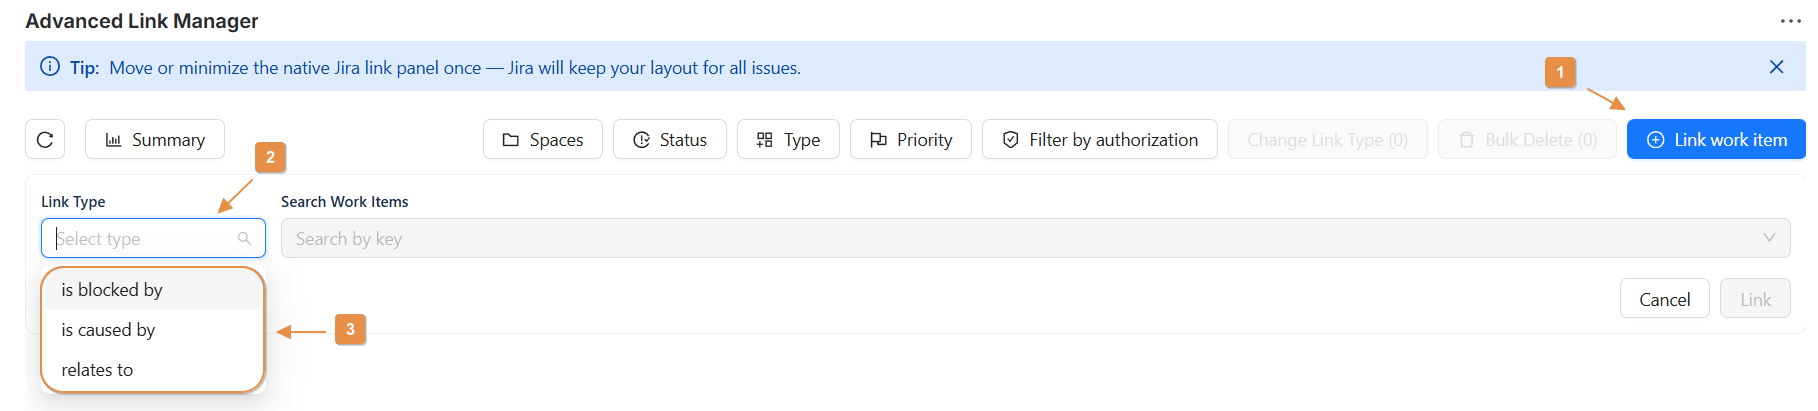
Verify the Available Link Types
-
You have to find only enabled link types when you want to add a link issue .
-
Create an issue
-
Click on Apps
-
Select Advanced Link Manager

-
Click on Add button the click on Select and the link types appears
Conslusion
-
In this guide, you've learned how to add and manage link types within the Link Manager configuration page for Jira.
-
By customizing these link types, you ensure that they are tailored to your project's specific needs, enhancing clarity in issue relationships and workflow efficiency.
-
Once configured correctly, the link types will be available at the issue level, providing your team with a streamlined dependency management experience.
Need help ?
💡 We're here for you! If you have questions or need to report a bug, visit our Help Center and raise a support ticket. Our team is ready to assist you