
The Advanced Link Manager Gadget allows you to visualize, analyze, and manage work item link hierarchies directly from your Jira dashboard.
It provides a configurable tree structure, powerful filtering options, customizable columns, and automatic refresh capabilities all in one flexible gadget.
How to Add the Gadget to Your Dashboard
-
Navigate to your Jira Dashboard.
-
Click Add gadget.
-
In the search bar, type Advanced Link Manager.
-
Select Advanced Link Manager Gadget.
-
Click Add gadget.
The gadget will now appear on your dashboard and will require configuration.
Gadget Configuration
-
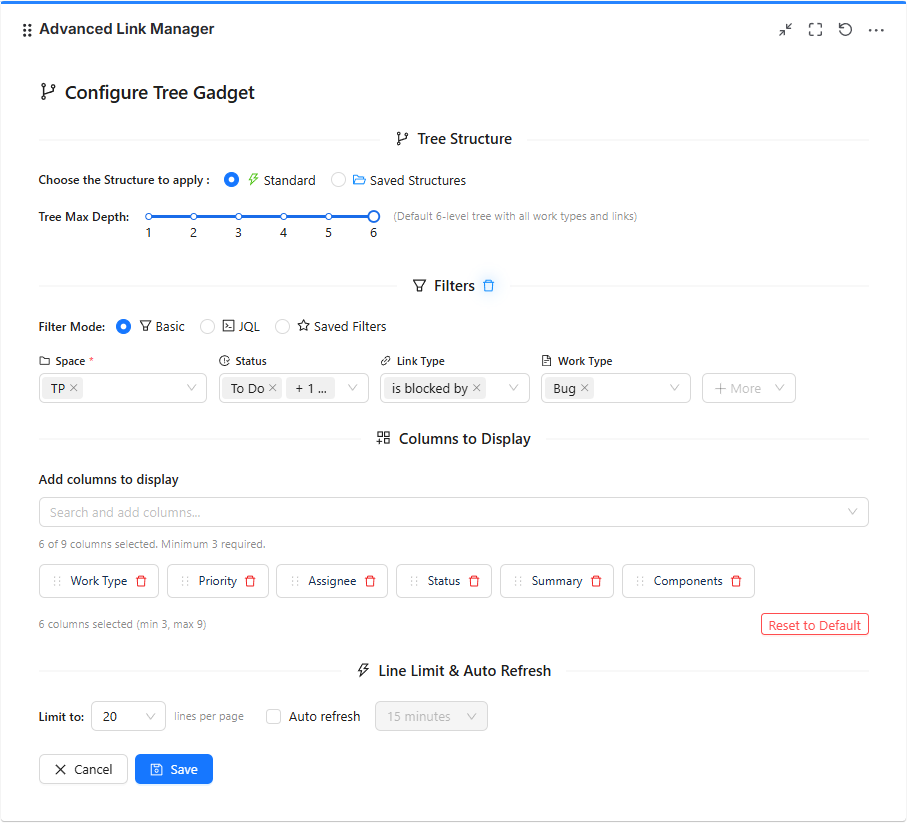
When adding the gadget the configuration page displayed , you will define how the link structure should be displayed.
1. Structure Selection
-
At first sight, you will see the Structure section.You can choose between:
Standard Tree : Use the default hierarchy structure provided by the app.
Saved Structure : Select a previously configured and saved structure.
Saved structures allow you to:
-
Reuse complex configurations
-
Apply consistent hierarchy logic
-
Minimize repeated configuration at gadget level
Once selected, the structure will define how linked work items are displayed in the gadget.
2. Filters
-
The Filters section allows you to narrow down which work items appear in the structure.
-
You can filter by:
-
Project: Select one or more projects to include in the structure.
-
Priority: Select one or more priority levels (Highest, High, Medium, Low).
-
Link Type : Select one or more work item link types (blocks, is blocked by, clones, duplicates).
-
Status: Select one or more work item statuses (To Do, In Progress, Done).
-
work item Type: Select one or more work item types (Task, Bug, Story, Epic).
-
Assignee : Select a specific user to display only work items assigned to them.
-
Fix Version: Select a specific fix version.
-
Filters help you focus only on relevant linked work items and improve performance.
3.Filter by JQL in the Gadget
-
You can now search and filter issues directly inside the gadget using JQL (Jira Query Language).
What You Can Do
-
Enter any valid JQL query directly in the gadget
-
Combine multiple conditions for advanced filtering
Example Queries
-
project = "Cloud Platform" AND status != Done -
assignee = currentUser() AND priority = High -
created >= -7d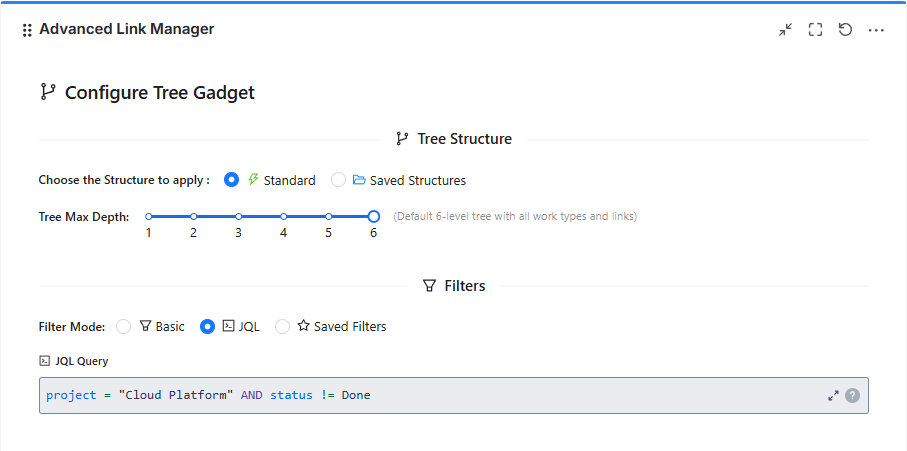
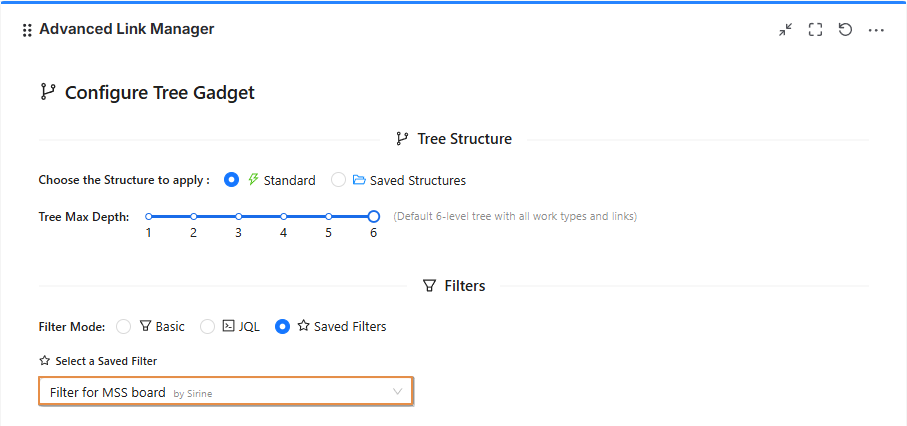
4.Select Saved Filter
-
Use the Saved Filter option to quickly apply an existing Jira filter to the gadget.
-
Simply choose one of your saved filters from the dropdown list, and the results will automatically display in the gadget.
5. Customize Columns
-
The Customize Columns section allows you to define which fields appear in the table.
You can:
-
Add available Jira fields
-
Remove unnecessary fields
-
Reorder columns using drag & drop
This gives full flexibility to adapt the gadget to different use cases .
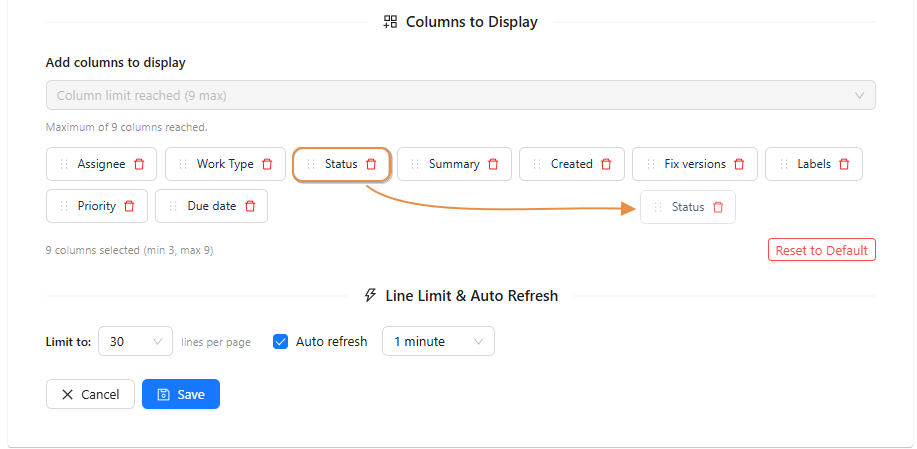
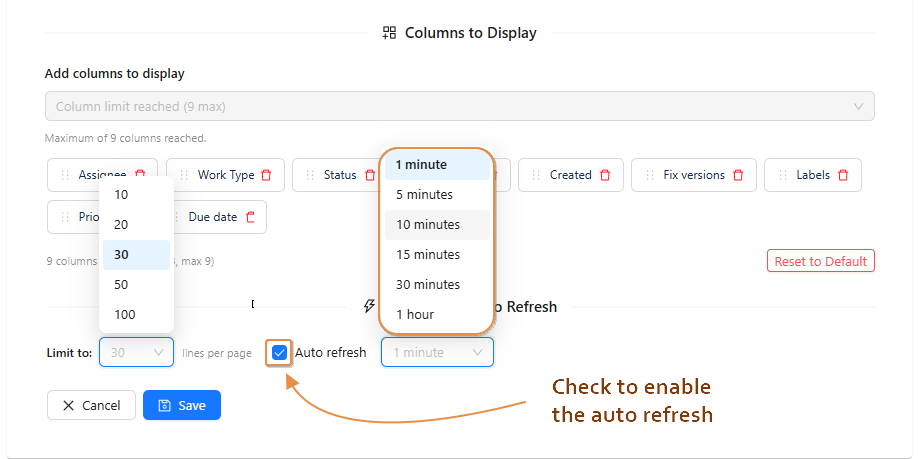
5. Visible Rows Limit
-
You can define how many rows should be displayed in the gadget.
Example:
-
Show 10 rows
-
Show 20 rows
-
Show 50 rows
6. Auto-Refresh Interval
-
The gadget can automatically refresh its data.
-
Options typically include:
-
Manual refresh only
-
Refresh every X minutes
-
This ensures the structure remains up to date without manually reloading the dashboard.
Gadget Display Controls
Highlight Options
-
The Highlight feature allows you to visually specific work items within the structure.
-
This improves readability and helps users quickly identify important items directly from the dashboard.
You can select one of the following highlight modes:
Highlight My Work : Automatically highlights work items assigned to the currently logged-in user.
Highlight High Priority : Highlights work items with the highest priority level (Highest).
Highlight Recently Changed : Highlights work items that were recently updated or transitioned.
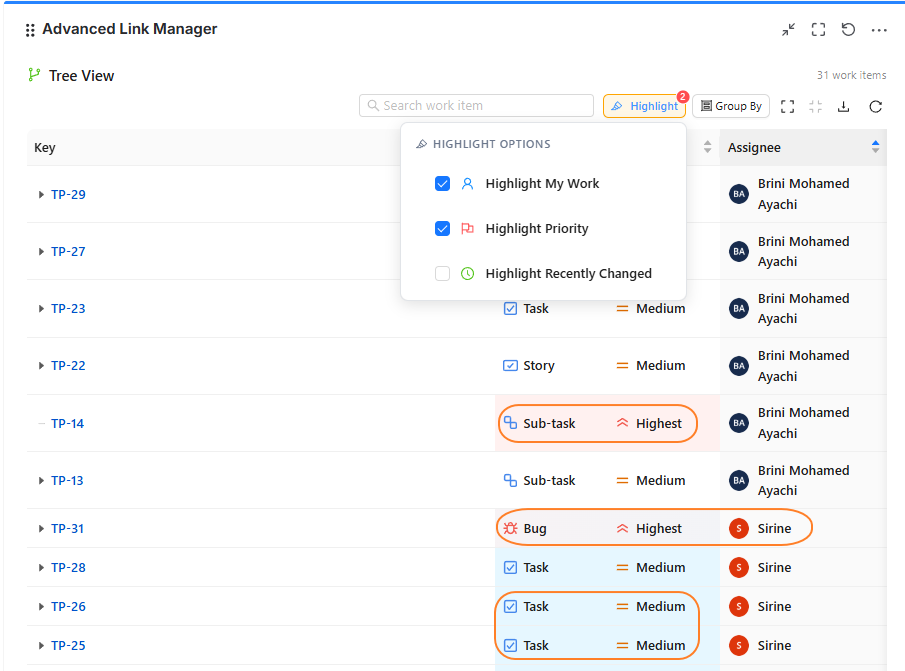
When two highlight rules are applied to the same column (for example, Assigned to you in blue and Highest priority in red), the colors will combine to reflect both conditions.
Group By
-
The Group By feature allows you to organize and structure the table content dynamically.
Available grouping options:
-
No Grouping : Displays work items in a standard hierarchical view.
-
Link Type Groups work items by their relationship type (blocks, is blocked by, clones).
-
Assignee : Groups work items based on the assigned user.
-
Priority : Organizes work items by priority level.
-
Status : Groups work items according to workflow status.( to do , done .. )
-
Work Type : Groups work items by work item type (Task, Bug, Story).
-
Space : Groups work items by project or space context.
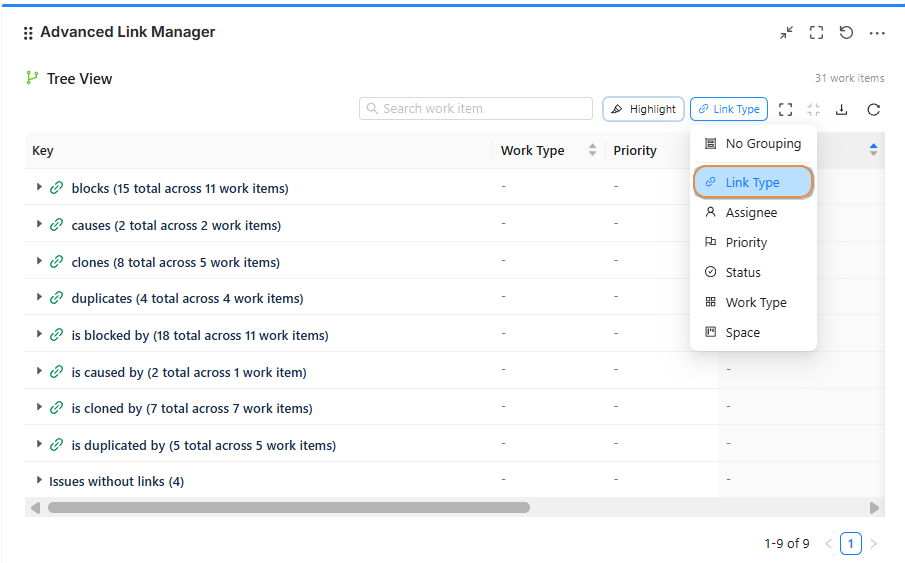
Grouping makes the table easier to read and helps users view dependencies in different ways based on what they need.
Search Work Item
-
The Search Work Item feature allows you to quickly find any work item in your project.
You can search using:
-
Work Item Key
Example:PROJ-123 -
Work Item Summary
Enter any keyword from the work item title, and the system will display matching results.
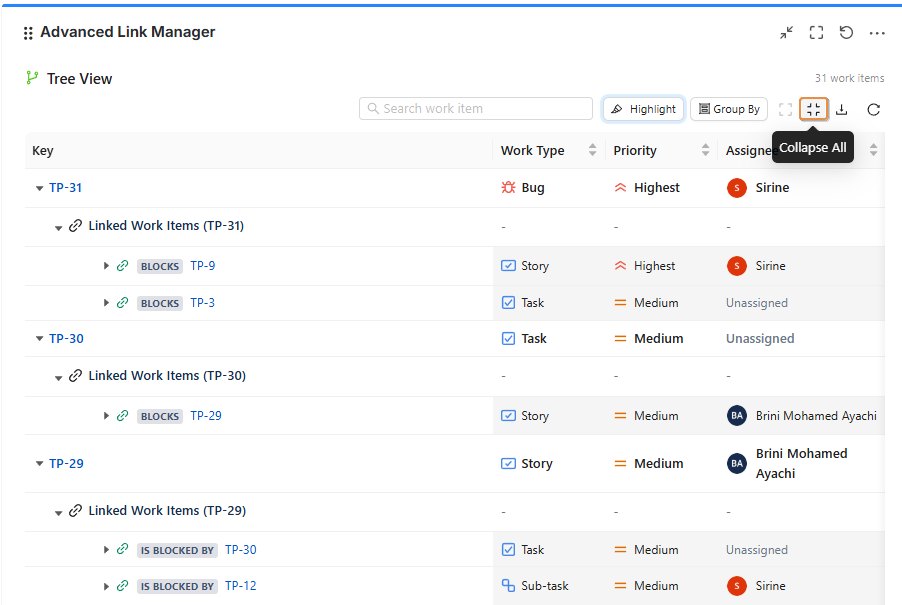
Collapse & Expand Hierarchy
Easily manage the visibility of your work item structure using the Collapse and Expand options.
-
Expand allows you to expand root work items, including all links and child work items.
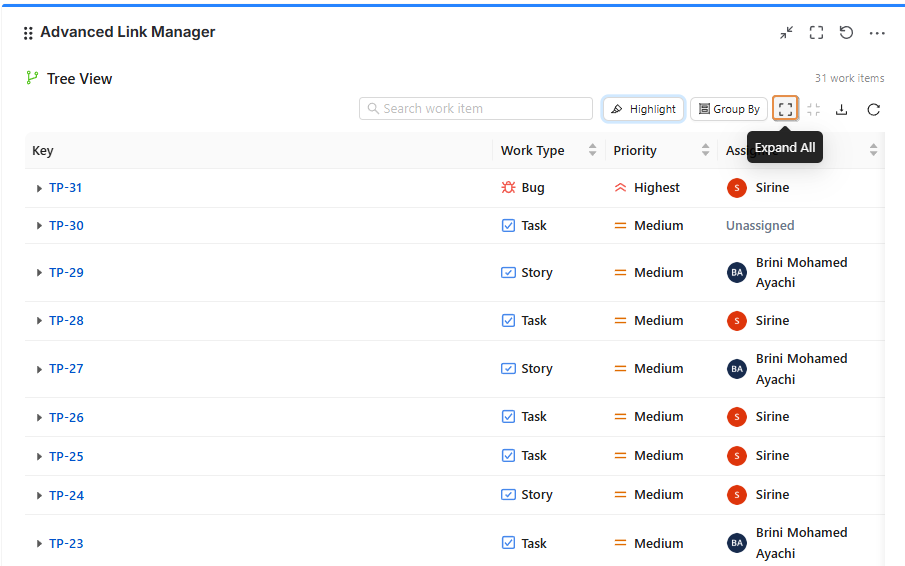
-
Collapse helps you simplify the view by hiding nested levels, making the list cleaner and easier to read.
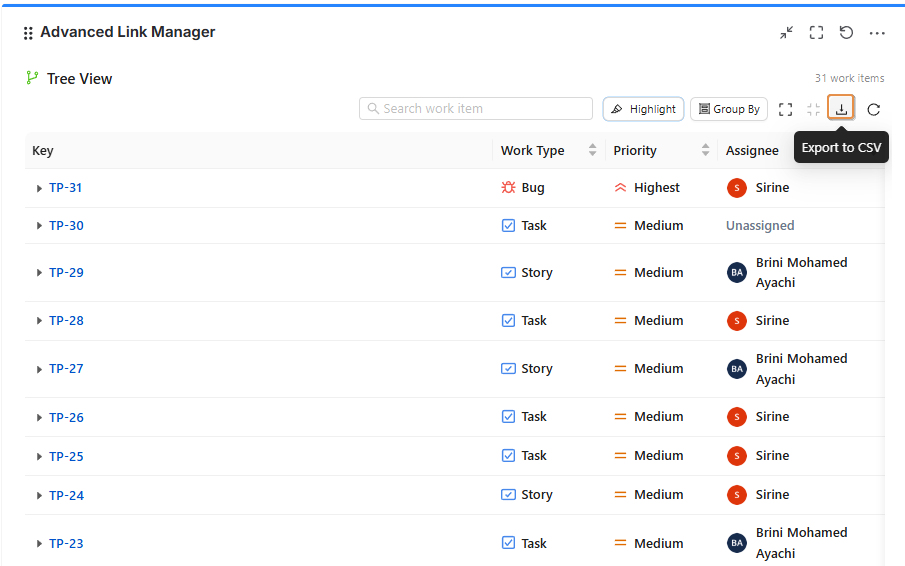
Export to CSV
The Export to CSV option allows you to download the displayed work items and their hierarchy into a CSV file.
This makes it easy to:
-
Share data with stakeholders
-
Perform external analysis
-
Keep an offline record of the results
The exported file reflects the current view and applied filters in the gadget.
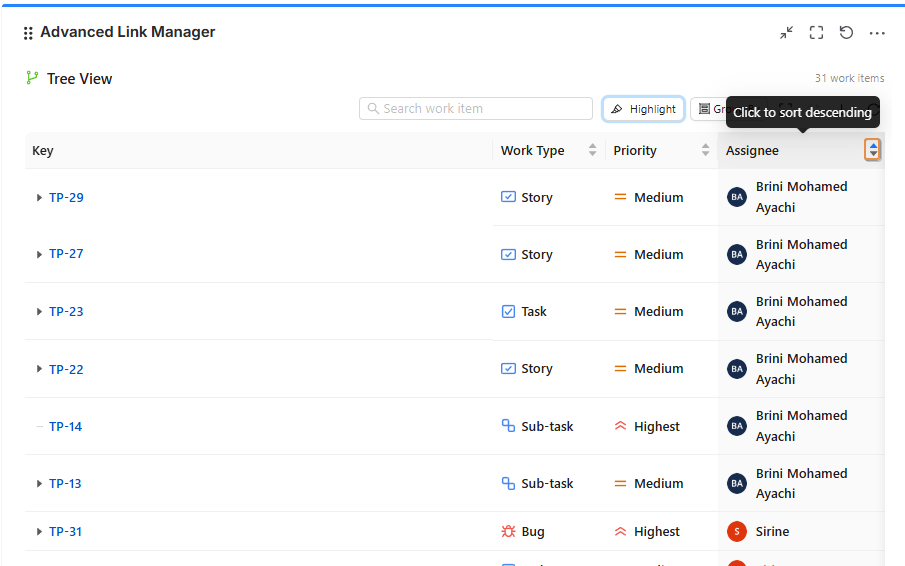
Column Sorting
-
You can sort the data by clicking on any column header.
-
Click once to sort in ascending order, and click again to switch to descending order. T
Best Practice
For better organization:
-
Configure complex structures at Global Level
-
Save them as reusable structures
-
Select them in the gadget instead of reconfiguring each time
This ensures consistency and reduces configuration errors.
Conclusion
-
The Advanced Link Manager Gadget provides a powerful and flexible way to visualize and manage work item dependencies directly from your Jira dashboard.
Need help?
💡 We're here for you! If you have questions or need to report a bug, visit our Help Center and raise a support ticket. Our team is ready to assist you