
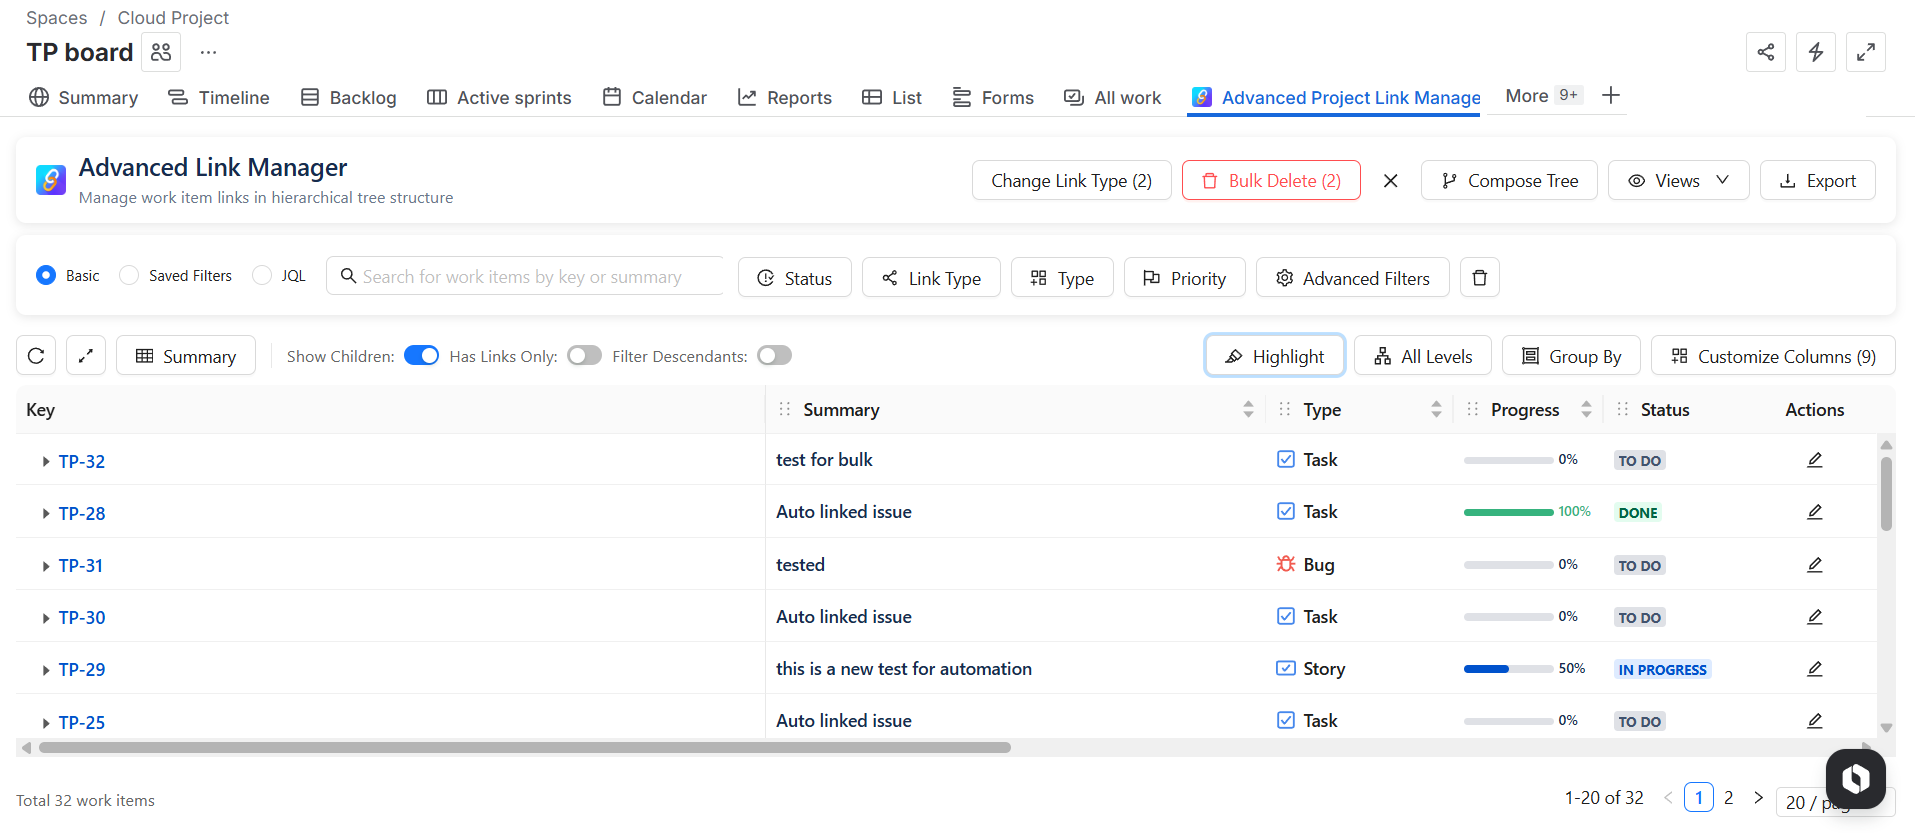
The Project Page in Advanced Link Manager gives you a focused and powerful way to manage linked issues within a single Jira project.
It allows you to filter, organize, highlight, and analyze issue relationships with precision.
From dependency tracking to bulk link management and custom hierarchy configuration using Compose Tree, the Project Page provides everything you need to control and understand your project’s structure in one centralized view.
Filters
Basic filters
-
The Project Page provides powerful filtering options to help you quickly focus on relevant issues.
Available Filters
Since you are already inside a specific project, the project filter is automatically applied.
You can filter by:
-
Status: Select one or multiple statuses (To Do, In Progress, Done) or filter by status category.
-
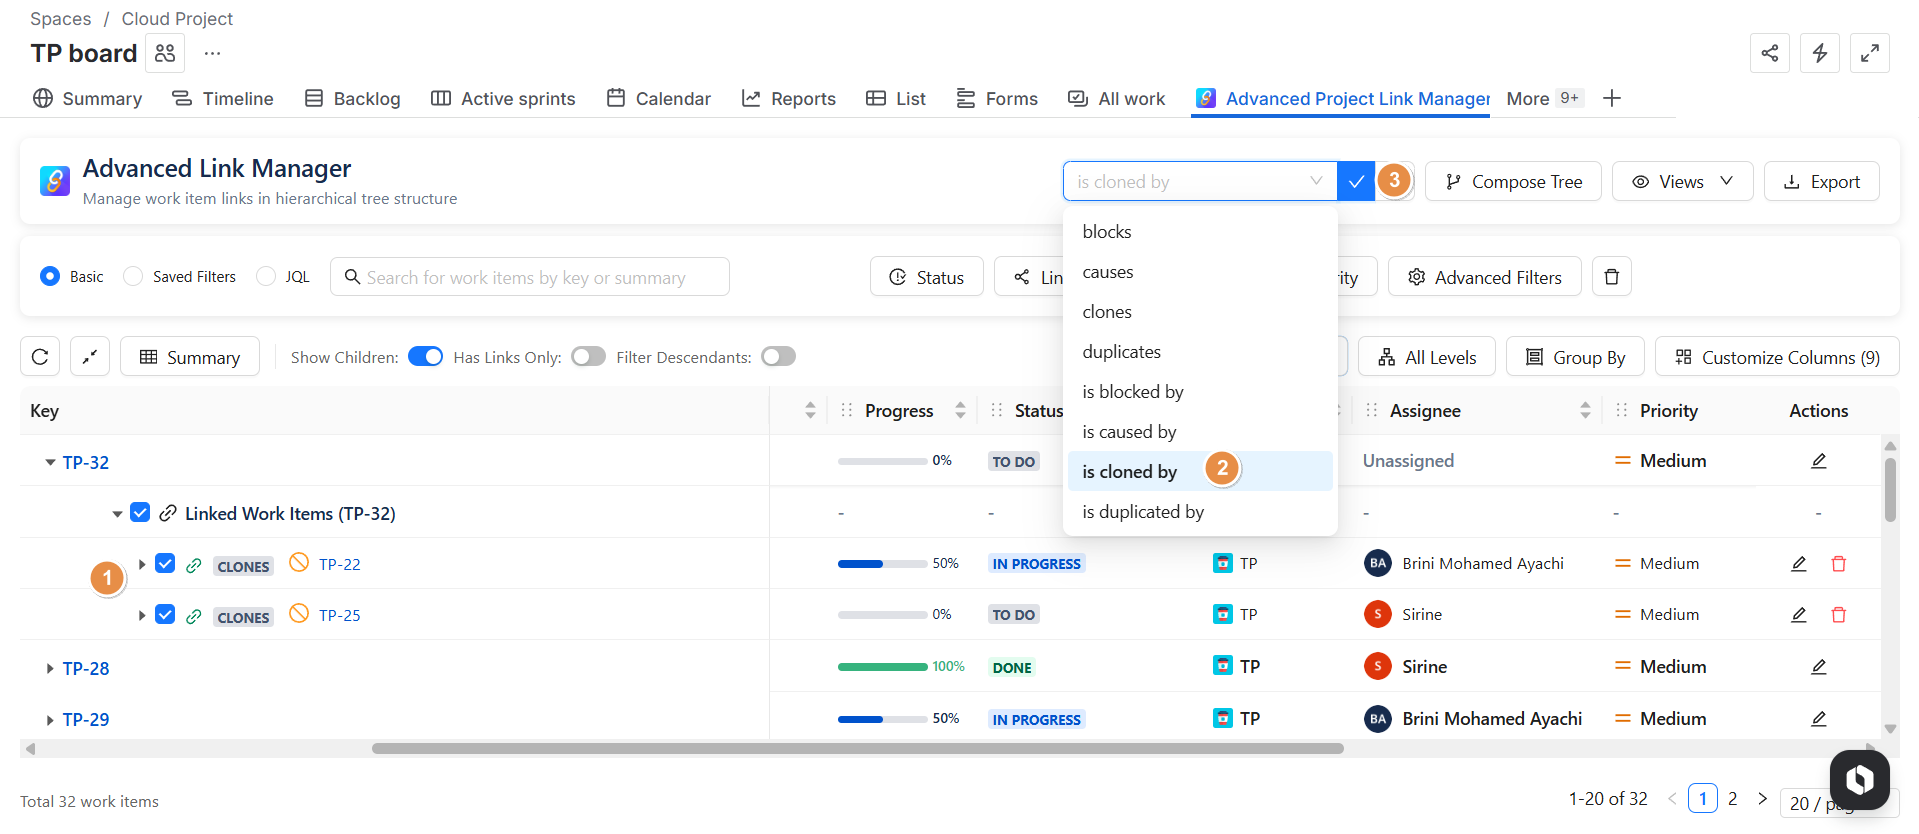
Link Type: Filter issues based on relationship type such as blocks, causes, clones, duplicates, etc.
-
Work Item Type: Filter by issue types like Epic, Story, Task, Bug, etc.
-
Priority: Filter by priority level (Highest, High, Medium, Low).
-
Clear Filters: Instantly remove all applied filters and reset the view.
Important Note
-
Filters are applied to root issues (main issues) by default.
-
Linked issues and child issues are not affected unless Filter Descendants toggle is disabled.
Filter by JQL
-
You can search and filter issues using JQL (Jira Query Language) directly from the Project Page.
What You Can Do
-
Enter any valid JQL query related to the current project
-
Combine multiple conditions for advanced filtering
Example Queries
assignee = currentUser() AND priority = High
Select Saved Filter
-
Use the Saved Filter option to quickly apply an existing Jira filter.
-
Simply choose one of your saved filters from the dropdown list, and the results will automatically display in the table.
Levels Display (Hierarchy Depth)
-
You can display up to 6 levels of linked issues.Choose the exact level depth from level 1 to 6 you want to show in the table.
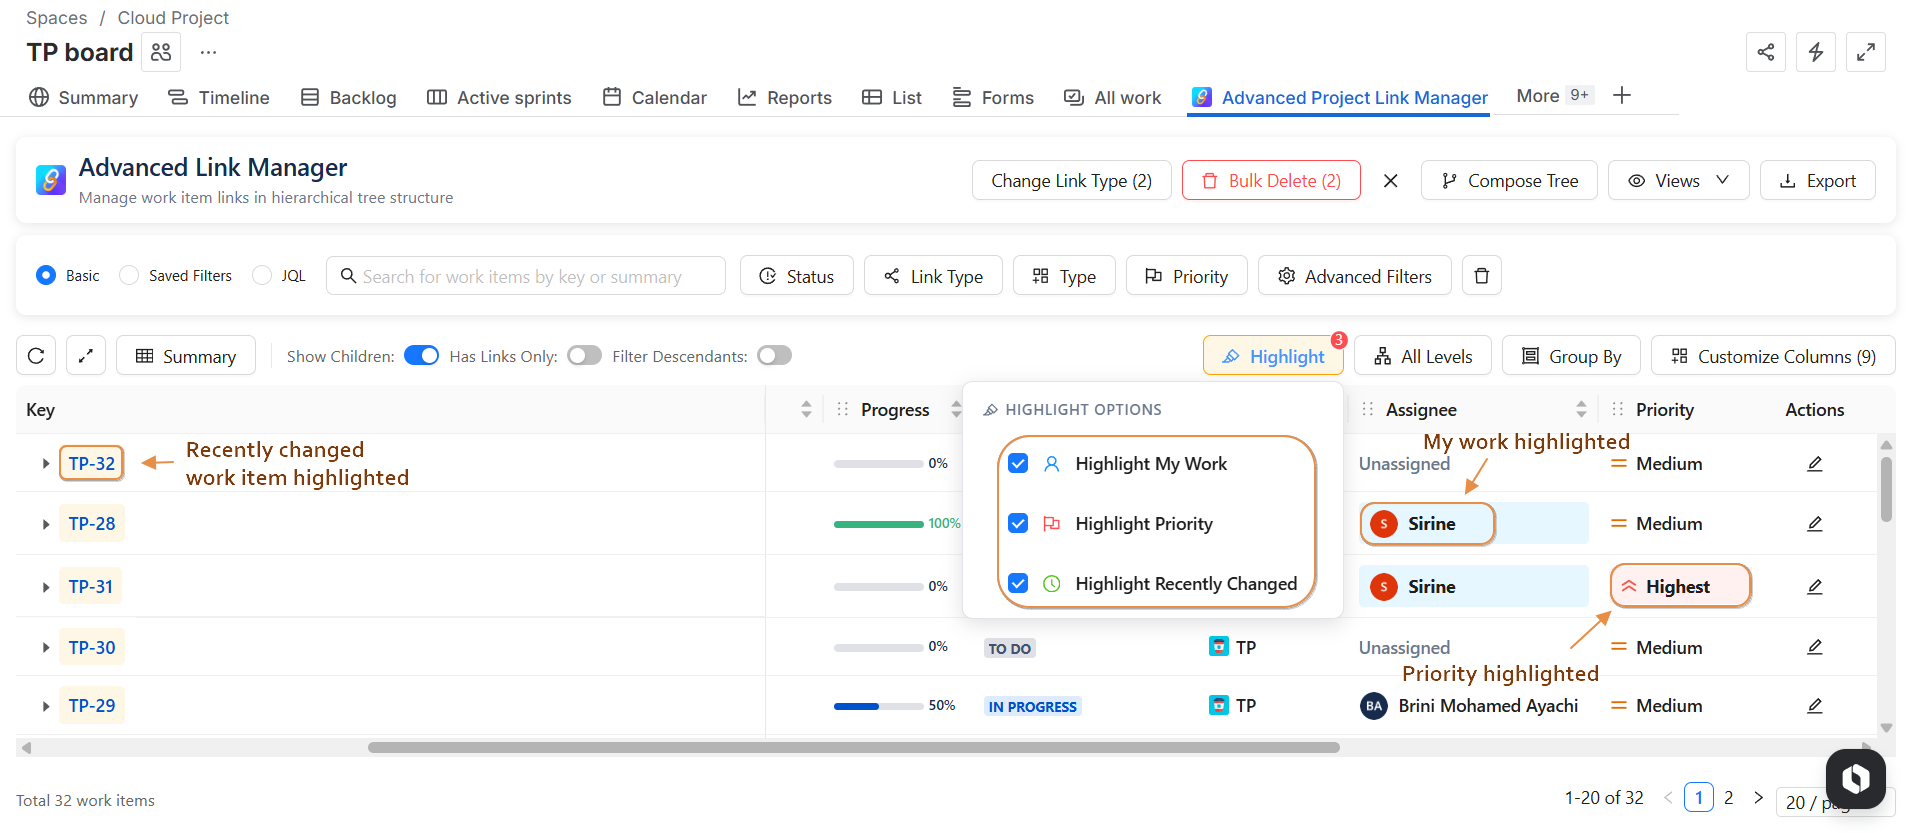
Highlight Options
Highlighting helps you quickly identify important issues.
Available Highlight Modes
-
Highlight My Work: Highlights issues assigned to the current user.
-
Highlight Priority: Highlights highest-priority issues.
-
Highlight Recently Changed: Highlights issues recently updated.
If multiple highlight options apply to the same issue (for example, assigned to you and highest priority), the highlight colors will be combined visually in the table .
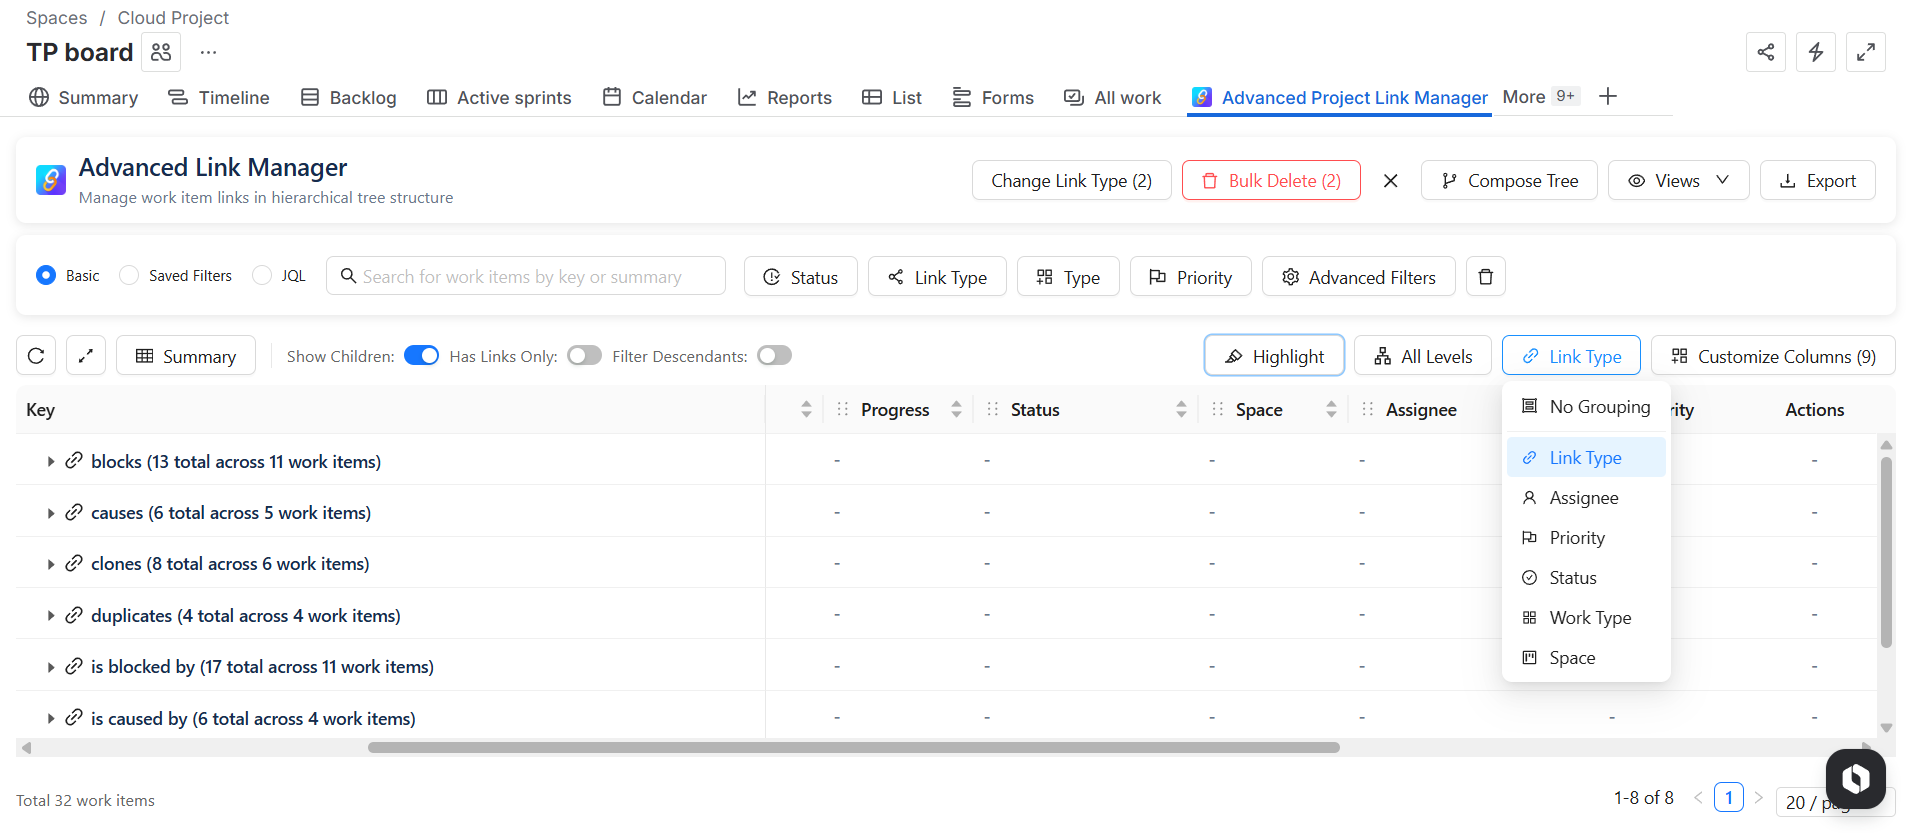
Group By filter
You can organize issues using different grouping options:
-
No Grouping
-
Link Type
-
Assignee
-
Priority
-
Status
-
Issue Type
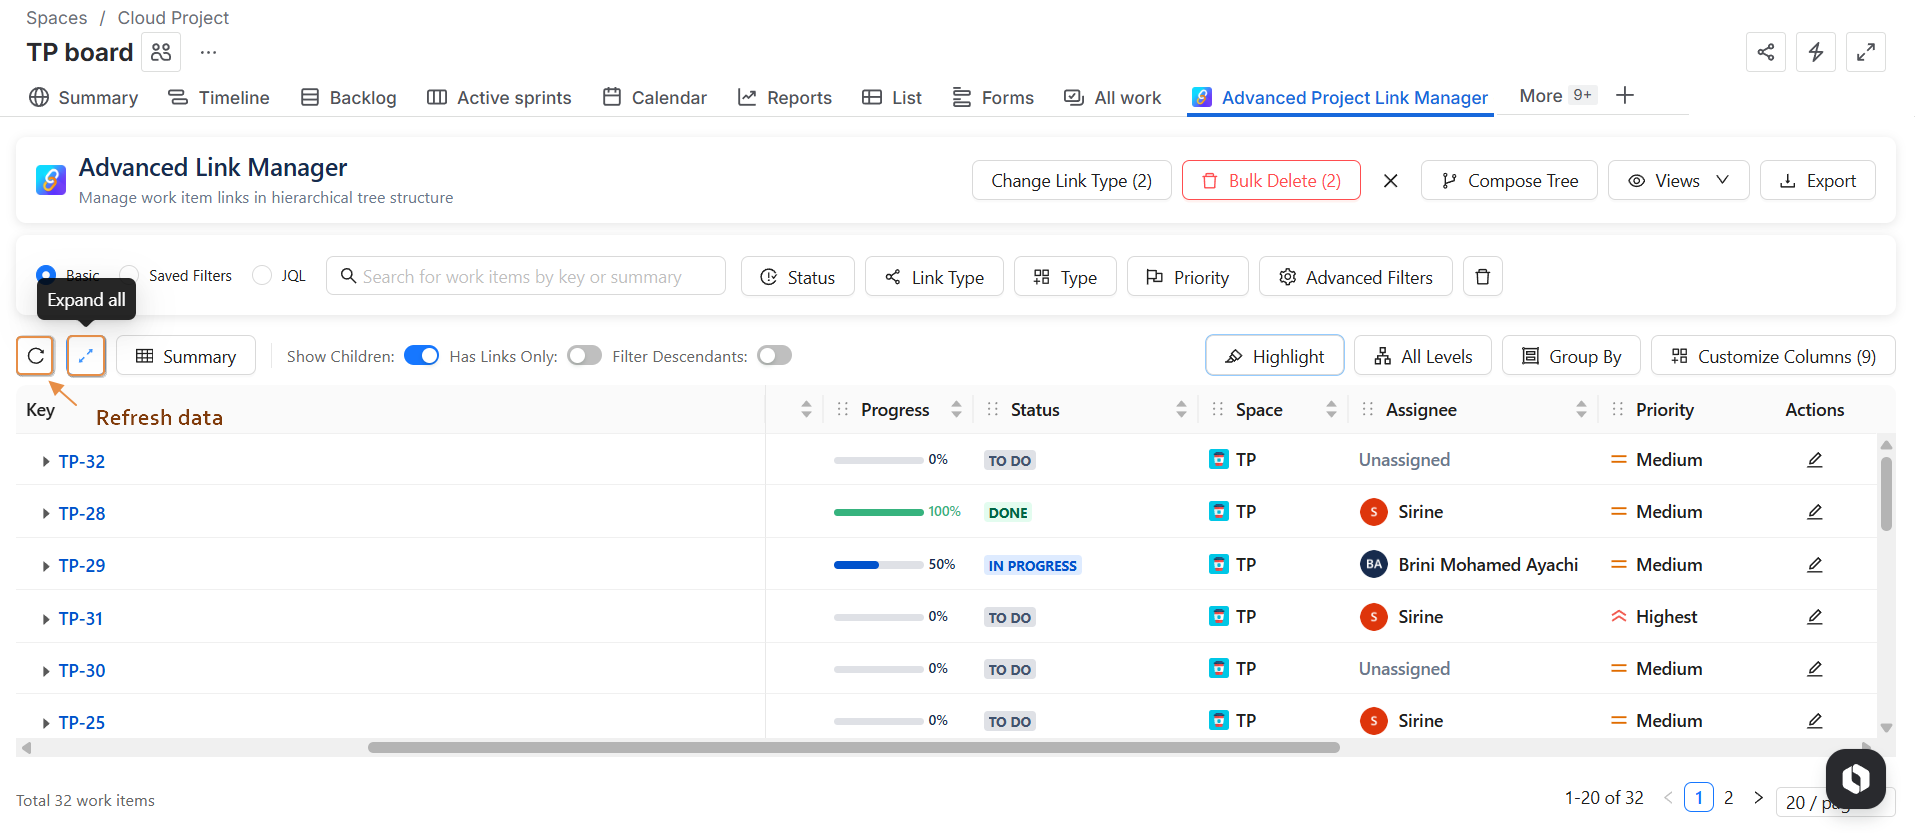
Expand and Collapse Levels
You can:
-
Expand issues level by level (from Level 1 up to Level 6)
-
Collapse expanded levels at any time
-
Expand root work items directly
This makes it easier to navigate large dependency structures inside the project.
Refresh Data
The Refresh button reloads the table.
Use it to display the most recent changes applied to issues or links.
Bulk Actions
The Project Page supports bulk operations on selected issues within the current project.
Bulk Change Link Type
-
Select the links you want to update.
-
Click Bulk Change.
-
Choose Change Link Type.
-
Select the new link type.
-
Click Check.
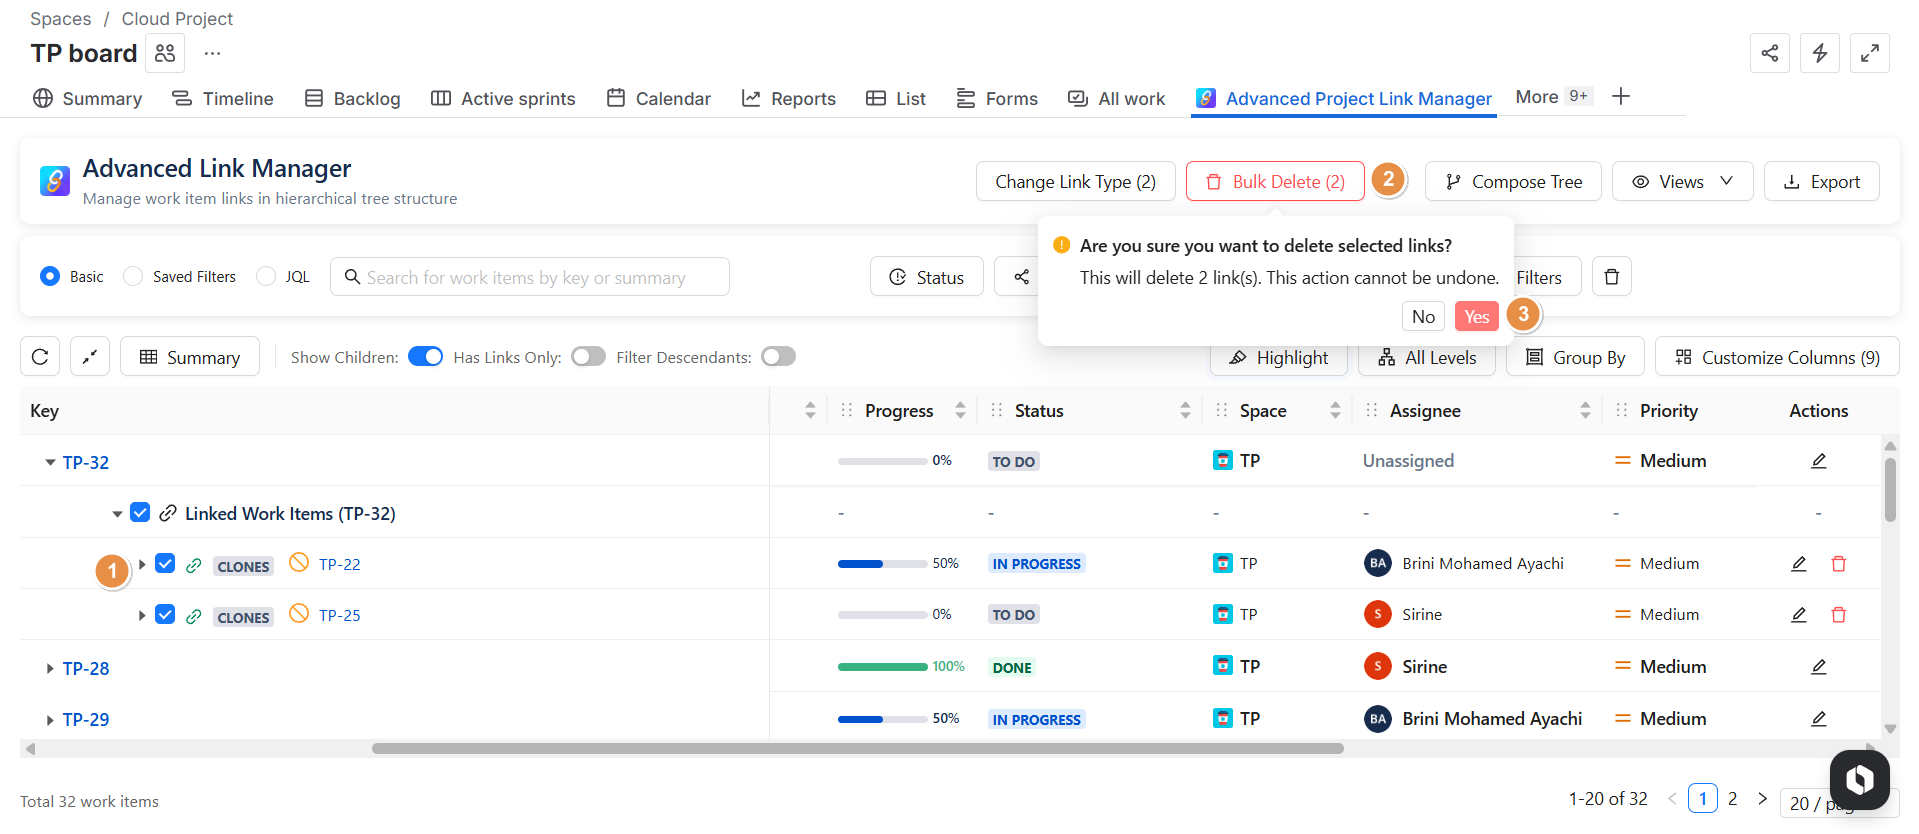
Bulk Delete Links
-
Select the links you want to delete.
-
Click Bulk Delete.
-
Confirm the action in the pop-up.
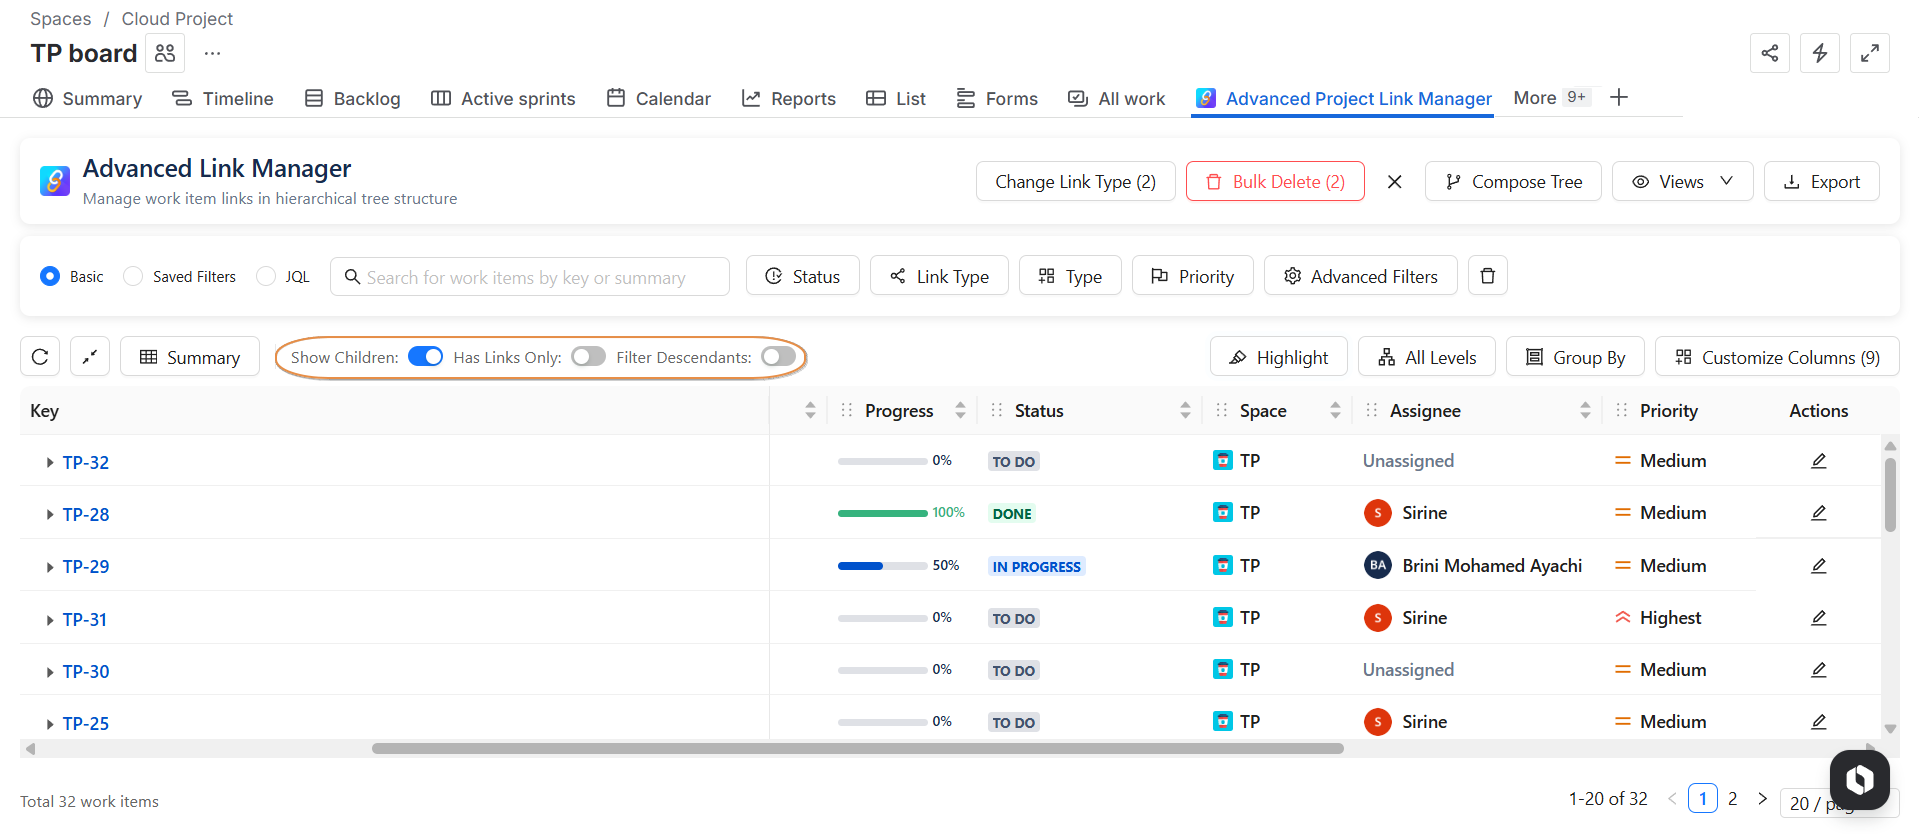
Toggle Options
Several toggle switches allow you to control what is displayed:
-
Show Children: Show or hide child issues.
-
Show Issues Without Links: Display or hide issues that have no links.
-
Filter scendants:When enabled, filters apply to child and linked issues.
Customize Columns
You can fully customize the table columns:
-
Add or remove fields
-
Reorder columns using drag and drop
This allows you to tailor the table to your project needs.
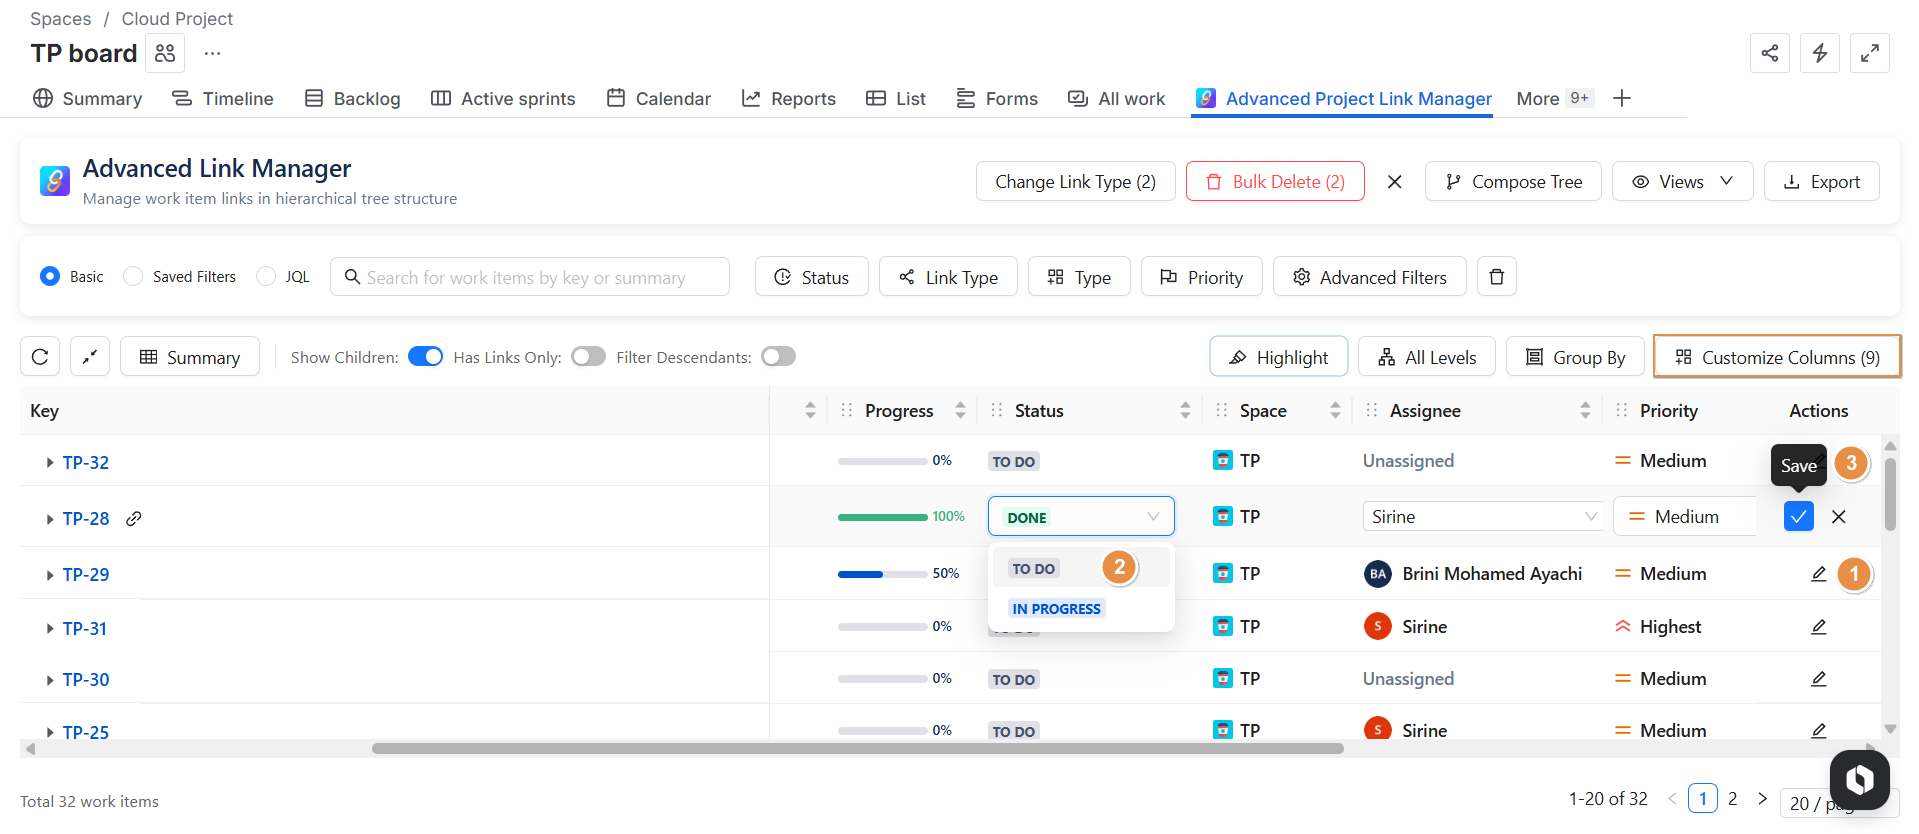
Inline Editing
-
You can edit issue fields directly from the table without opening the issue view.
Compose Tree (Project-Level Structure Control)
-
Compose Tree is also available at the Project Level and allows you to define, customize, and reuse hierarchical structures .
Default Tree Structure
-
When you open the Project Page, a default hierarchy is automatically applied.
Default Structure
-
Level 1: Work Items = ALL (within this project)
-
Level 2: Child Issues + All Links
-
Level 3: Child Issues + All Links
-
Level 4: Child Issues + All Links
-
Level 5: Child Issues + All Links
-
Level 6: Child Issues + All Links
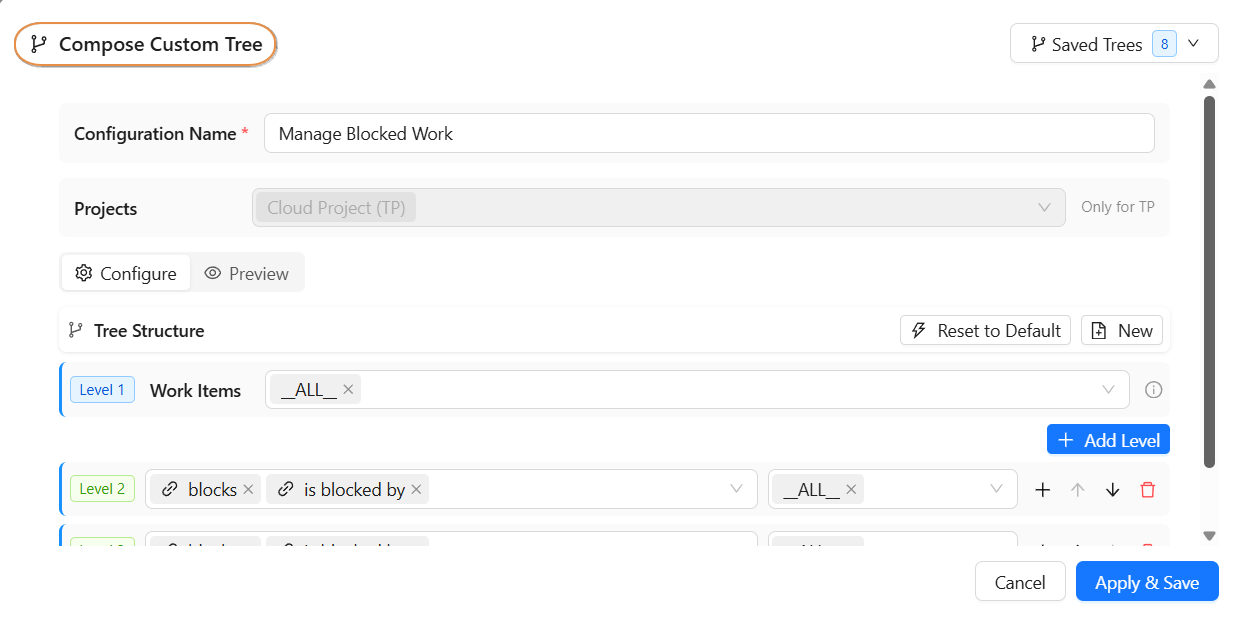
Create a New Tree Structure
To create a custom hierarchy:
-
Click New Structure
-
Enter a Configuration Name (required)
-
Define the structure for each level
-
Click Apply and Save
The new structure is immediately applied to the table.
Reset to Default Structure
At any time:
-
Click Reset to Default
-
Click Use Standard View
The default hierarchy will be reapplied instantly.
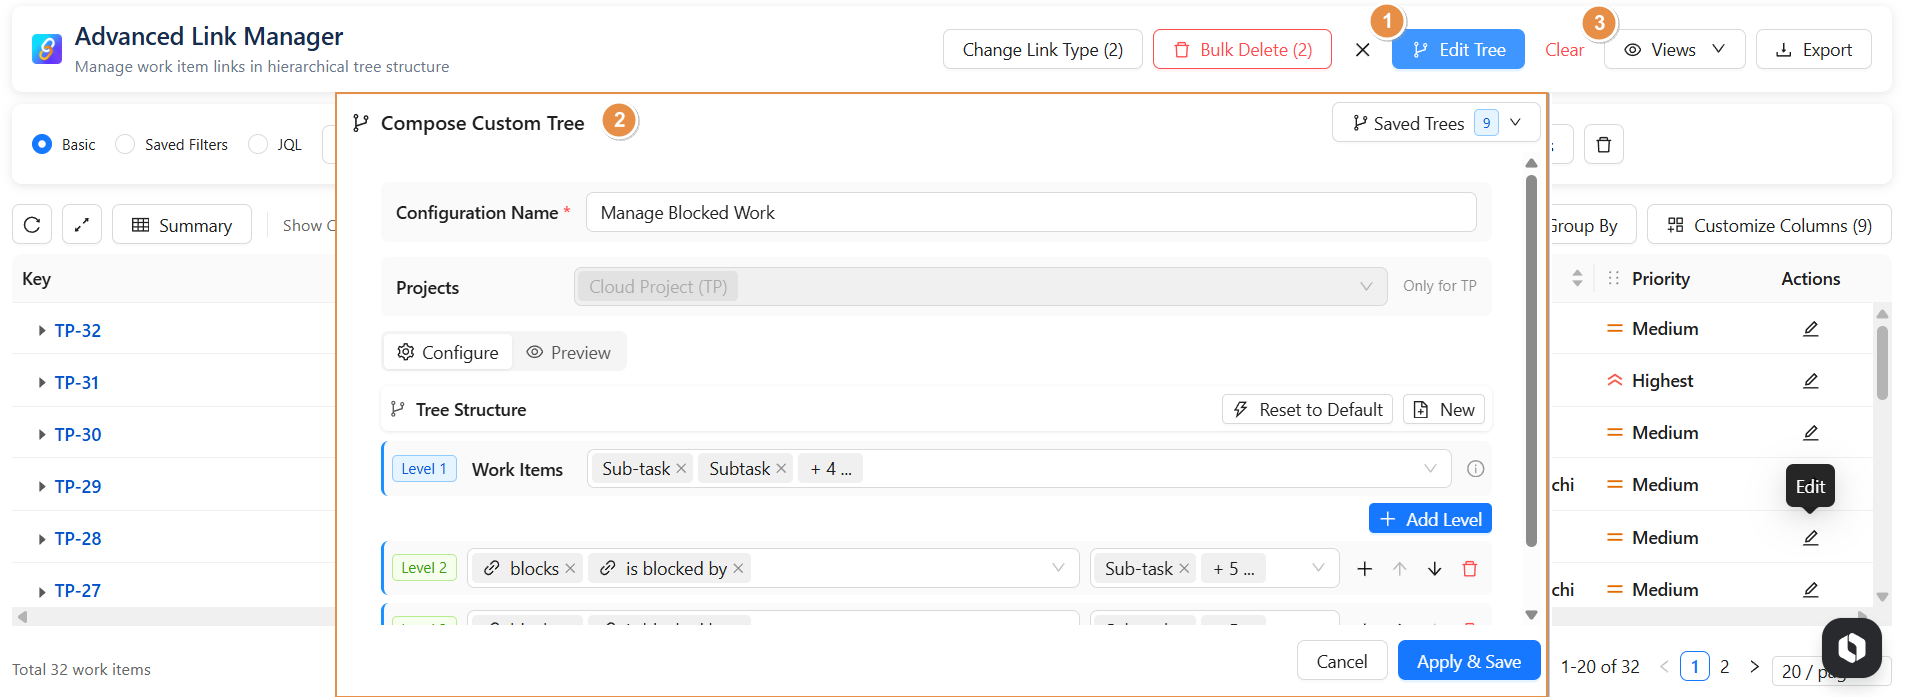
Edit an Existing Structure
You can modify a saved structure:
-
Click Load
-
Select the structure
-
Update:
-
Configuration name
-
Hierarchy levels
-
-
Click Apply and Save
Clear Custom Structure
-
If you want to discard the current structure:
-
Click Clear
-
The table resets to the default tree structure.
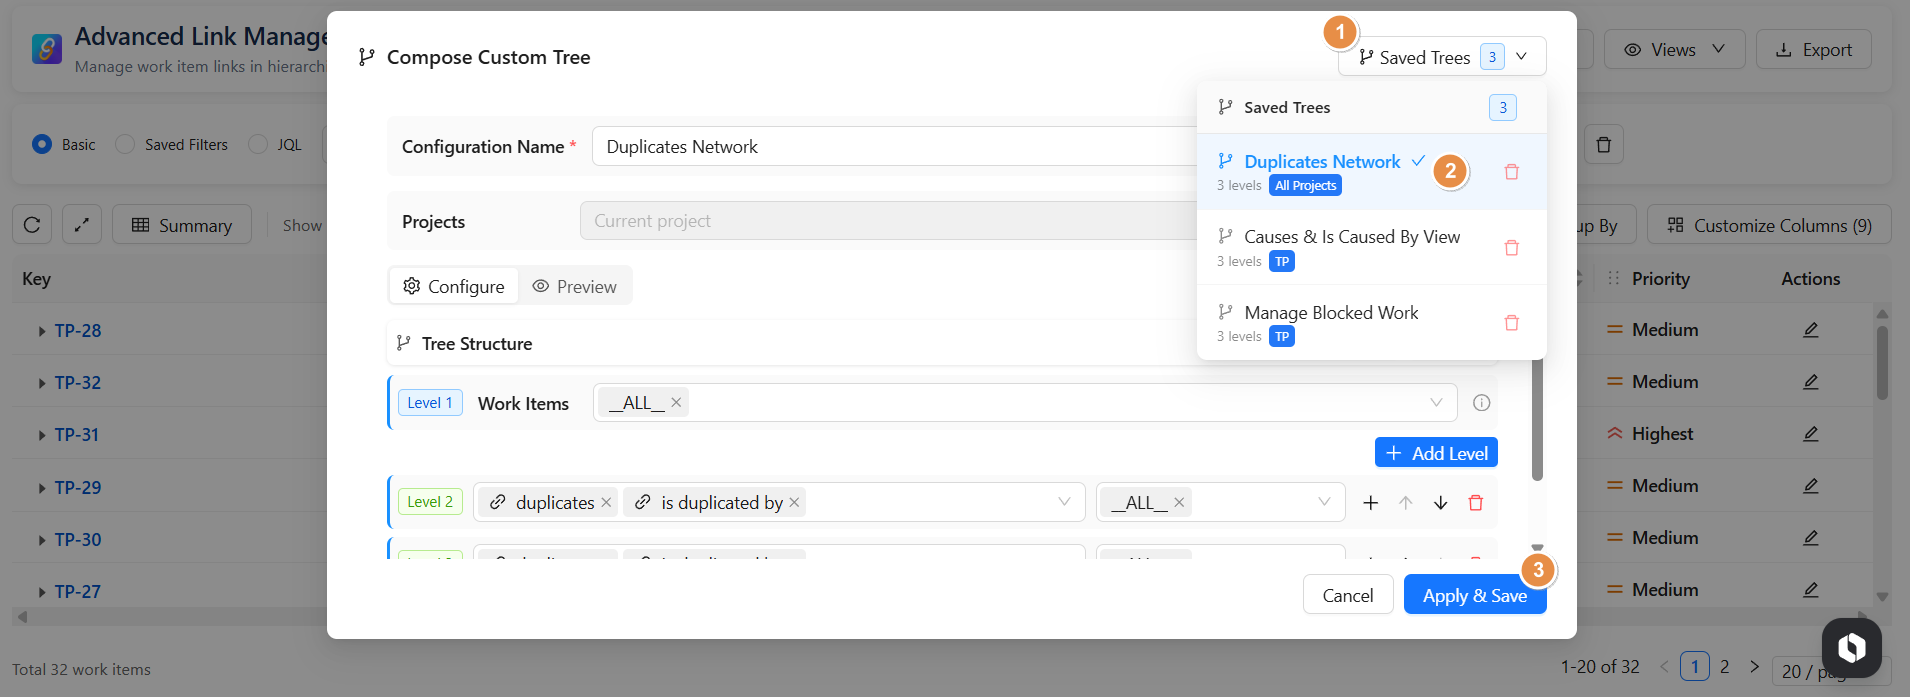
Load Saved Structures (Key Benefit)
All applied structures are automatically saved.
To reuse a structure:
-
Click Load
-
Select the structure
-
Optionally edit it
-
Click Save and Apply
The selected structure is instantly loaded and applied.
Why Compose Tree Is Powerful at Project Level
-
Create project-specific hierarchical views
-
Switch between multiple saved structures
-
Maintain consistency across project reporting
-
Ideal for managing complex dependencies within a single project
Save & Manage Your Views (Project Page)
-
After applying filters, highlights, grouping, or adjusting columns, you can save your configuration and reuse it anytime inside the project.
Save a View
Once your table is configured:
-
Click Save View
-
Choose visibility:
-
🔓 Public : Visible to all project users
-
🔐 Private : Visible only to you
-
👥 Custom Access : Share with selected users or groups
-
-
Project selected: in the project level the project already selected
-
Include Highlights
-
Click Save View
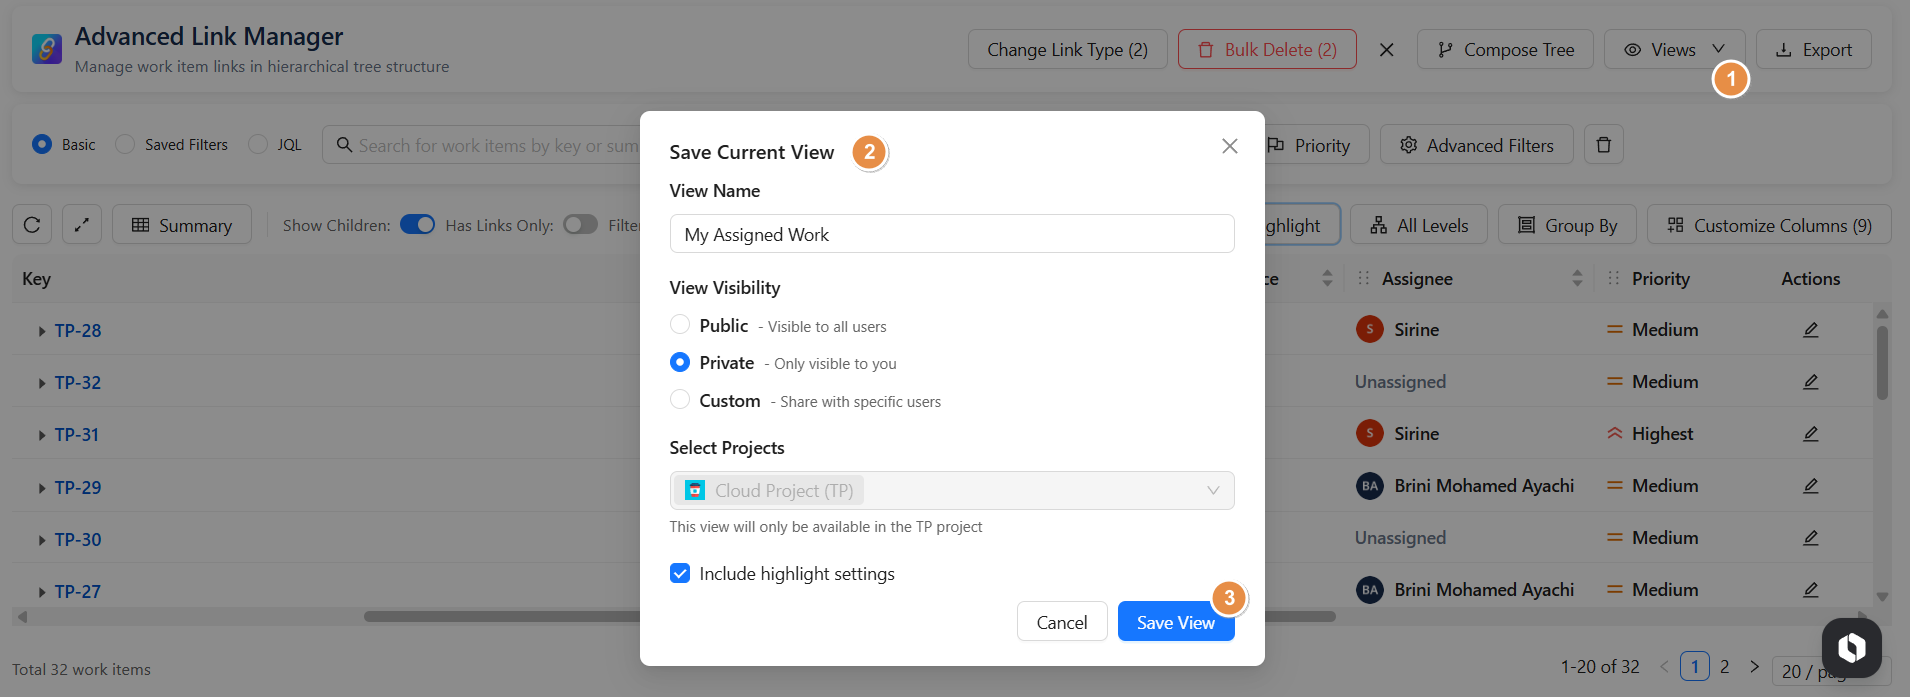
Your view is now stored and can be loaded anytime.
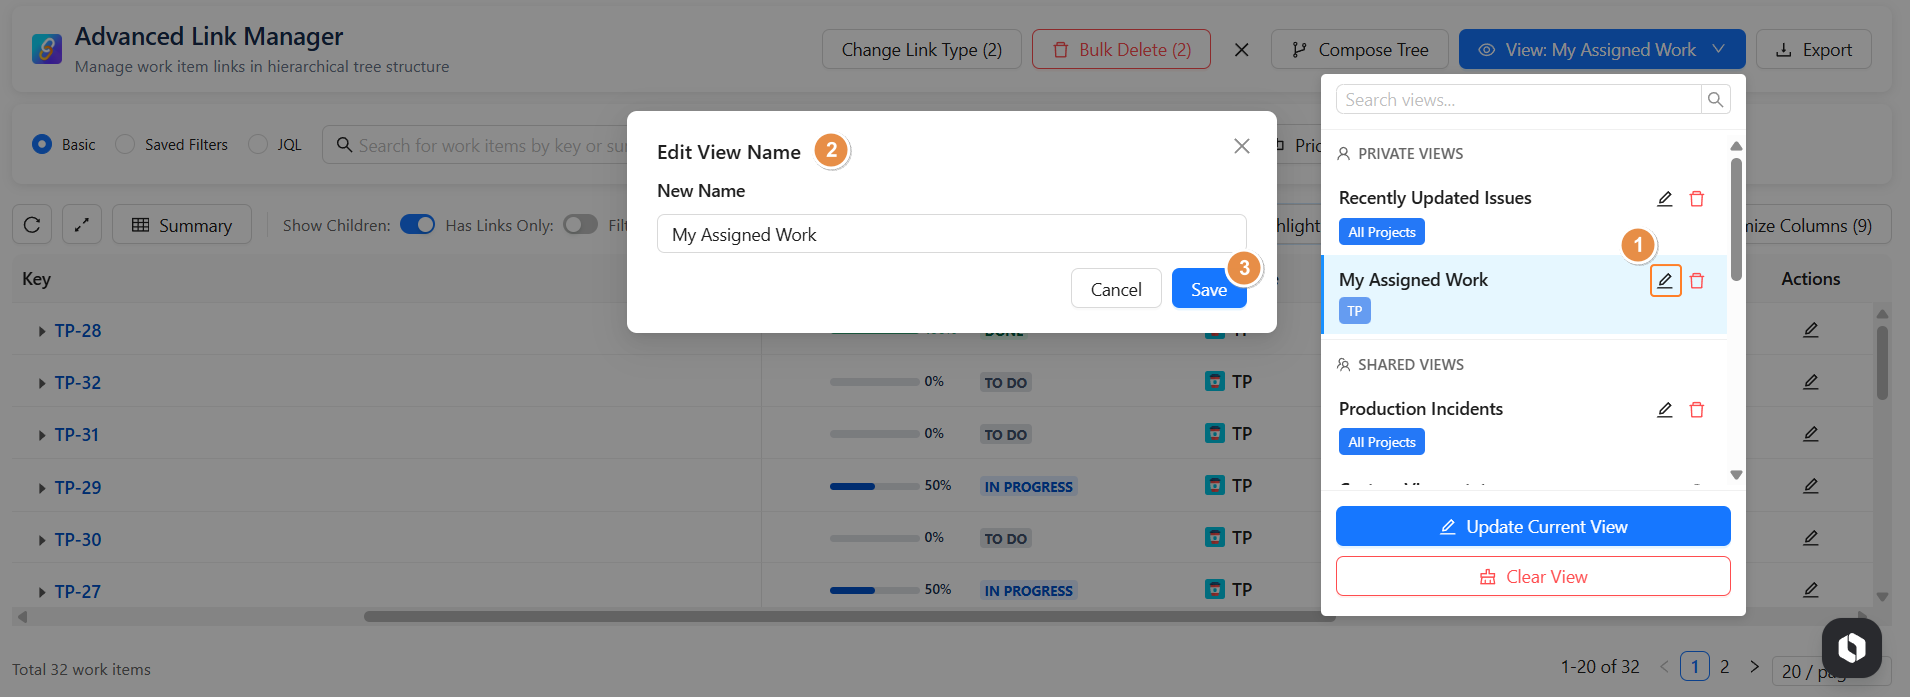
Edit a Saved View
-
Click the ✏️ icon next to the view name
-
Update the name
-
Click Save
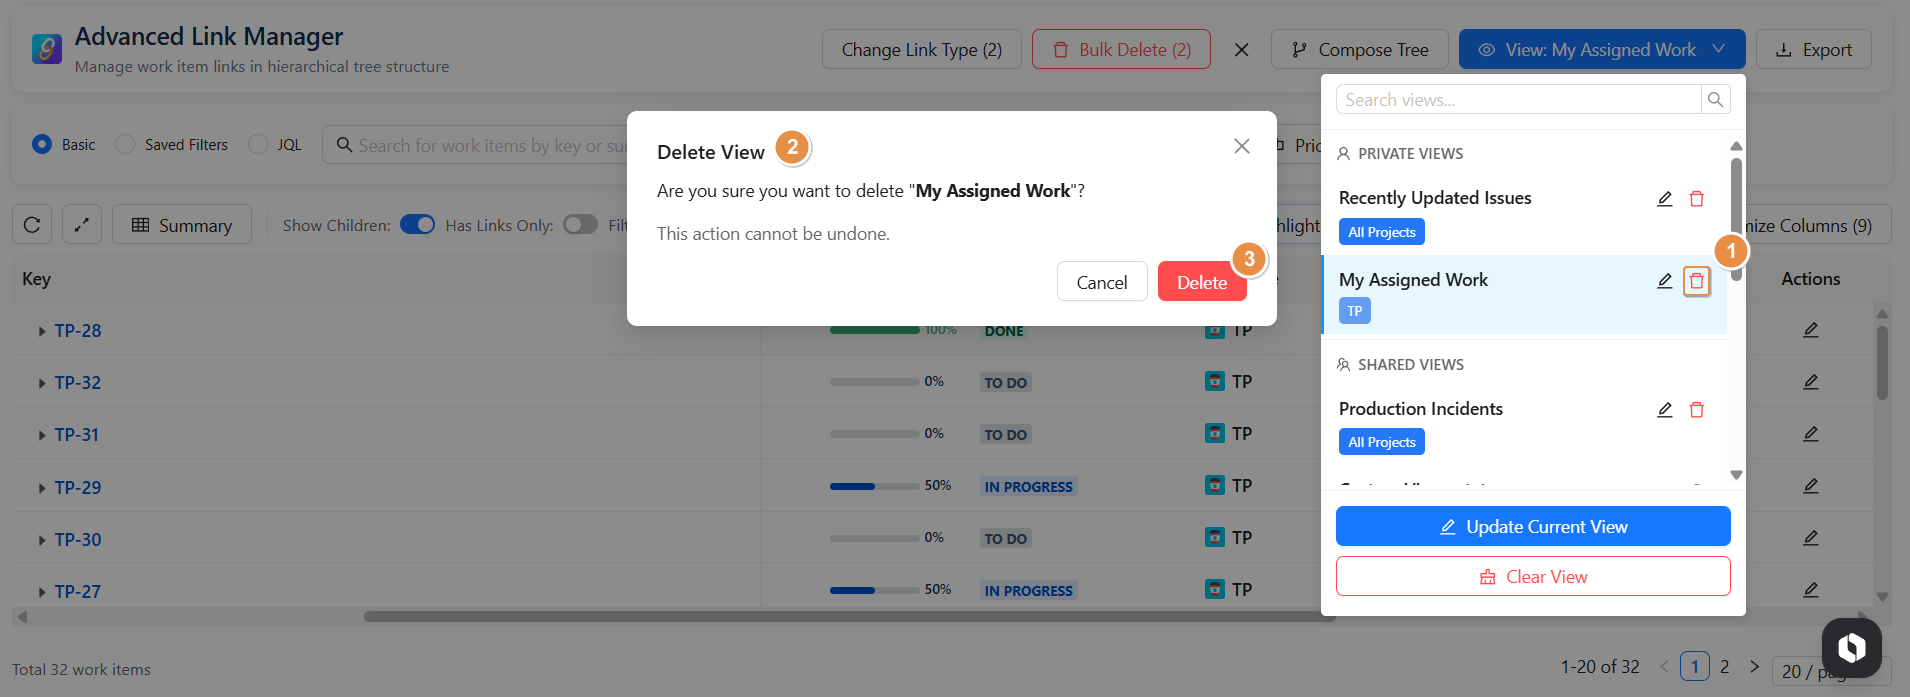
Delete a Saved View
-
Click the 🗑 icon
-
Confirm deletion
The view will be permanently removed.
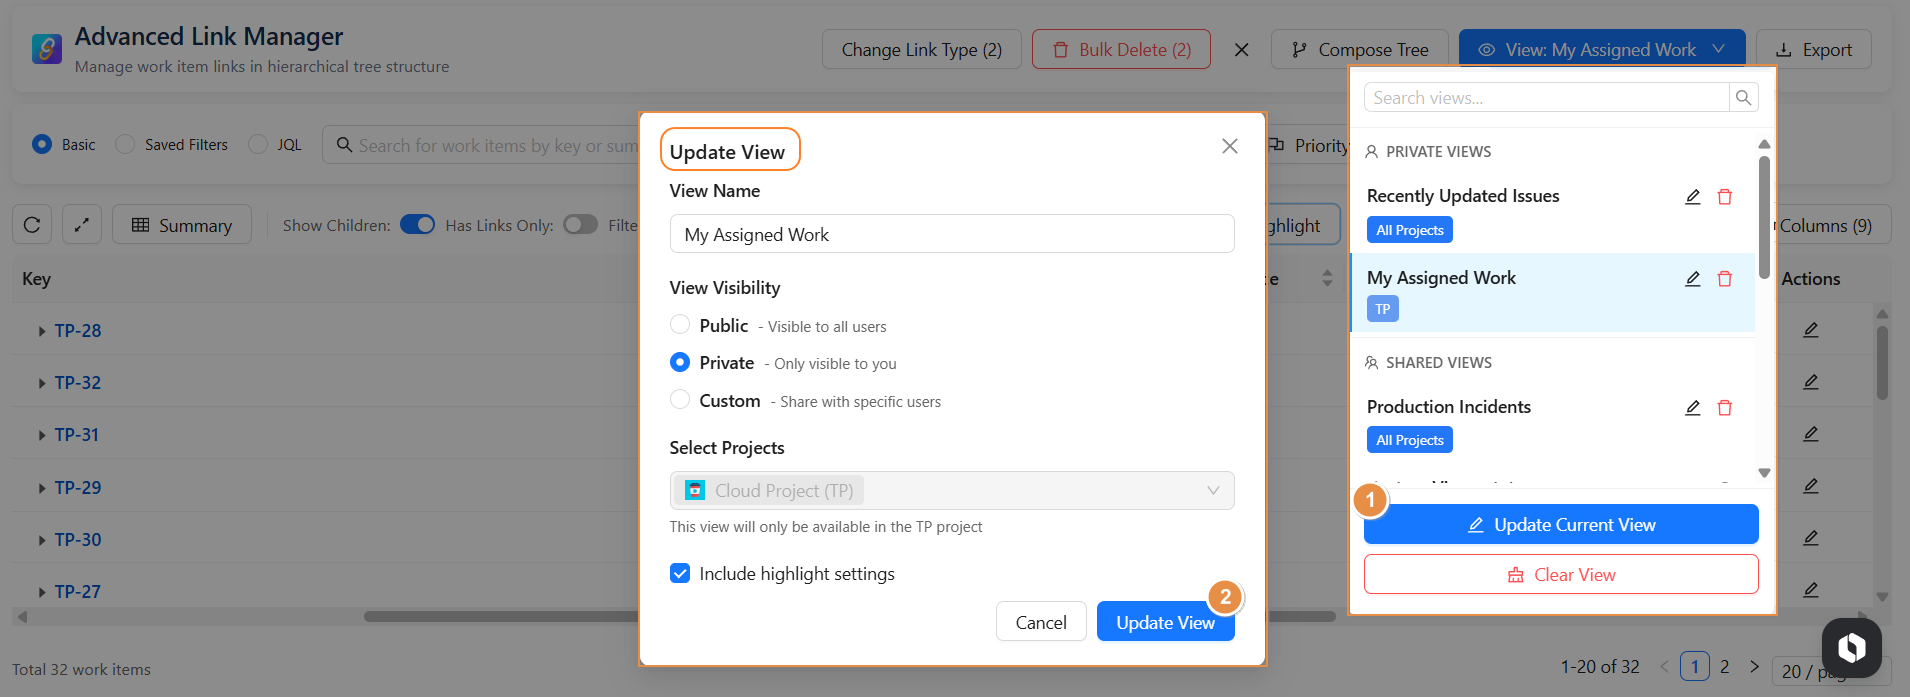
Update an Existing View
If you modify filters, highlights, or layout:
-
Click Update Current View
-
Adjust visibility or highlight settings if needed
-
Click Update View
The saved view will reflect the new configuration.
Conclusion
-
he Project Page empowers teams to efficiently manage issue relationships at the project level.
-
With advanced filtering, hierarchy control, bulk actions, and saved views, it simplifies complex dependencies and improves visibility across linked work items .