
The Product Groups Management page allows administrators to control user access across Atlassian products through group-based permissions. Instead of managing users individually, access is structured and simplified by assigning products and roles to groups.
Groups Overview
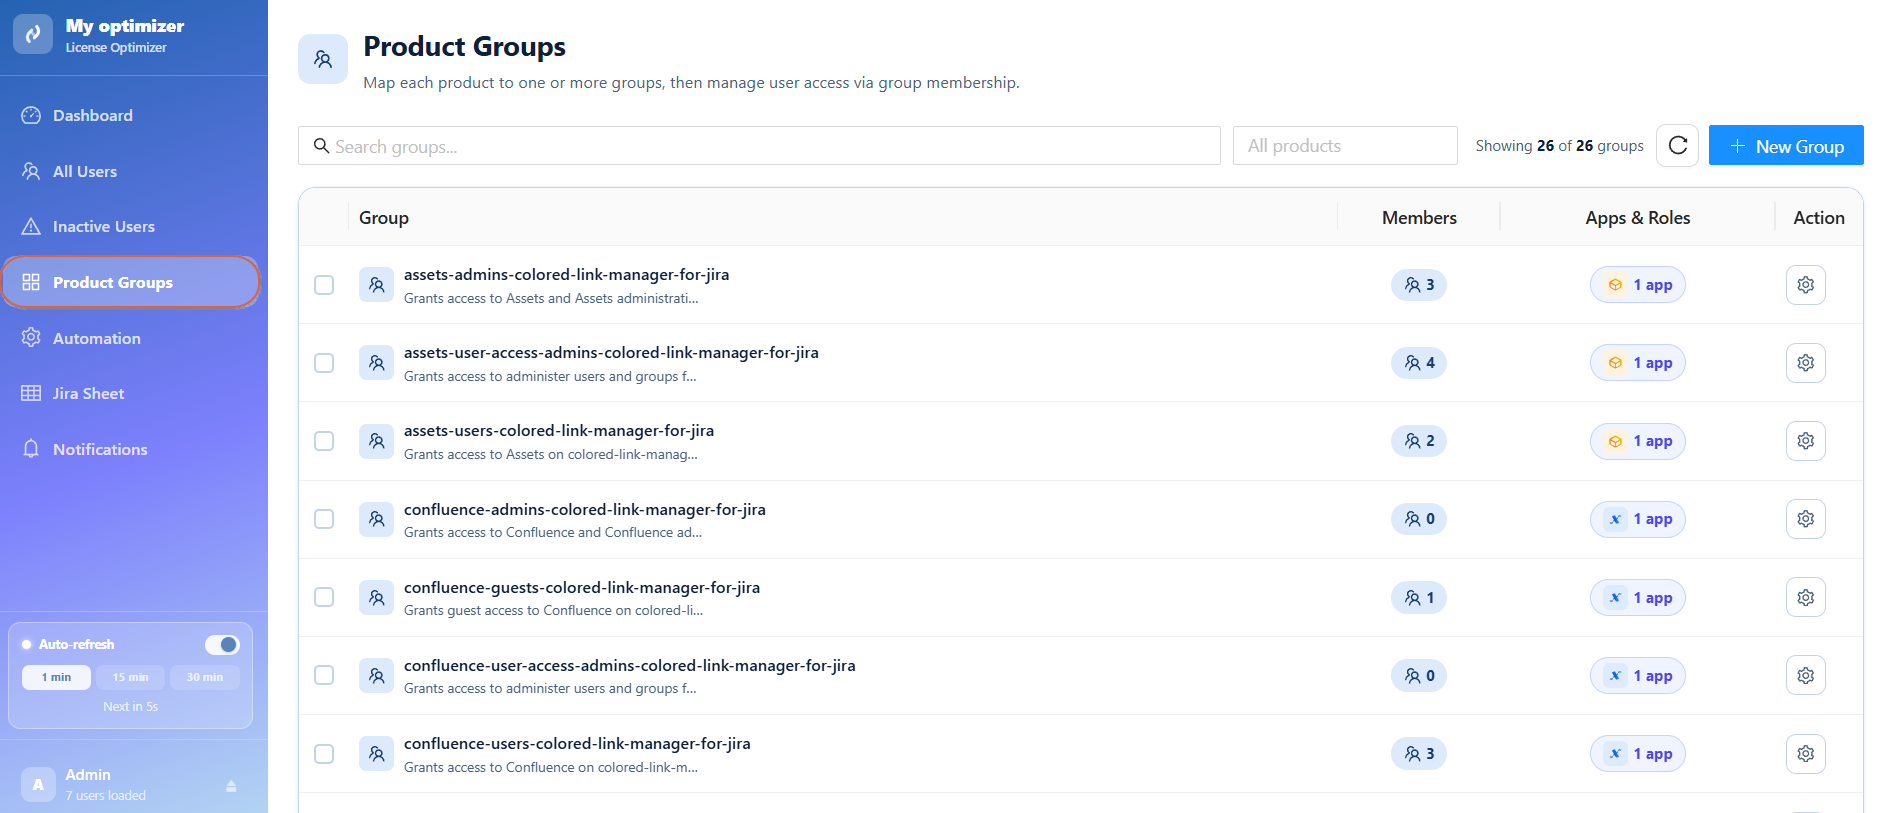
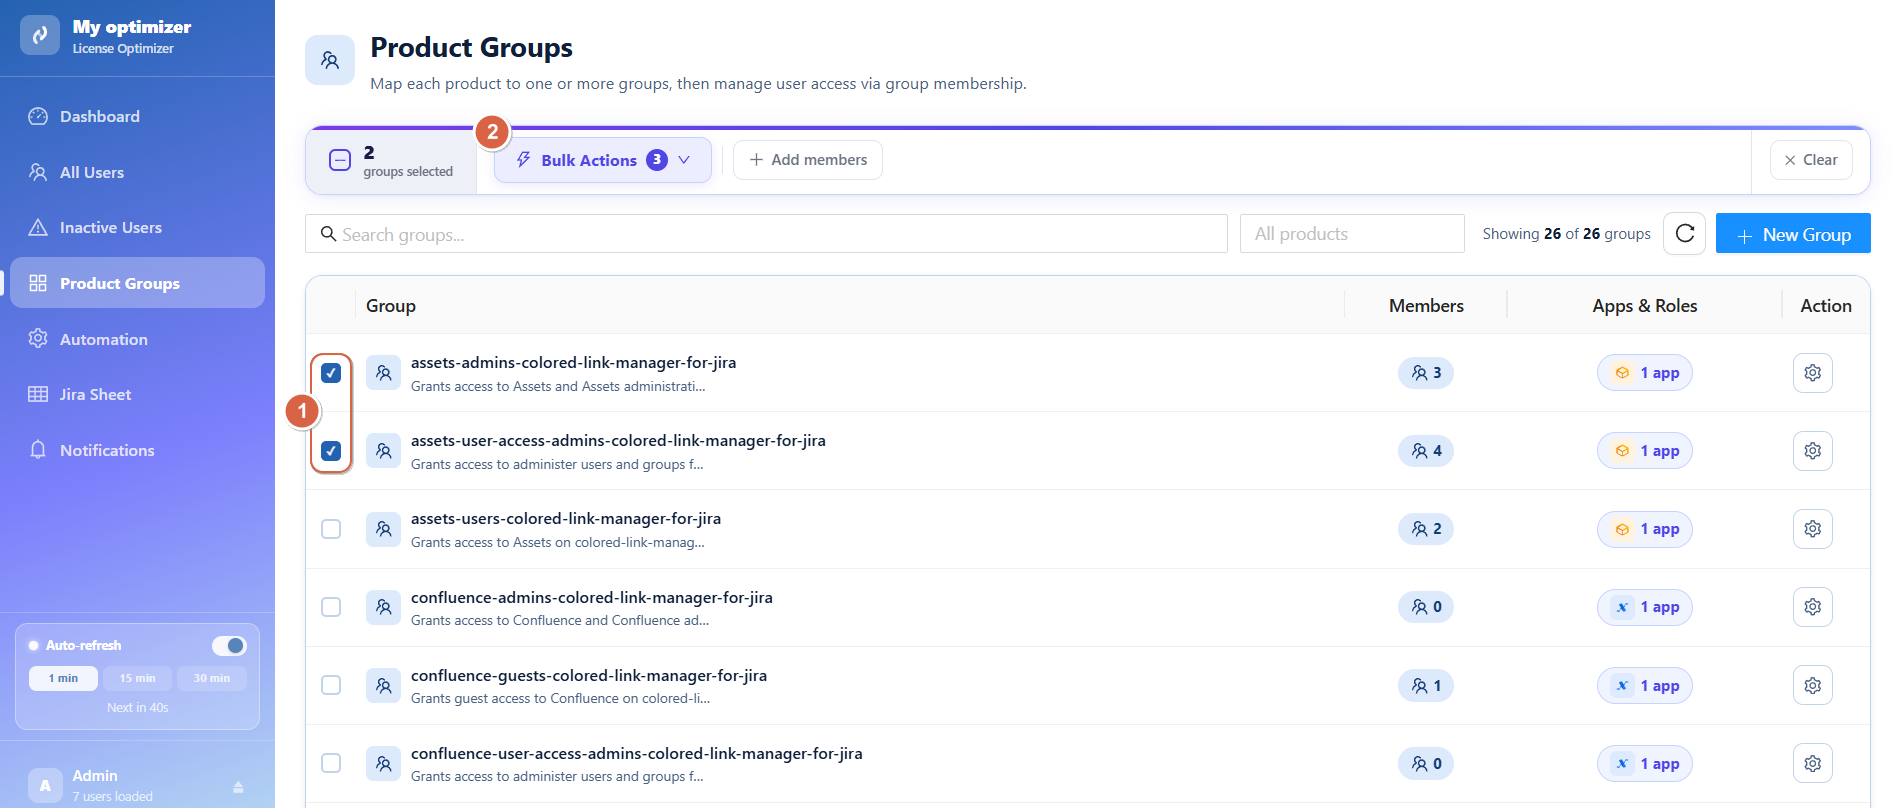
The page displays all existing groups in your organization.
Example Group List
Each group includes:
-
Group name
-
Description (purpose of the group)
-
Number of members
-
Linked application (Assets, Jira, etc.)
-
Assigned role
Each group is clearly mapped to a product and role to simplify access control.
Create a New Group
Administrators can easily create new groups to define access rules.
Steps to Create a Group
-
Click Create New Group
-
Enter the Group Name
-
Select a Linked Product ( Assets, Jira, Confluence)
-
Choose a Role
-
Confirm create group
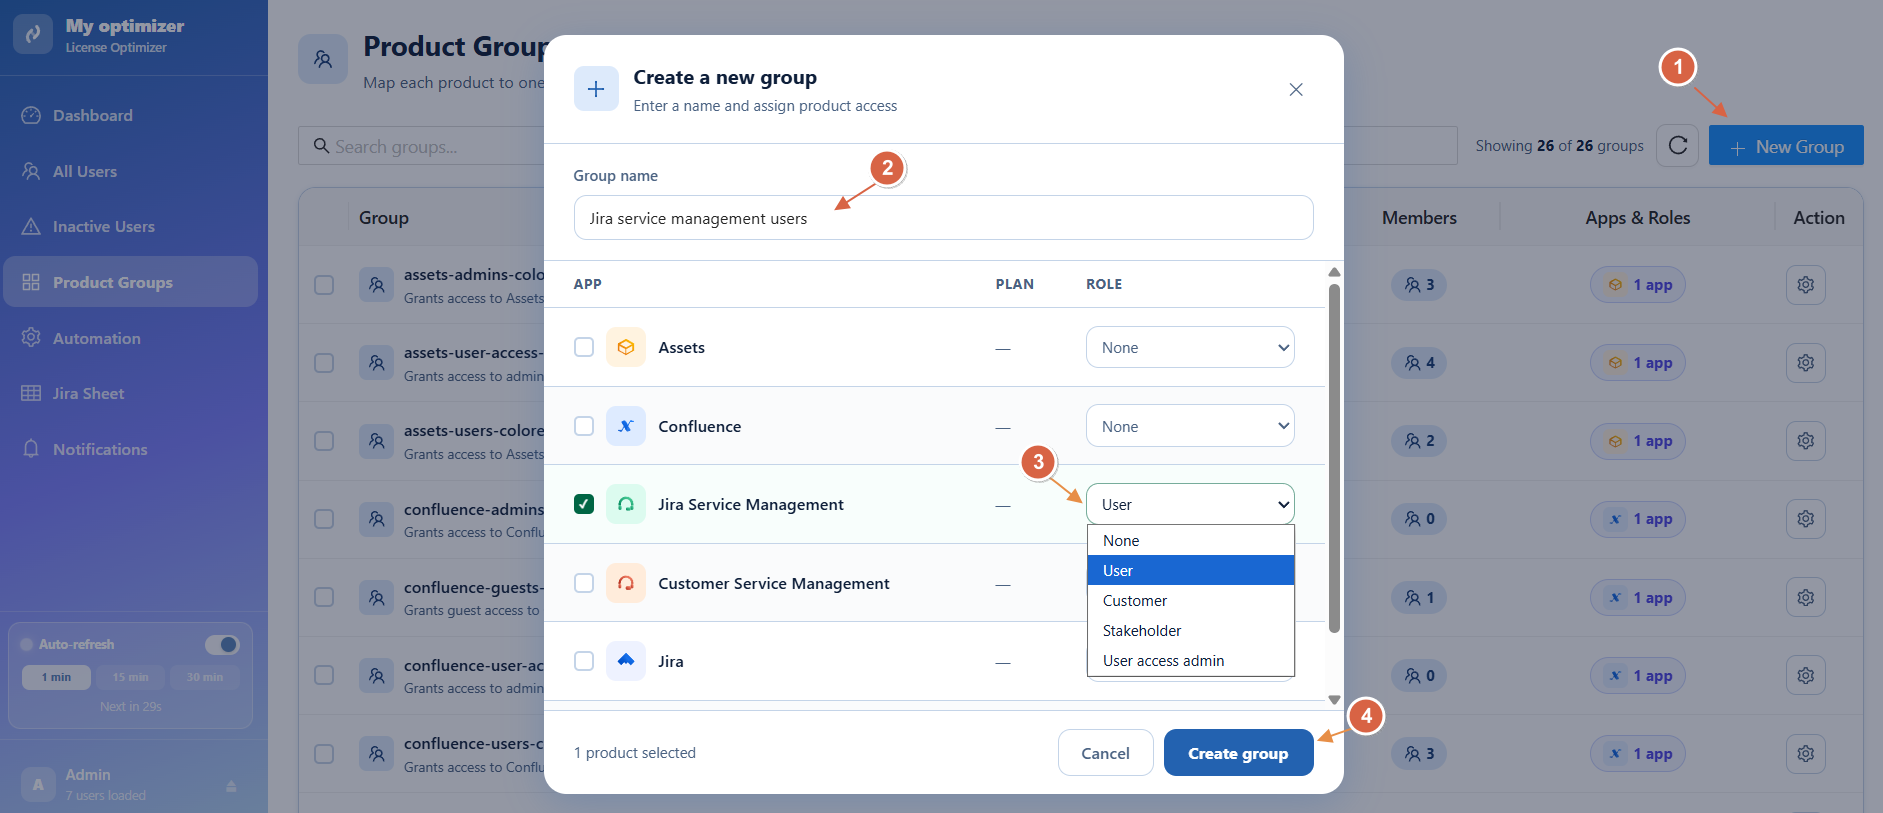
Once created, the group is automatically linked to the selected product with the defined role.
Group Table Overview
Each group row provides key information:
-
Group name
-
Number of members
-
Linked applications
-
Assigned roles
-
Action menu
This allows administrators to quickly understand how access is structured across the organization.
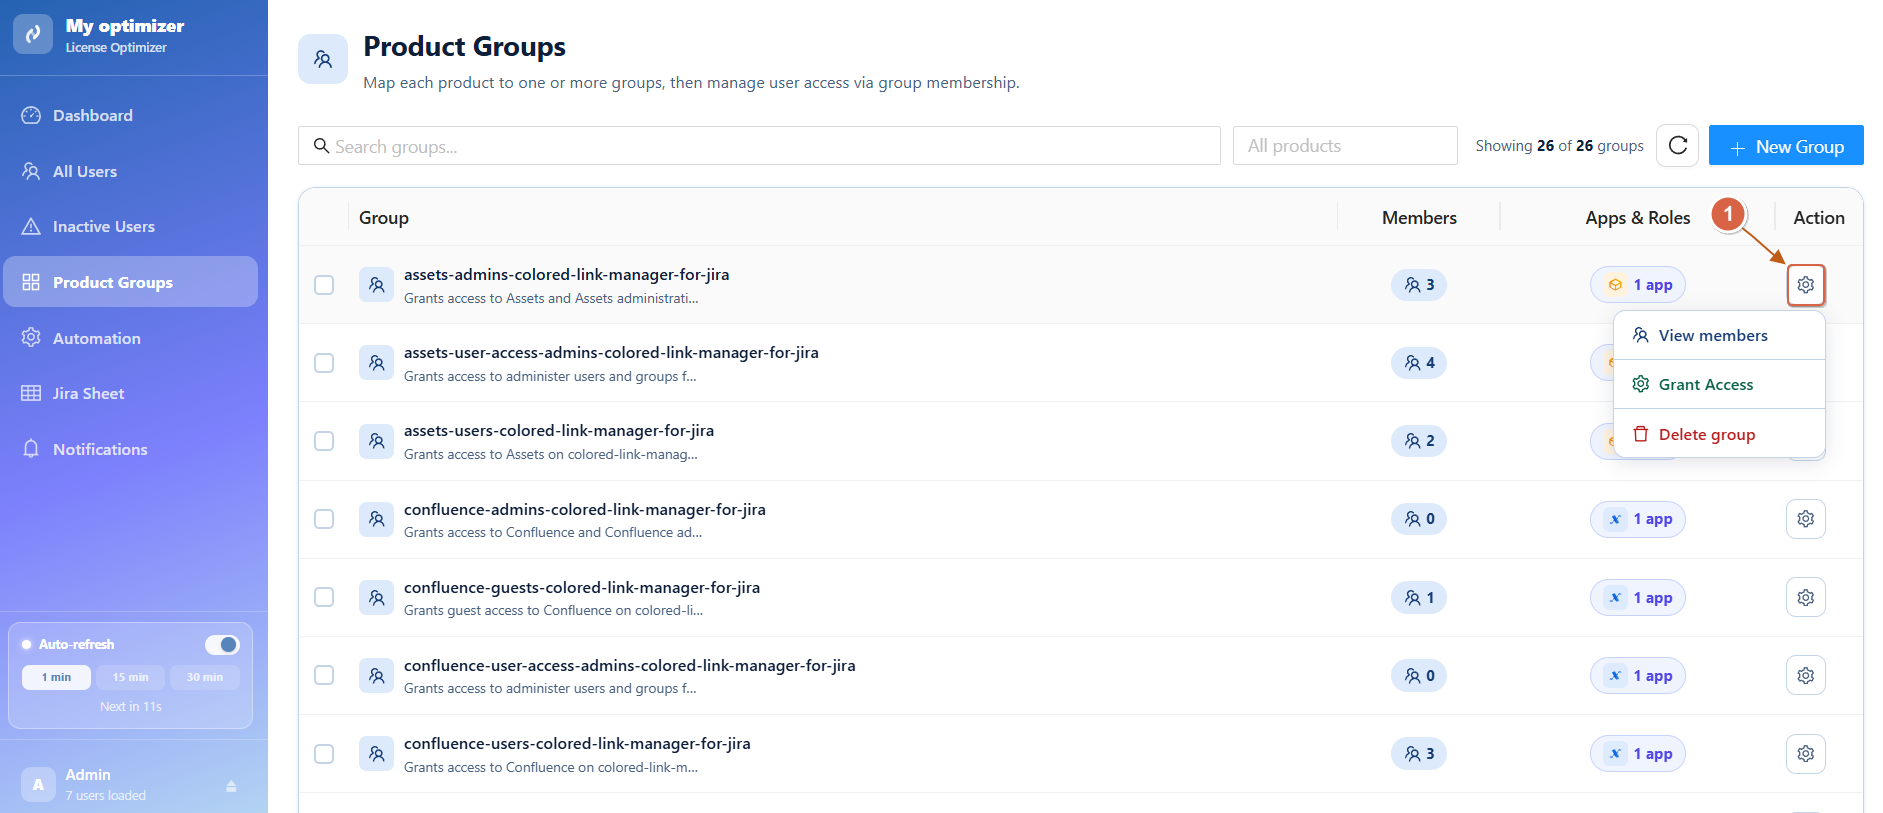
Group Actions
Each group includes an Actions menu for management.
Available Actions
-
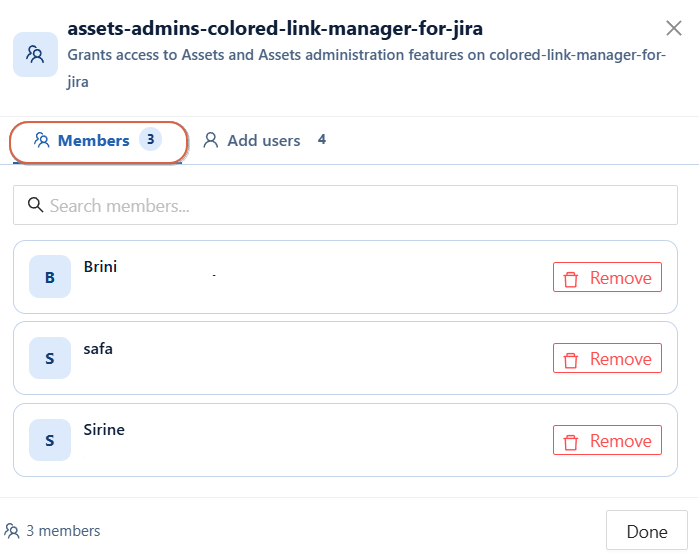
View Members : See all users in the group
-
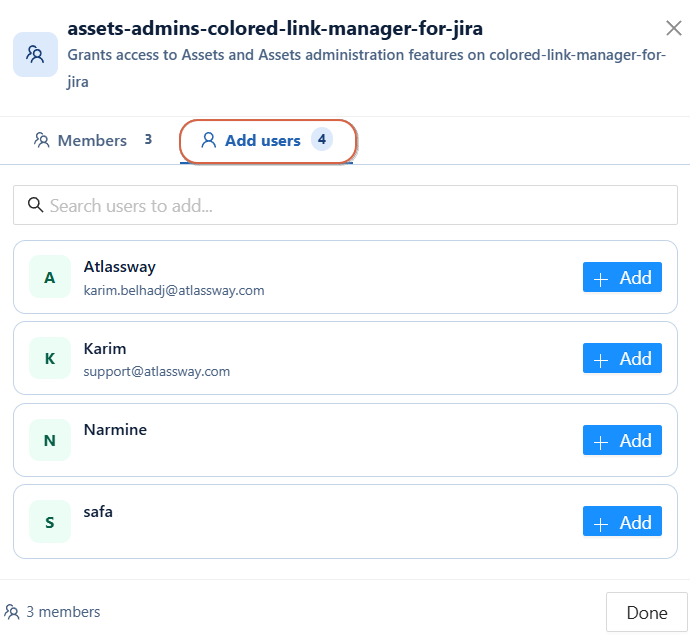
Add a user :
-
Switch to the Add users tab to see users not yet in the group
-
Use the Search bar to find a specific user
-
Click + Add next to the desired user
-
Click Done when finished
-
-
Remove a user :
-
Switch to the members tab to see users not yet in the group
-
Use the Search bar to find a specific user
-
Click remove next to the desired user
-
Click Done when finished
-
-
The Members tab shows current members, you can remove them from there.
The Add users tab shows only users who are not yet in the group.
-
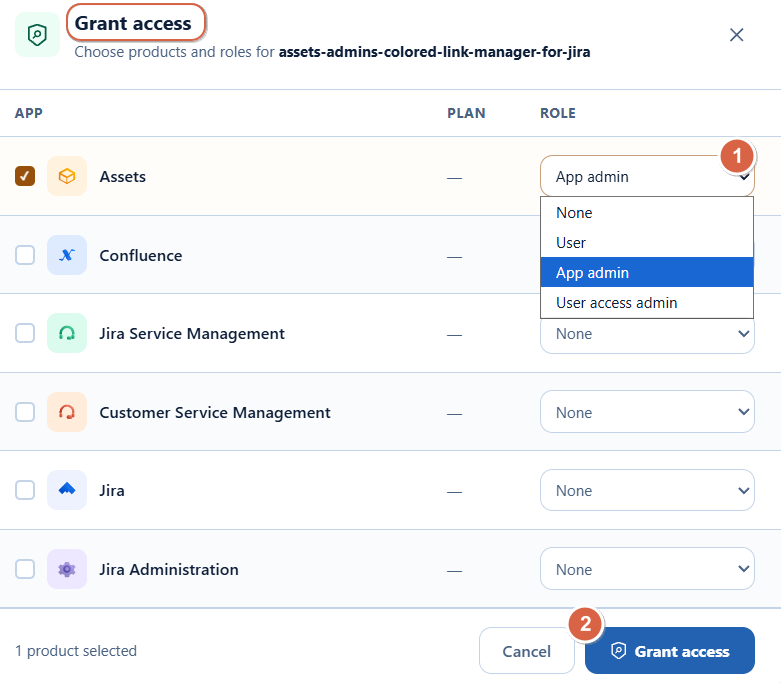
Grant Access : assign product access and roles
-
Click Grant Access
-
In the modal, check the products you want to grant access to
-
For each selected product, choose a Role from the dropdown (App admin, User, None...)
-
Click Grant access to confirm
-
You can select multiple products at once,each product gets its own independent role within the same group.
-
Delete Group : permanently remove the group
These actions allow quick and direct management of group configuration.
Bulk Actions
When selecting multiple groups, bulk operations become available to streamline management.
Steps:
-
Check the checkbox next to each group you want to select
-
The bulk action bar appears showing the number of selected groups
-
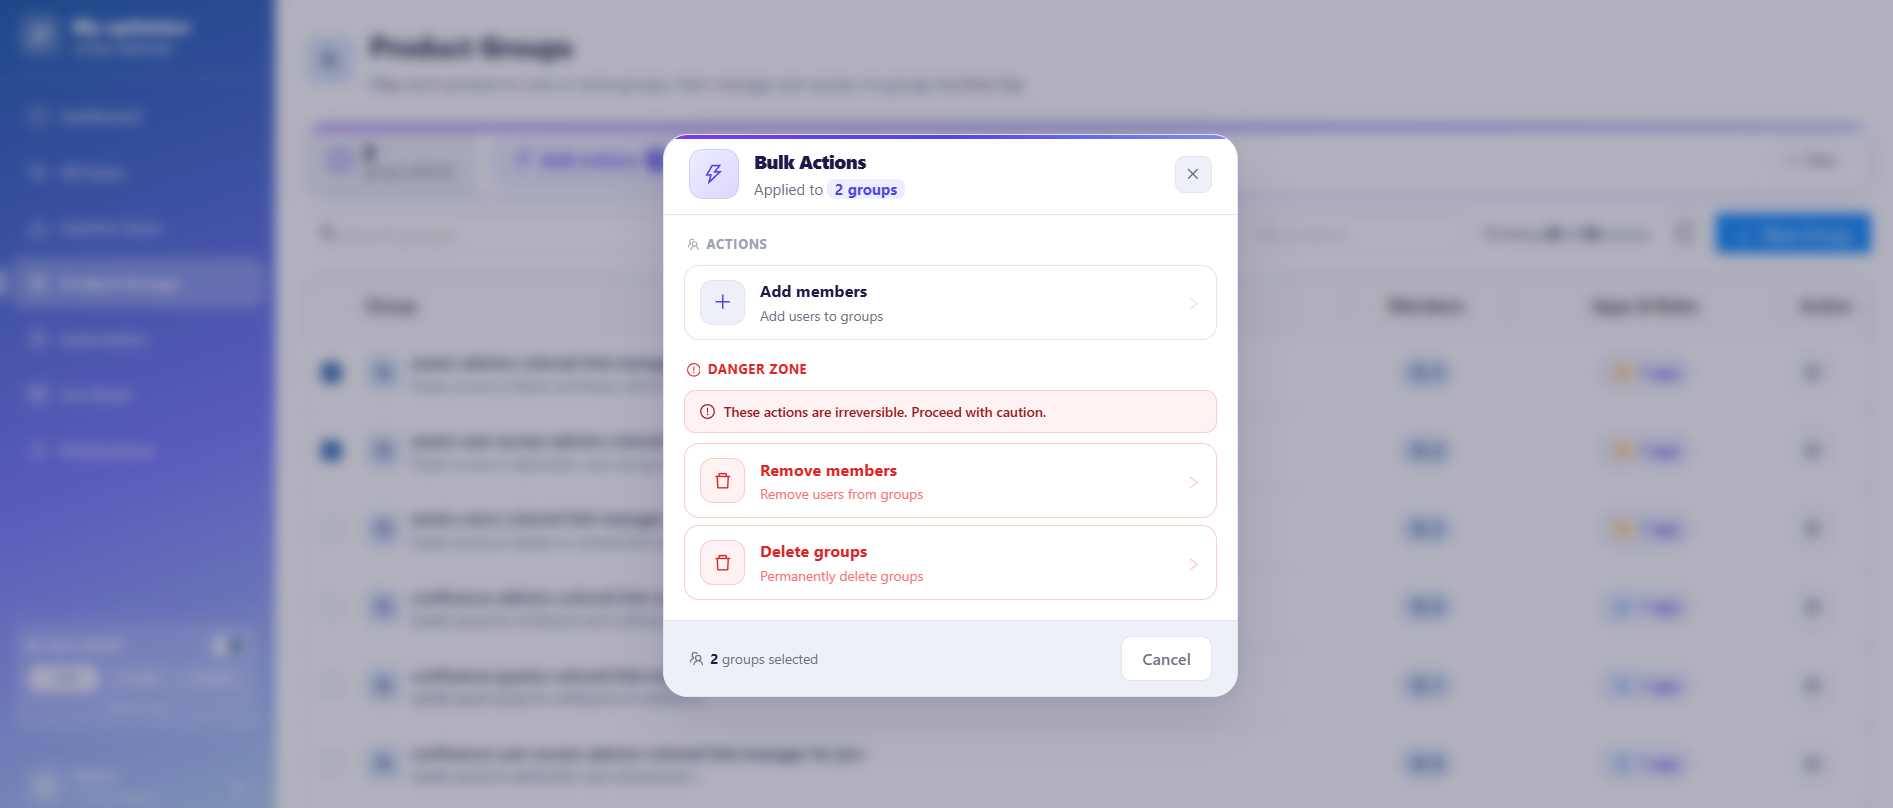
Click Bulk Actions or the quick button + Add members
-
Choose an action:
Standard Actions
-
Add Members → assign users to selected groups
Danger Zone
These actions are irreversible:
-
Remove Members → unassign users from groups
-
Delete Groups → permanently remove selected groups
-
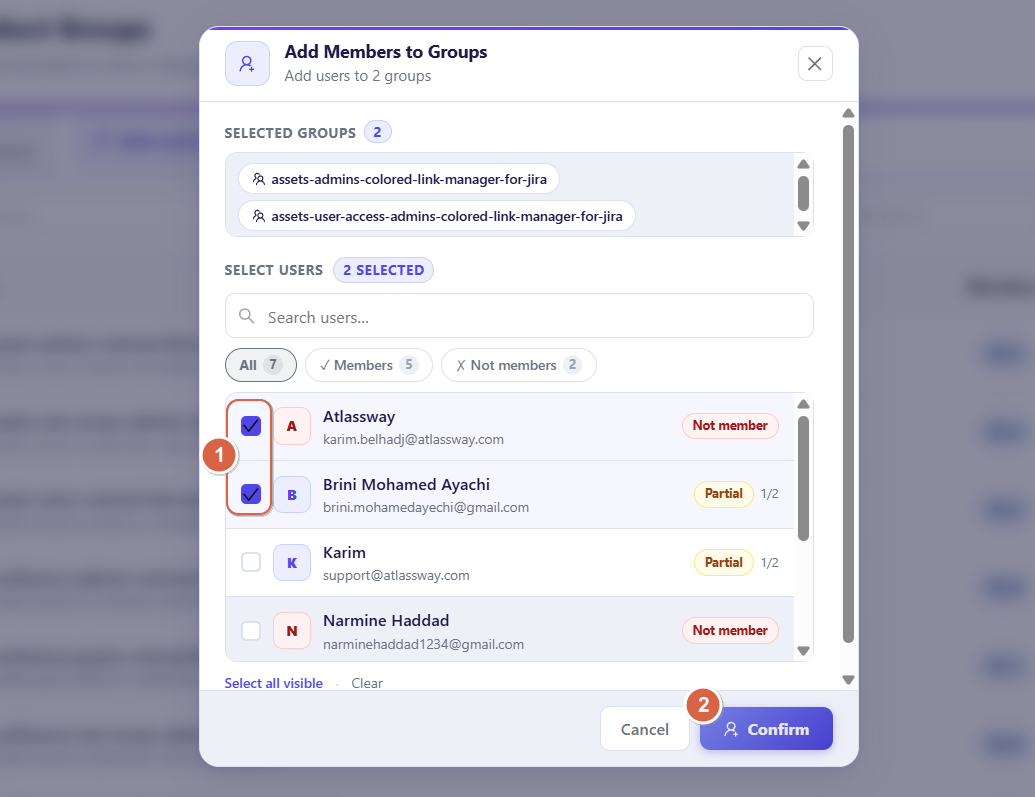
Click Add Members: Select the users you want to add, then click Confirm. The selected users will be added as members of the chosen group.
Bulk actions help administrators manage large-scale permission changes efficiently.
Refresh Data
A Refresh button is available to ensure the group list is always up to date.
-
Reloads latest group memberships
-
Updates product-role assignments
-
Synchronizes changes made by other administrators
Why This Page Matters
The Product Groups Management page is essential for:
-
Simplifying permission management
-
Reducing manual user-by-user configuration
-
Ensuring consistent product access rules
Conclusion
The Product Groups Management page provides a structured and scalable way to manage Atlassian access. By linking products and roles directly to groups, administrators can efficiently control permissions, reduce complexity, and maintain a secure and well-organized user access model across the organization.
Need help?
💡 We're here for you! If you have questions or need to report a bug, visit our Help Center and raise a support ticket. Our team is ready to assist you!