
The Automation Rules page allows administrators to automatically manage inactive Atlassian users by defining rules that suspend accounts based on inactivity criteria.
This feature helps organizations reduce license costs, improve security, and eliminate manual user cleanup by running scheduled automation workflows.
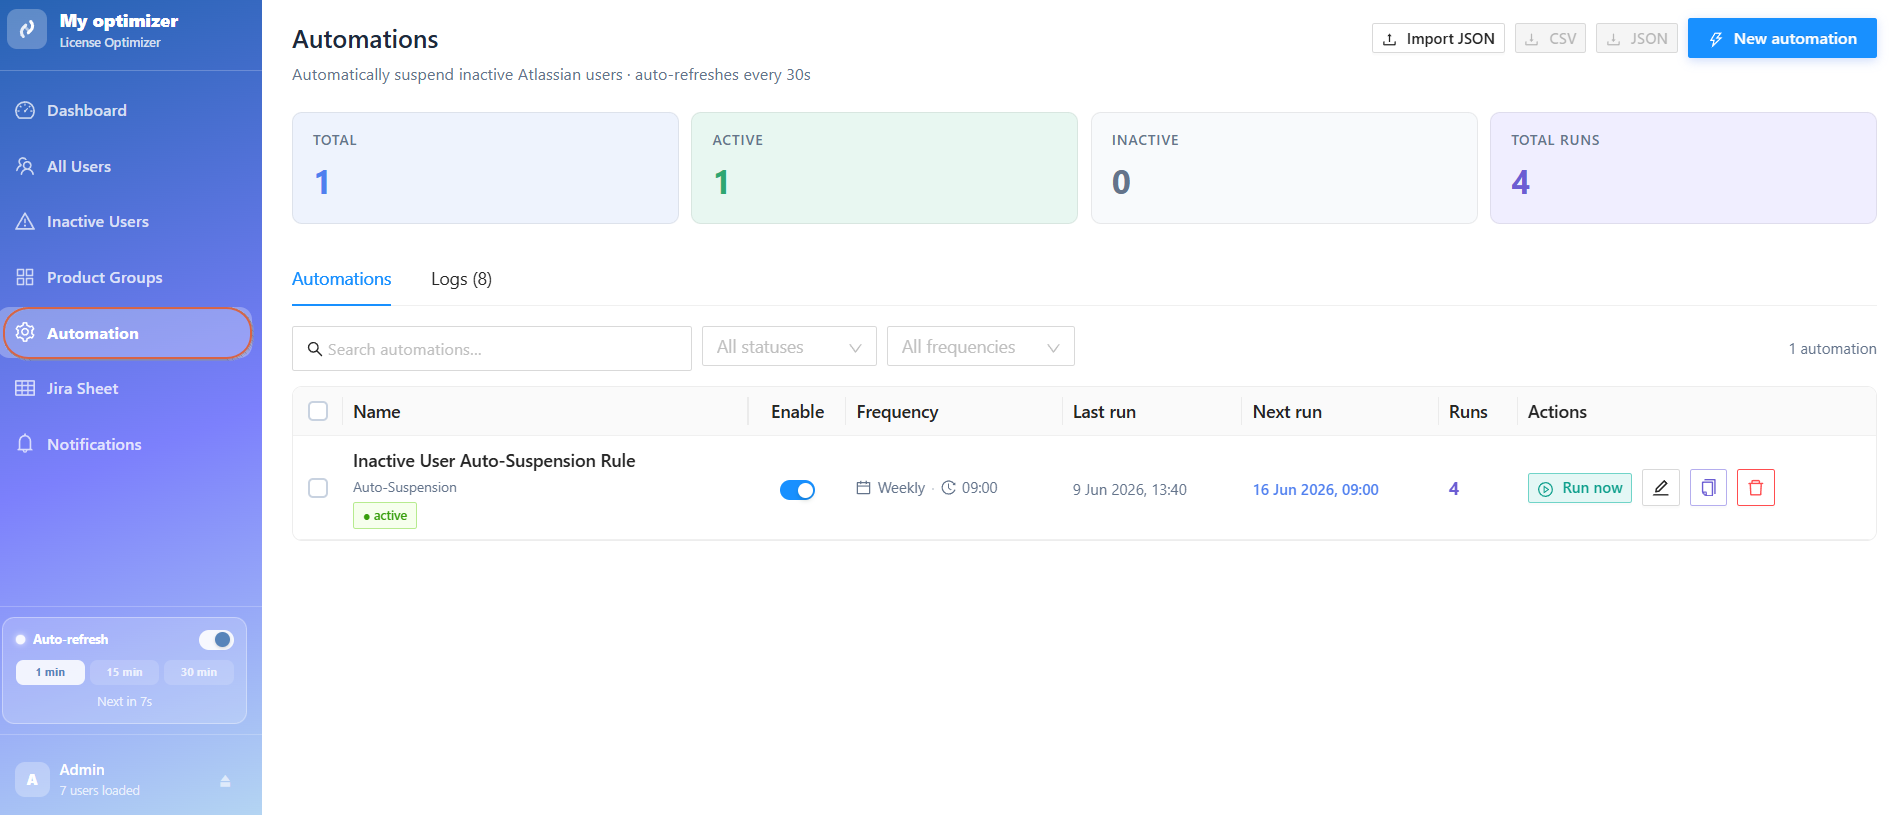
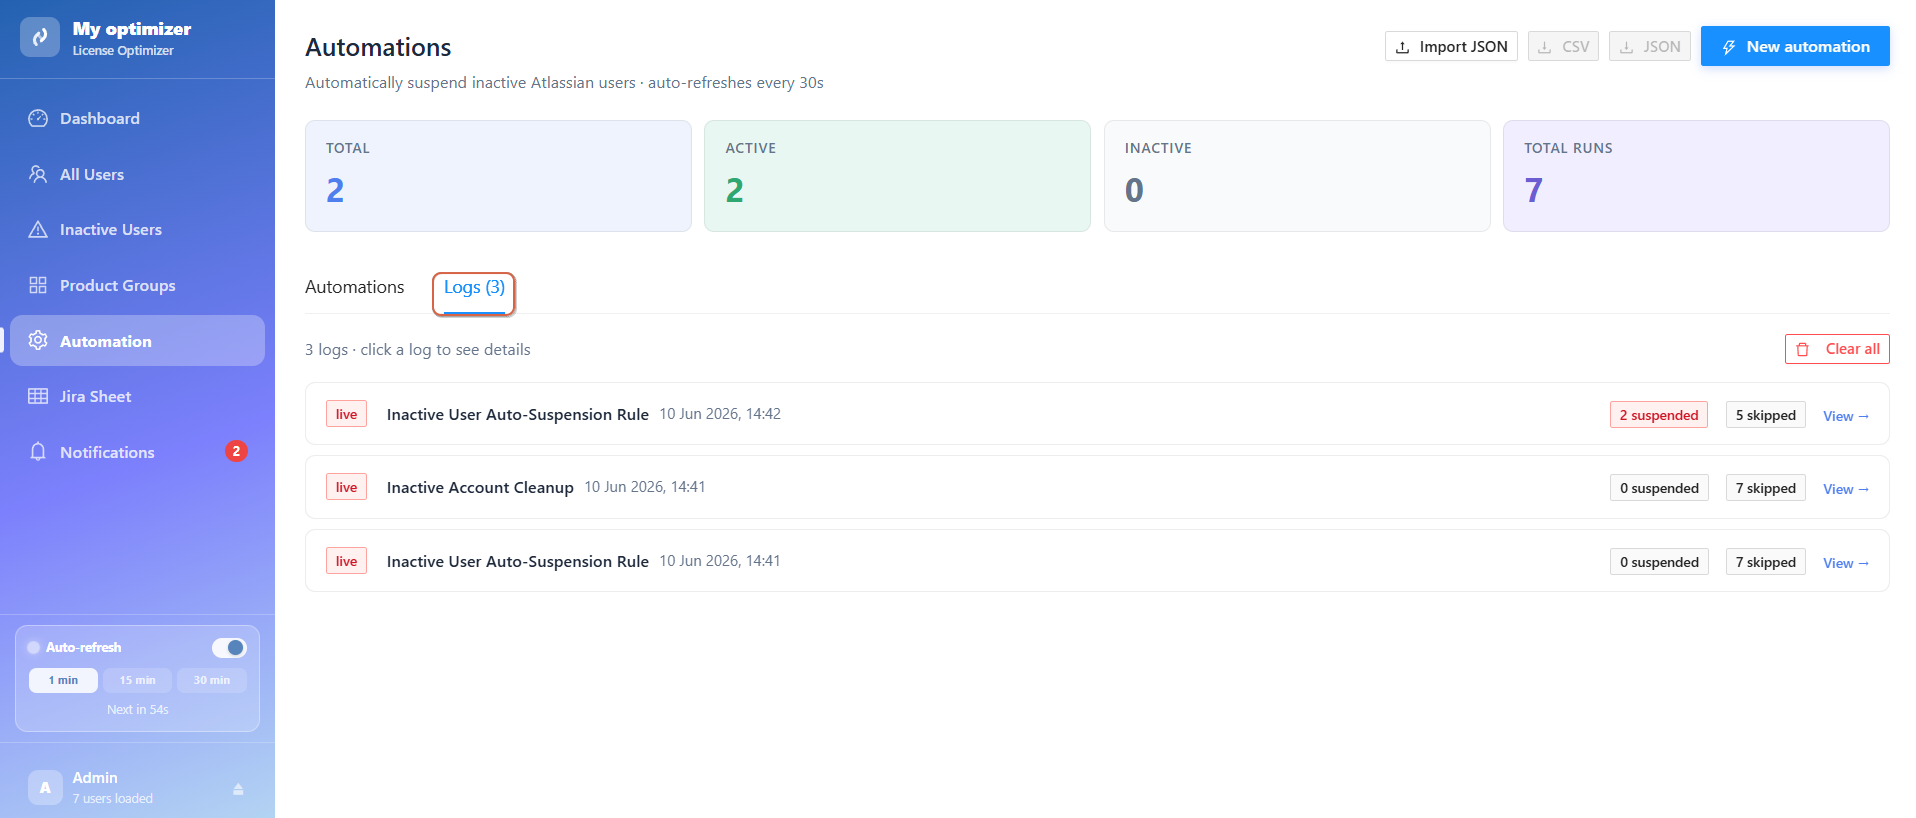
Automation Dashboard Summary
At the top of the page, you can view a real-time summary of all automation activity:
-
Total Automations
-
Active Automations
-
Inactive Automations
-
Total Runs
Automation List
The main table displays all configured automation rules.
Example Rule
-
Name: The title of the automation rule.
-
Status: Shows if the rule is active or inactive.
-
Frequency: How often the rule runs (daily, weekly, or monthly).
-
Last Run: The last time the rule was executed.
-
Next Run: The next scheduled execution time
-
Runs: Total number of times the rule has run.
Available Actions per Rule
Each automation includes management actions:
-
Edit Rule : modify configuration
-
Delete Rule : remove automation permanently
-
Duplicate Rule : clone existing configuration
-
Run Now : execute the rule immediately
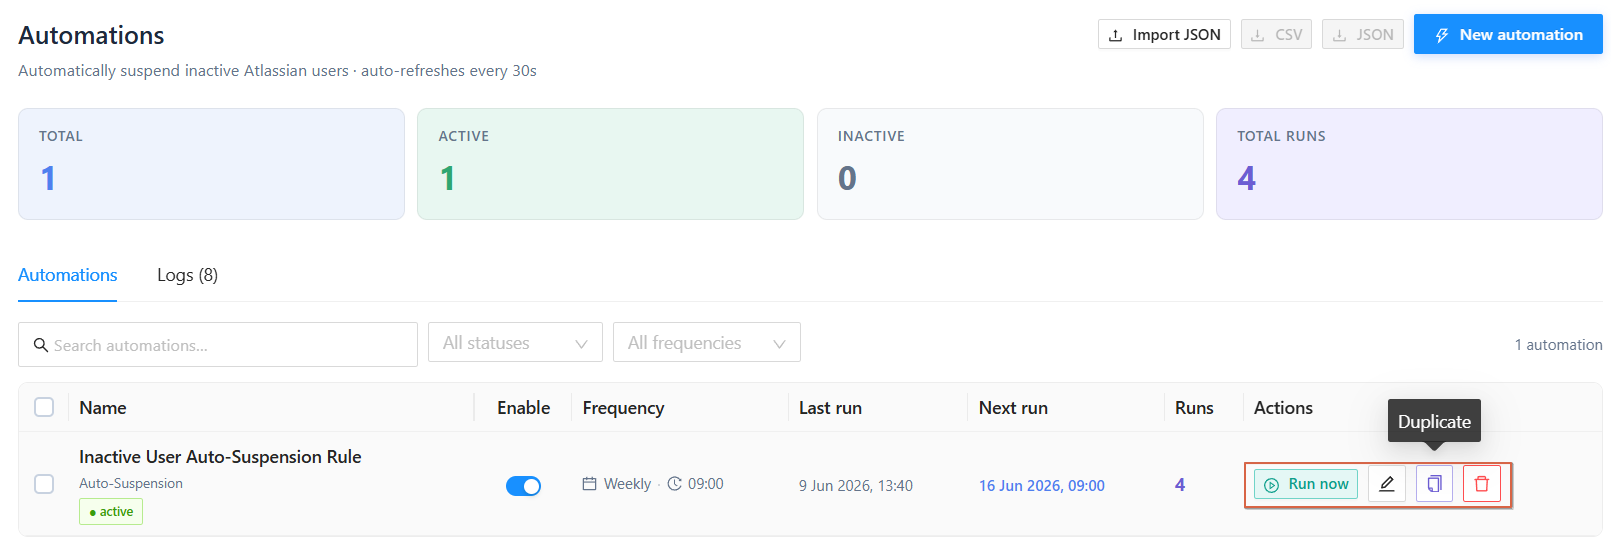
These actions allow full control over automation behavior.
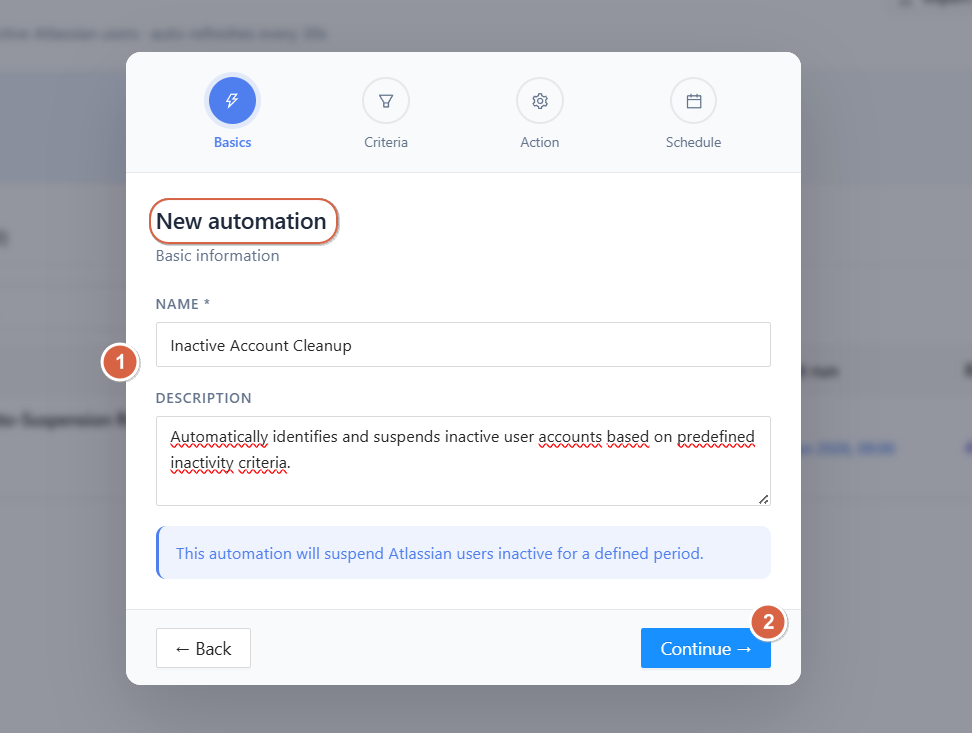
Create New Automation
Administrators can create custom rules to automatically suspend inactive users.
Step 1: Basic Information
-
Enter Automation Name (required)
-
Add an optional Description
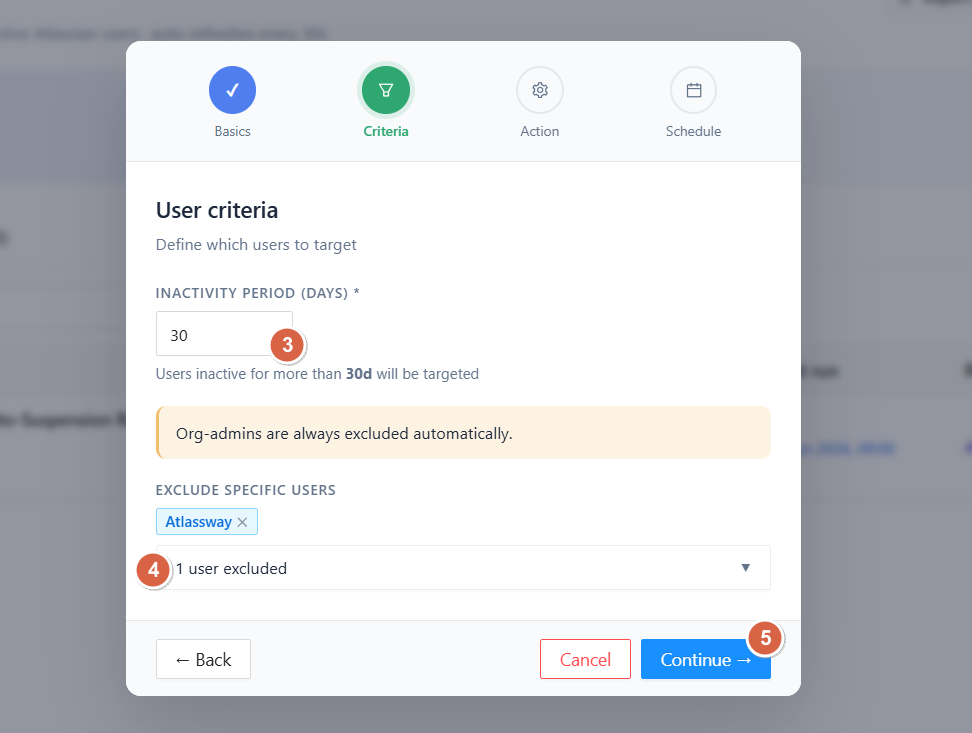
Step 2: User Criteria
Define which users will be targeted.
Inactivity Period (Days)
-
Default: 30 days
-
Users inactive for more than the defined period will be selected
Exclusions
-
Org administrators are automatically excluded
-
You can manually exclude specific users
This ensures critical accounts are never suspended accidentally.
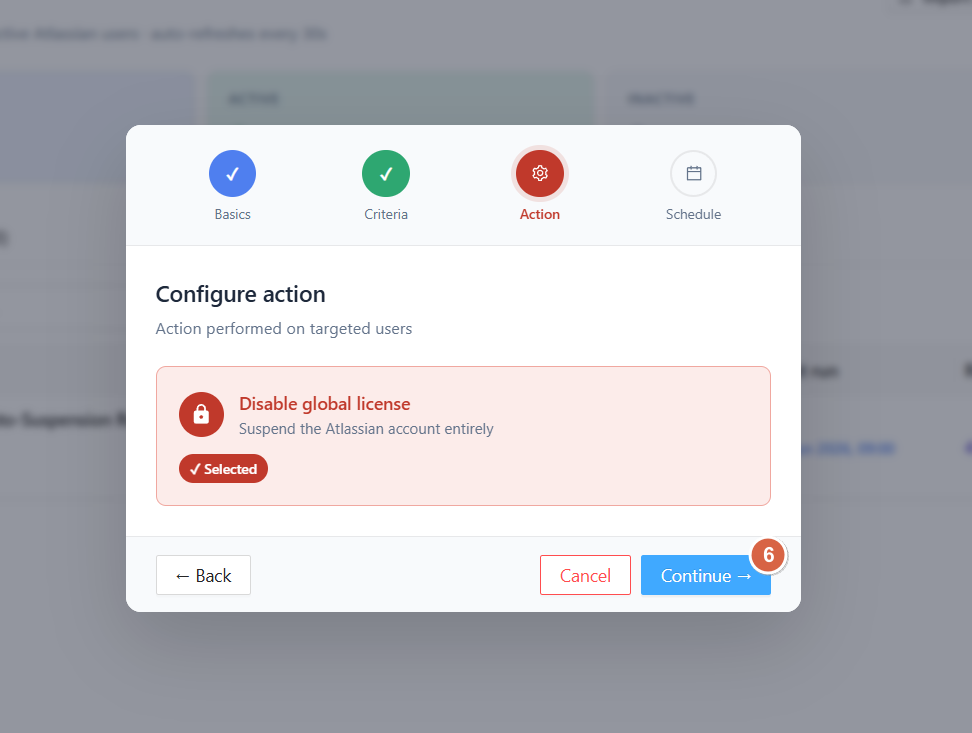
Step 3: Action Configuration
Define what happens to targeted users.
Available Action
-
Disable Global License
-
Fully suspends the Atlassian account
This ensures users lose all product access when the rule is triggered.
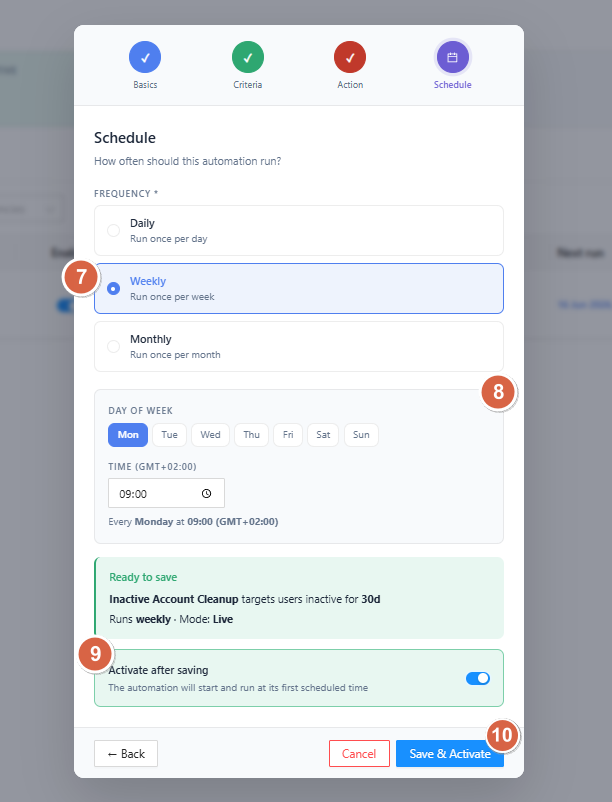
Step 4: Schedule
Define how often the automation runs.
Frequency Options
-
Daily → runs once per day
-
Weekly → runs once per week
-
Monthly → runs once per month
Schedule Configuration
-
Select Day of Week (Mon–Sun)
-
Set execution Time
Example:
-
Every Monday at 09:00
Activation Settings
-
Toggle Activate after saving to enable automation immediately
-
If disabled, the rule is saved but not executed automatically
A summary is displayed before saving, showing:
-
Target inactivity period
-
Schedule
-
Action type
Automation Logs
The Logs section provides full visibility into automation execution history.
Log Overview
Each log entry includes:
-
Automation name
-
Execution date and time
-
Number of suspended users
-
Number of skipped users
Example Logs
-
26 May 2026, 19:26 → 1 suspended / 7 skipped
-
22 May 2026, 14:16 → 1 suspended / 7 skipped
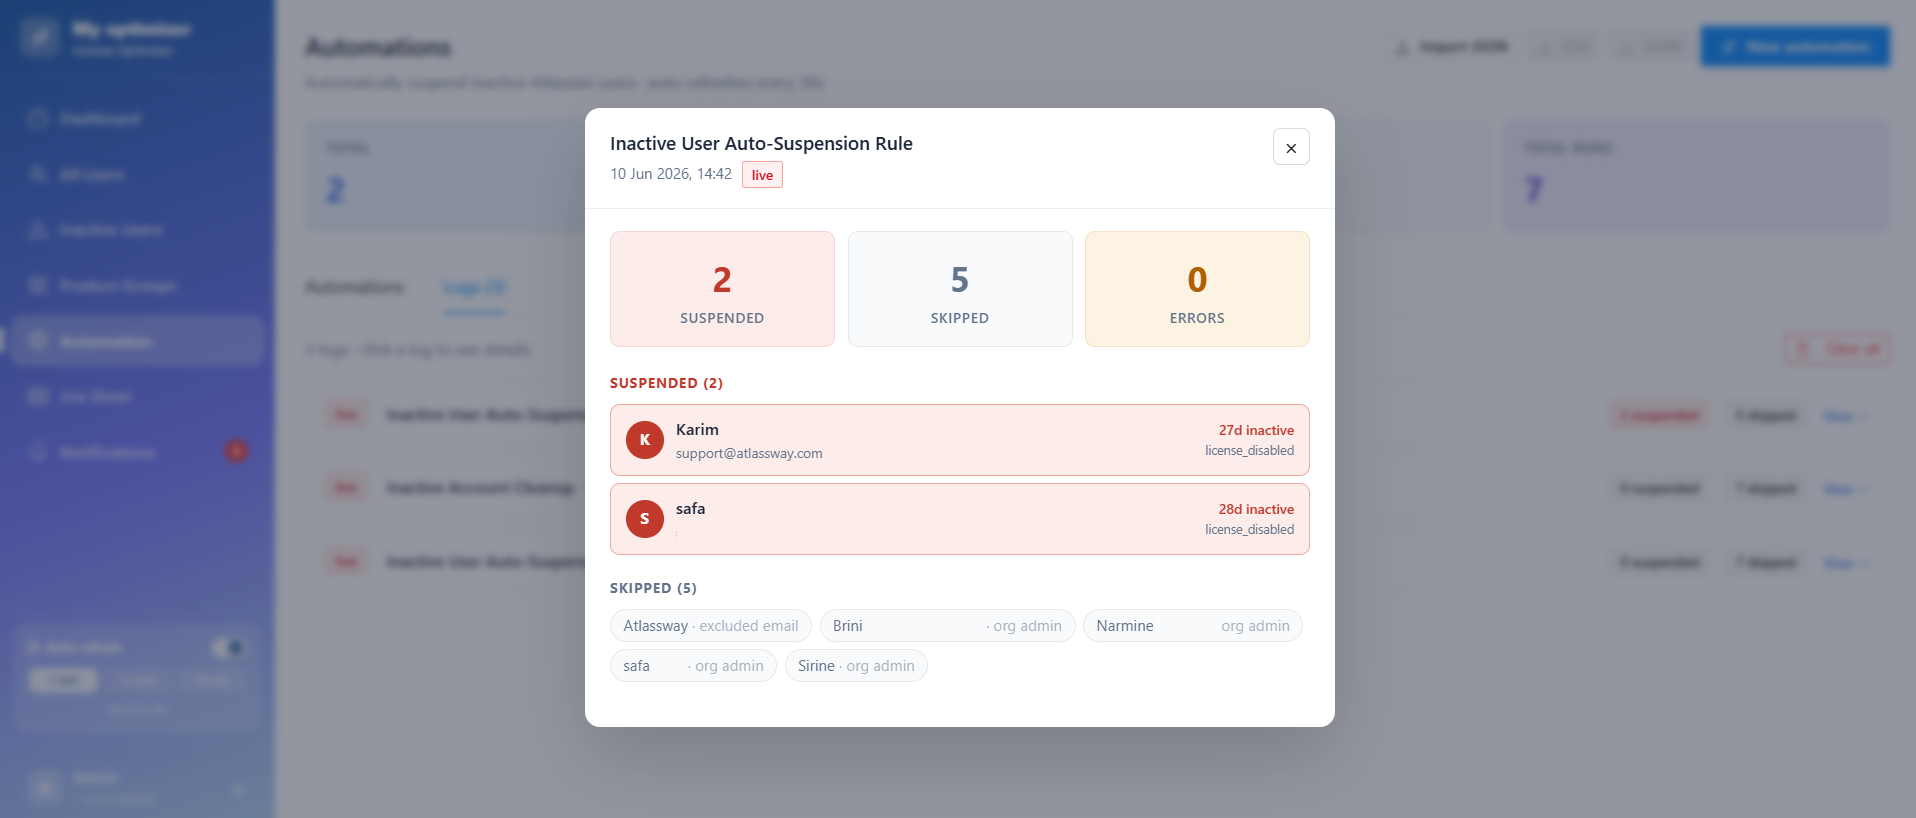
View Log Details
Click View → on any log to see detailed execution results, including:
-
Users suspended
-
Errors
-
Users skipped
-
Reason for skipping (e.g., admin account, exclusion rule, recent activity)
Clear Logs
Administrators can:
-
Clear all logs to reset history
-
Remove old execution records for a cleaner view
Why Automation Matters
Automation rules help organizations:
-
Automatically detect inactive users
-
Reduce unnecessary license costs
-
Improve security by removing unused access
-
Eliminate manual administrative work
-
Ensure consistent user lifecycle management
Conclusion
The Automation Rules page is a powerful engine for maintaining control over Atlassian user activity. By combining flexible criteria, scheduled execution, and detailed logs, administrators can fully automate inactive user management while maintaining transparency and control over every action performed.
Need help?
💡 We're here for you! If you have questions or need to report a bug, visit our Help Center and raise a support ticket. Our team is ready to assist you!