
Modifying an existing template in Advanced Work Item Templates for Jira allows you to keep your templates up-to-date with your team's evolving needs. Whether you need to adjust fields, change descriptions, or update project associations, editing templates is simple and intuitive.
How to Edit a Template
-
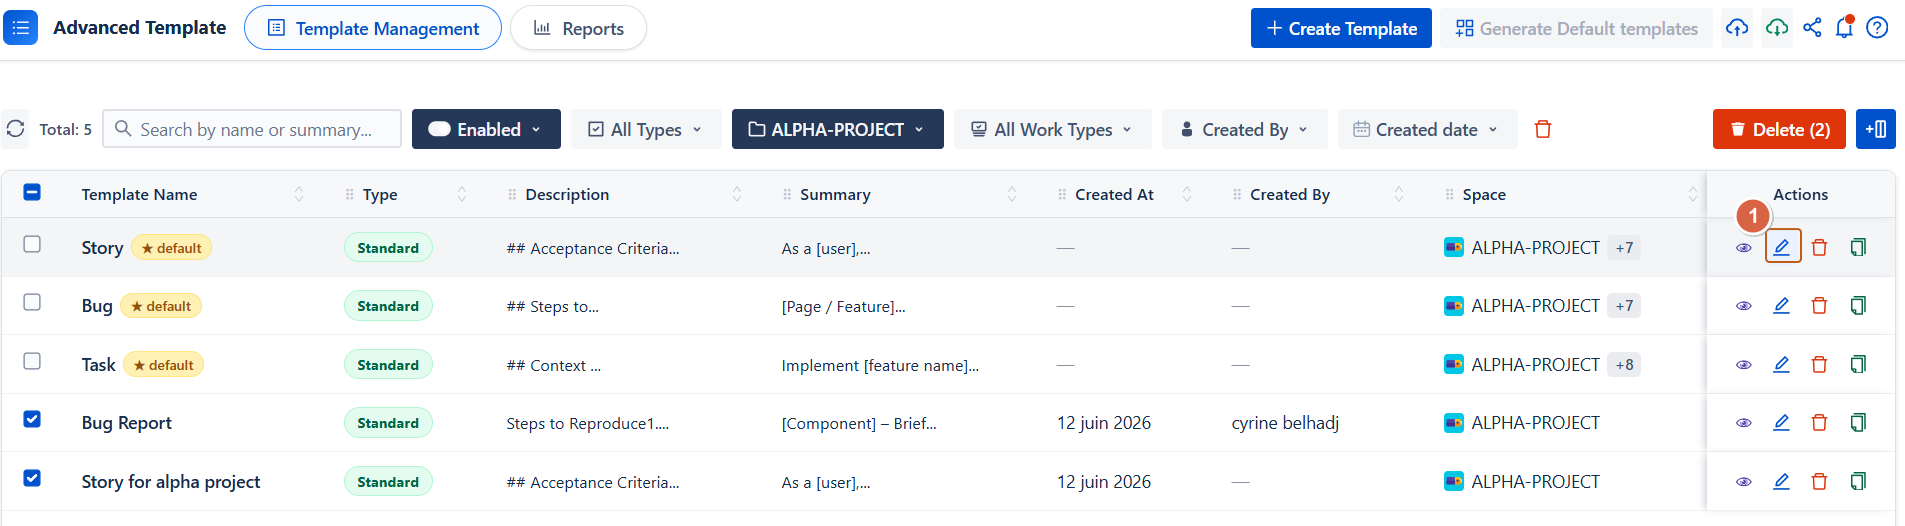
Navigate to Apps → Advanced Work Item Templates for Jira .
-
In the template list, select the template you want to modify.
-
Click the Edit Template button (pencil icon) to open the editor.
Edit Template Form
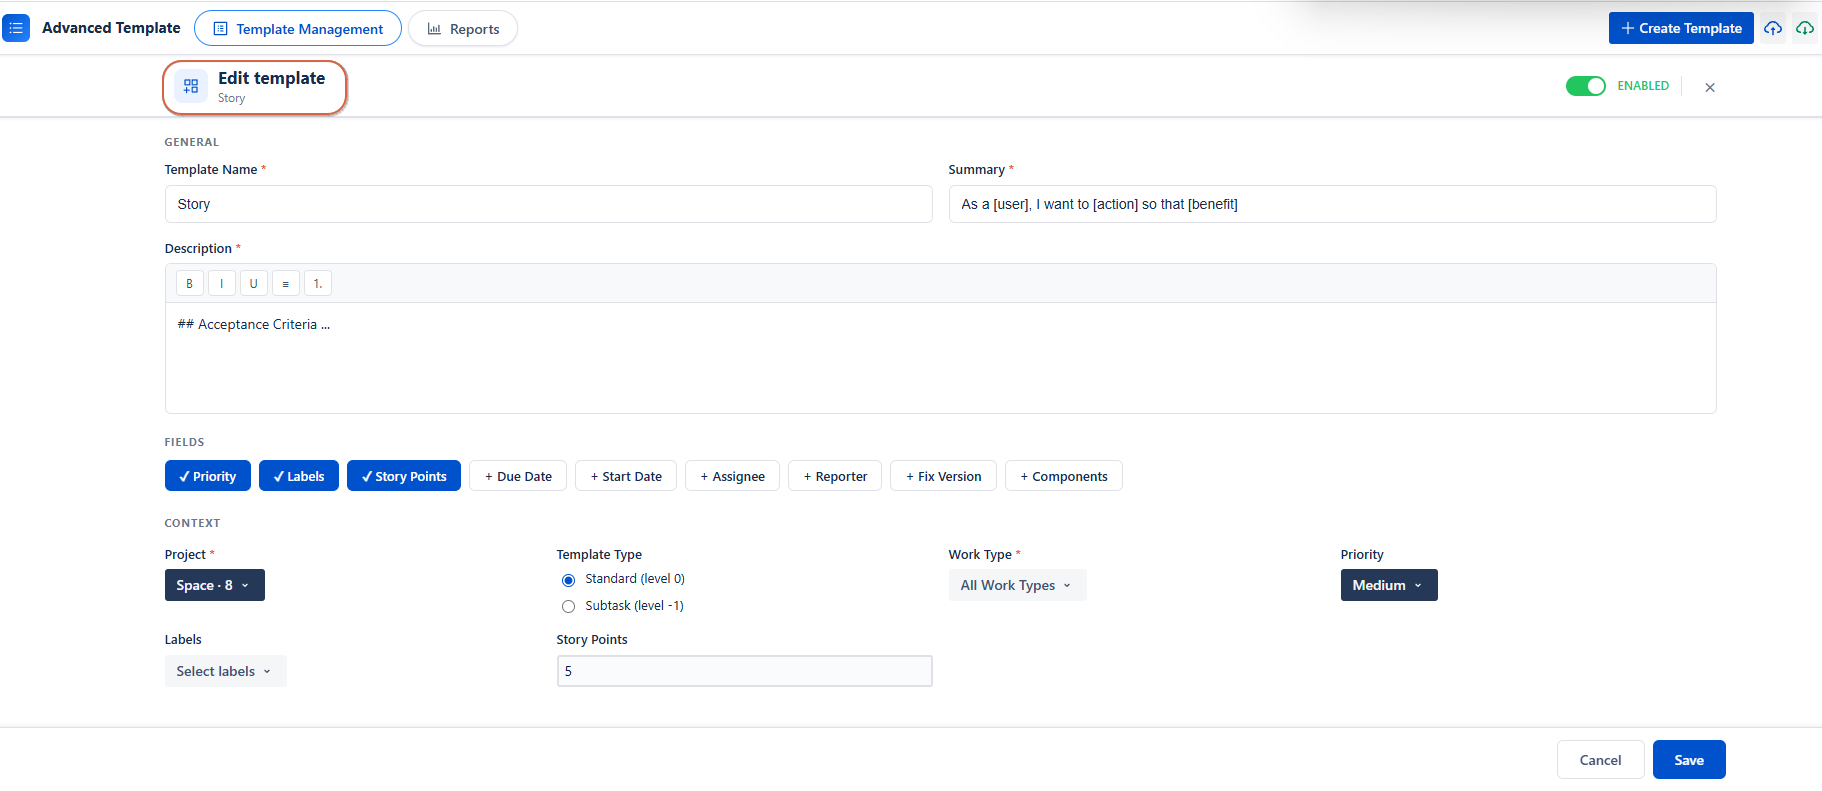
Once you open the edit template view, you'll see the same comprehensive form used during creation, organized into clear sections:
General
-
Template Name: Update the name to better reflect your template's purpose
-
Summary: Modify the short description of the work item
-
Description: Edit rich text content
Context
-
Project: Change or add additional projects to associate with this template
Note: When multiple projects are selected, available fields are limited to those common across all selected projects
-
Template Type: View the template classification:
-
Standard (level 0)
-
Sub-task (level -1): Read-only: cannot be changed after creation
-
Reminder: Sub-tasks must always be linked to a parent issue
-
Work Item Type: Update the work item type(s) (Bug, Task, Story, etc.)
-
Available options depend on the selected projects
-
For sub-tasks, only one parent work type can be selected
-
Fields (Optional) :
You can modify the values of fields that were already selected when the template was created.
You can add new fields or remove existing fields directly from the edit view.
-
Priority: Modify the default priority level
-
Labels: Update pre-filled labels (available options depend on selected projects)
-
Story Points: Change estimated effort points
-
Start Date: Update the default start date
-
Due Date: Update the default due date
-
Assignee: Change the pre-assigned team member
-
Search for users by name
-
Clear the selection with the × button
-
-
Reporter: Update who reports the issue
-
Search for users by name
-
Clear the selection with the × button
-
-
Fix Version: Modify the target version for fixes
-
Available versions depend on selected projects
-
-
Components: Update associated components
-
Available options depend on selected projects
-
Important Notes When Editing
Multi-Project Templates
When your template is linked to multiple projects:
-
Only fields with common values across all projects are shown
-
For example, if Project A has versions v1.0 and v2.0, but Project B only has v2.0, only v2.0 will appear in the Fix Version dropdown
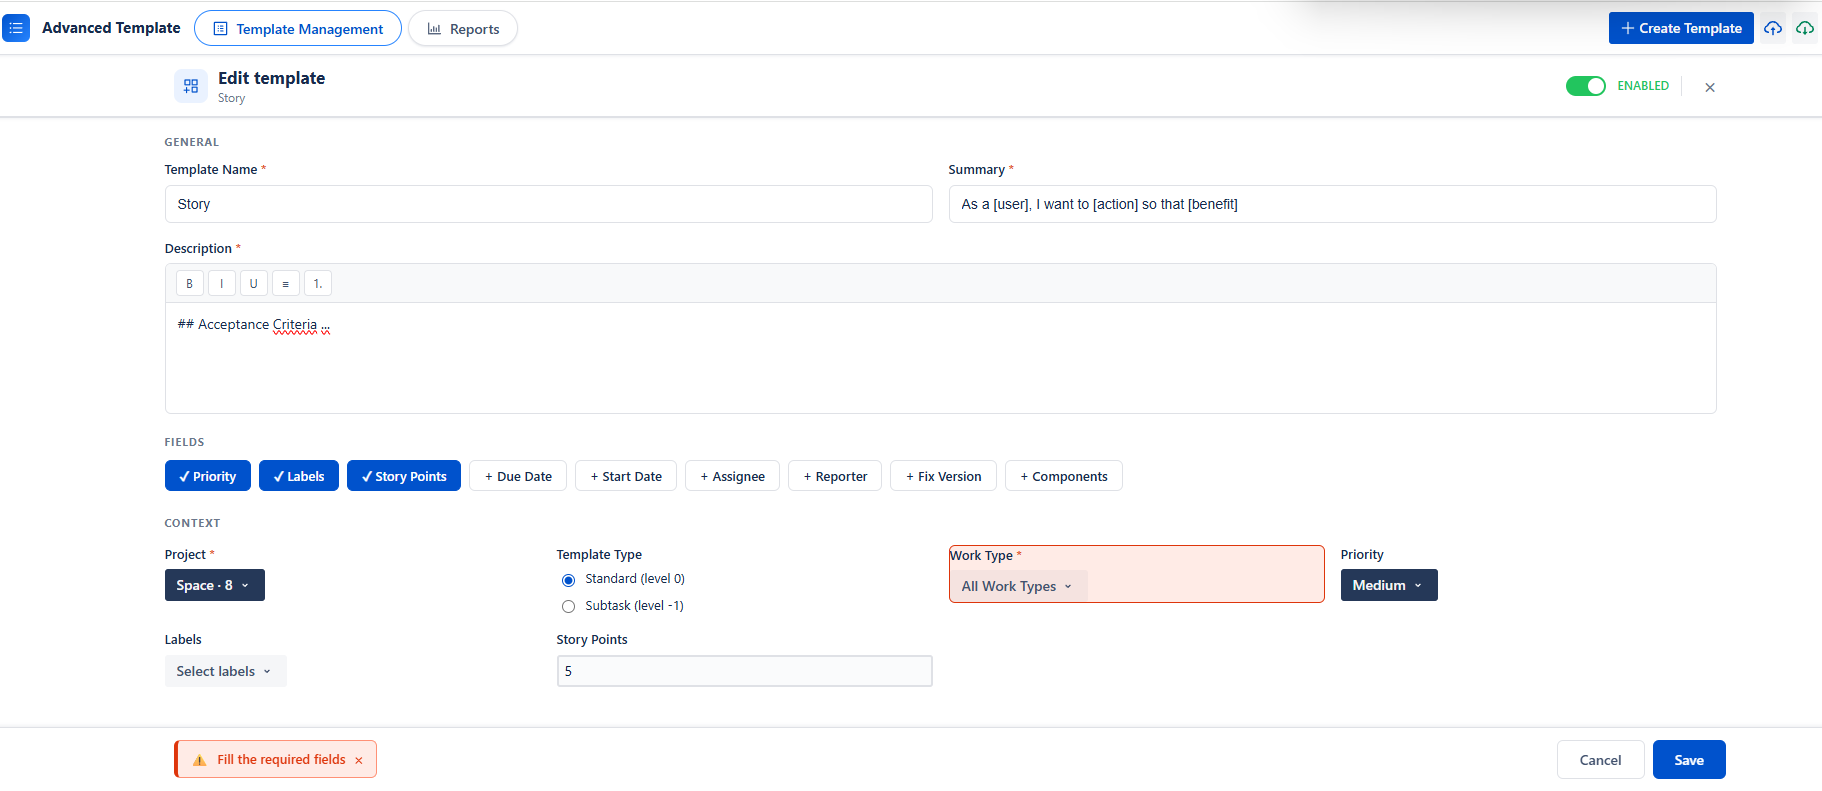
Field Validation
Required fields are clearly marked. If validation errors occur:
-
Fields with errors display a red border and red background
-
All errors must be resolved before the template can be saved
Read-Only Fields
The Template Type (Standard vs. Sub-task) cannot be changed after creation. If you need to switch template types, you'll need to create a new template.
Saving Your Changes
Once you've made all necessary edits:
-
Review your changes to ensure accuracy
-
Click the Save Changes button
-
A success notification will confirm your template has been updated
Cancel Editing
If you want to discard your changes:
-
Click the Cancel button
-
Your original template settings will remain unchanged
To edit templates, you need the appropriate permissions set by your Jira administrator. If you don't have permission:
-
You'll see an error message: "You don't have permission to edit templates"
-
Contact your Jira administrator to request template editing access
Best Practices for Editing Templates
✅ Keep templates focused: Edit out unnecessary fields to keep work items clean and focused
✅ Update descriptions regularly: Keep template descriptions up-to-date as your process evolves
✅ Review project associations: Periodically check that your templates are linked to the right projects
✅ Test after editing: After making significant changes, test the template by creating a work item to ensure all fields populate correctly
Troubleshooting
Changes won't save?
-
Ensure all required fields are filled in
-
Check that there are no validation errors (red-bordered fields)
Conclusion
Editing a template in Advanced Work Item Templates for Jira is a flexible and intuitive way to keep your Jira workflows aligned with your team’s evolving needs. You can easily update fields, adjust project associations, and refine template details while maintaining full control over how work items are created.
Need help?
💡 We're here for you! If you have questions or need to report a bug, visit our Help Center and raise a support ticket. Our team is ready to assist you!