
Welcome to the Global Page of Time in Status! 🚀
This page brings all your work items together in one place, making it easy to search, filter, analyze, and export data.
Whether you’re a team member tracking tasks, a manager monitoring project , or an admin managing configurations, this page gives you the tools to stay in control.
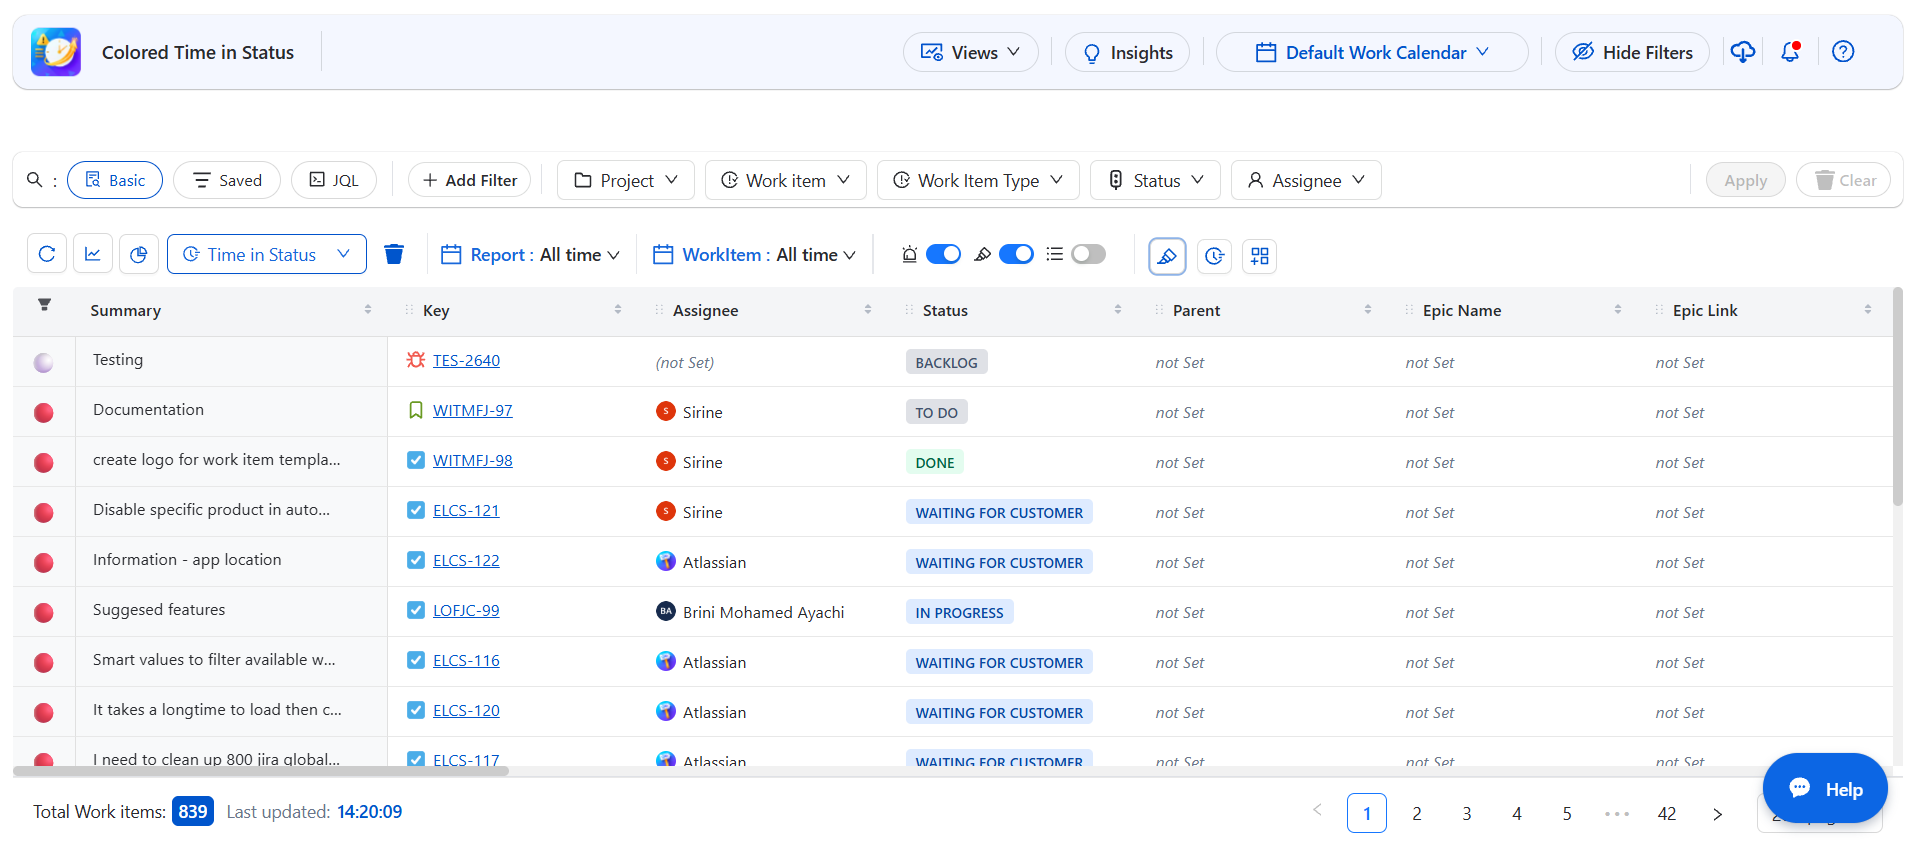
🔍 Search & Filters
Basic Search
-
Use the extended filter panel to quickly find work items with precise, multi-criteria filtering.
Available Filters:
-
Project : Filter by one or more Jira projects
-
Work Item : Enter specific keys or IDs
-
Work Item Type : Story, Bug, Epic, Task, etc.
-
Status :To Do, In Progress, Done, etc.
-
Assignee : Filter by assigned users
-
Reporter : Who created the work item
-
Components, Fix Version, Labels : Project details and tags
-
Sprint : Items linked to sprints
-
Parent : Sub-tasks or linked items
-
Priority : Highest, High, Medium, Low etc..
-
Creator : Original creator of the issue
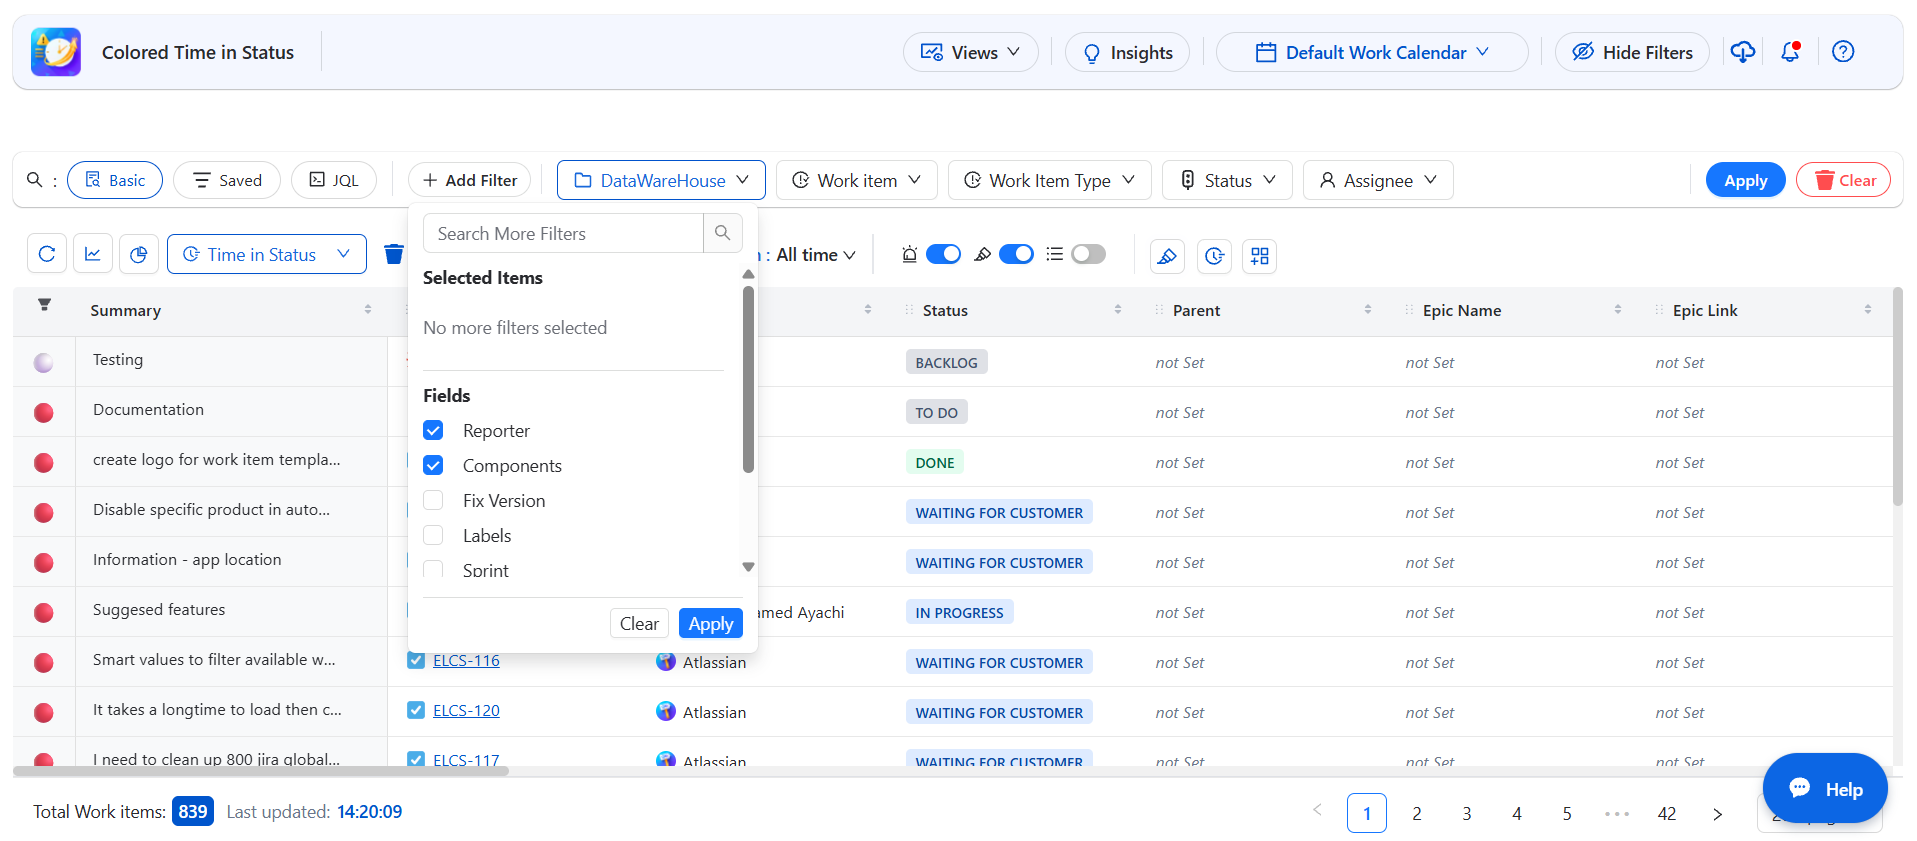
Click the Clear Filter 🧹 icon to instantly reset all filters.
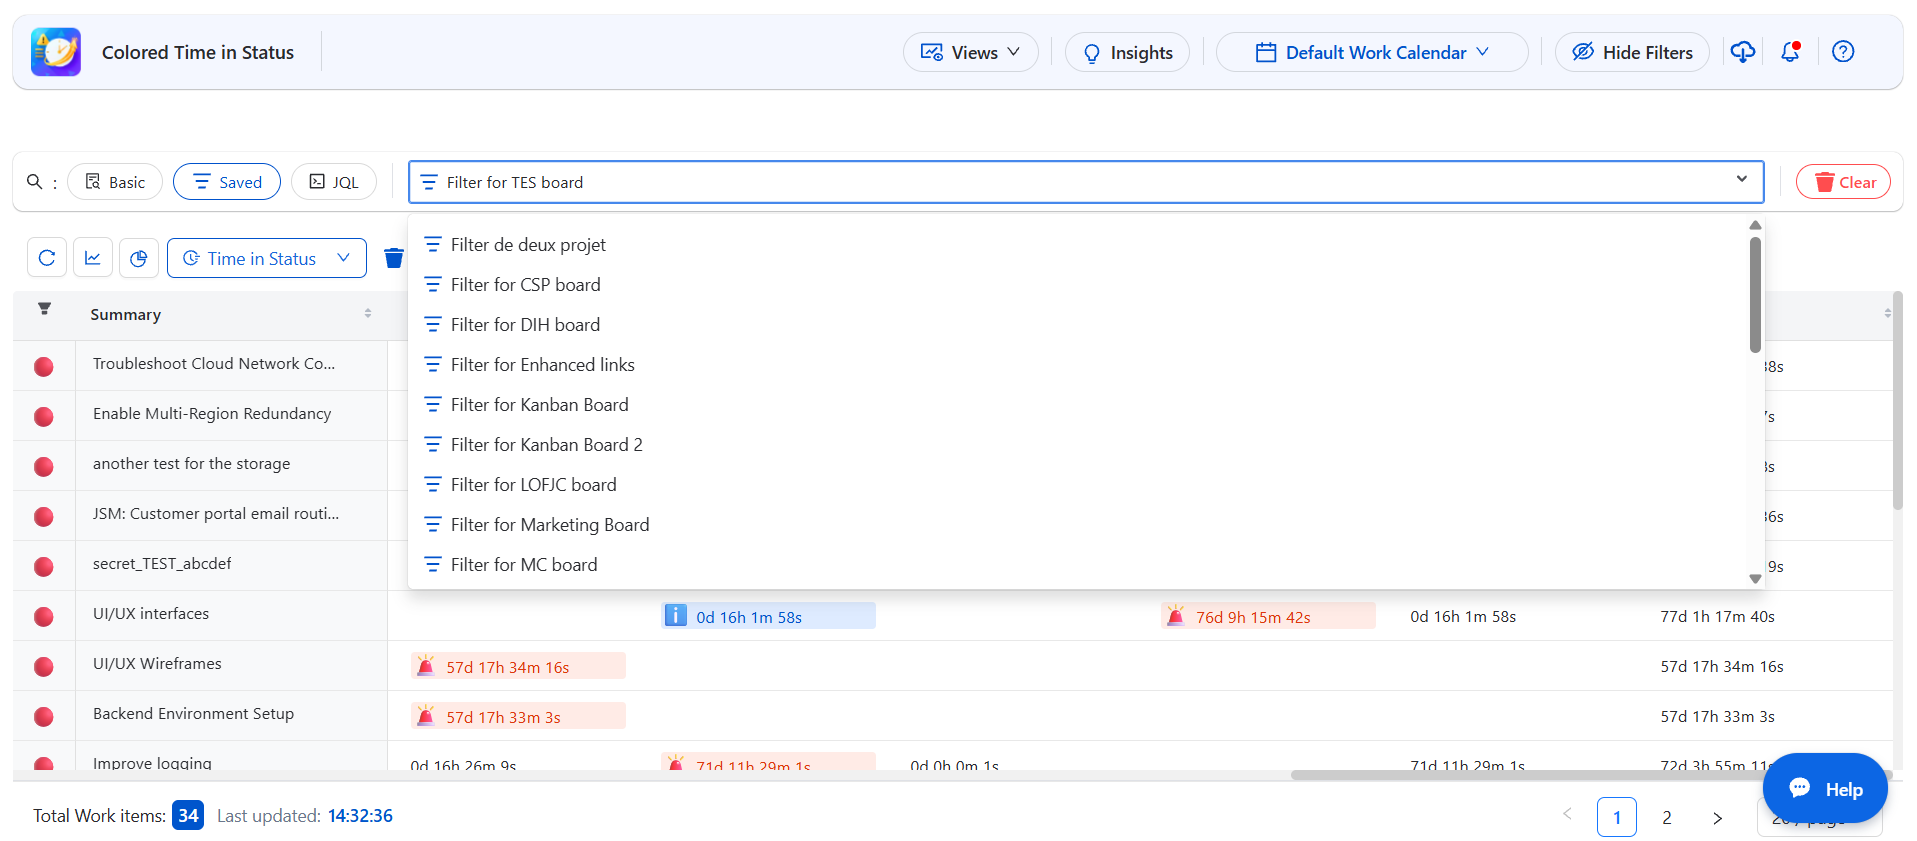
💾 Saved Filters
Quickly reuse your favorite filters for consistent reporting or team-wide views.
-
Access your saved filters from the dropdown menu.
-
Selecting a filter applies all its conditions instantly.
-
Click Clear Filter to reset.
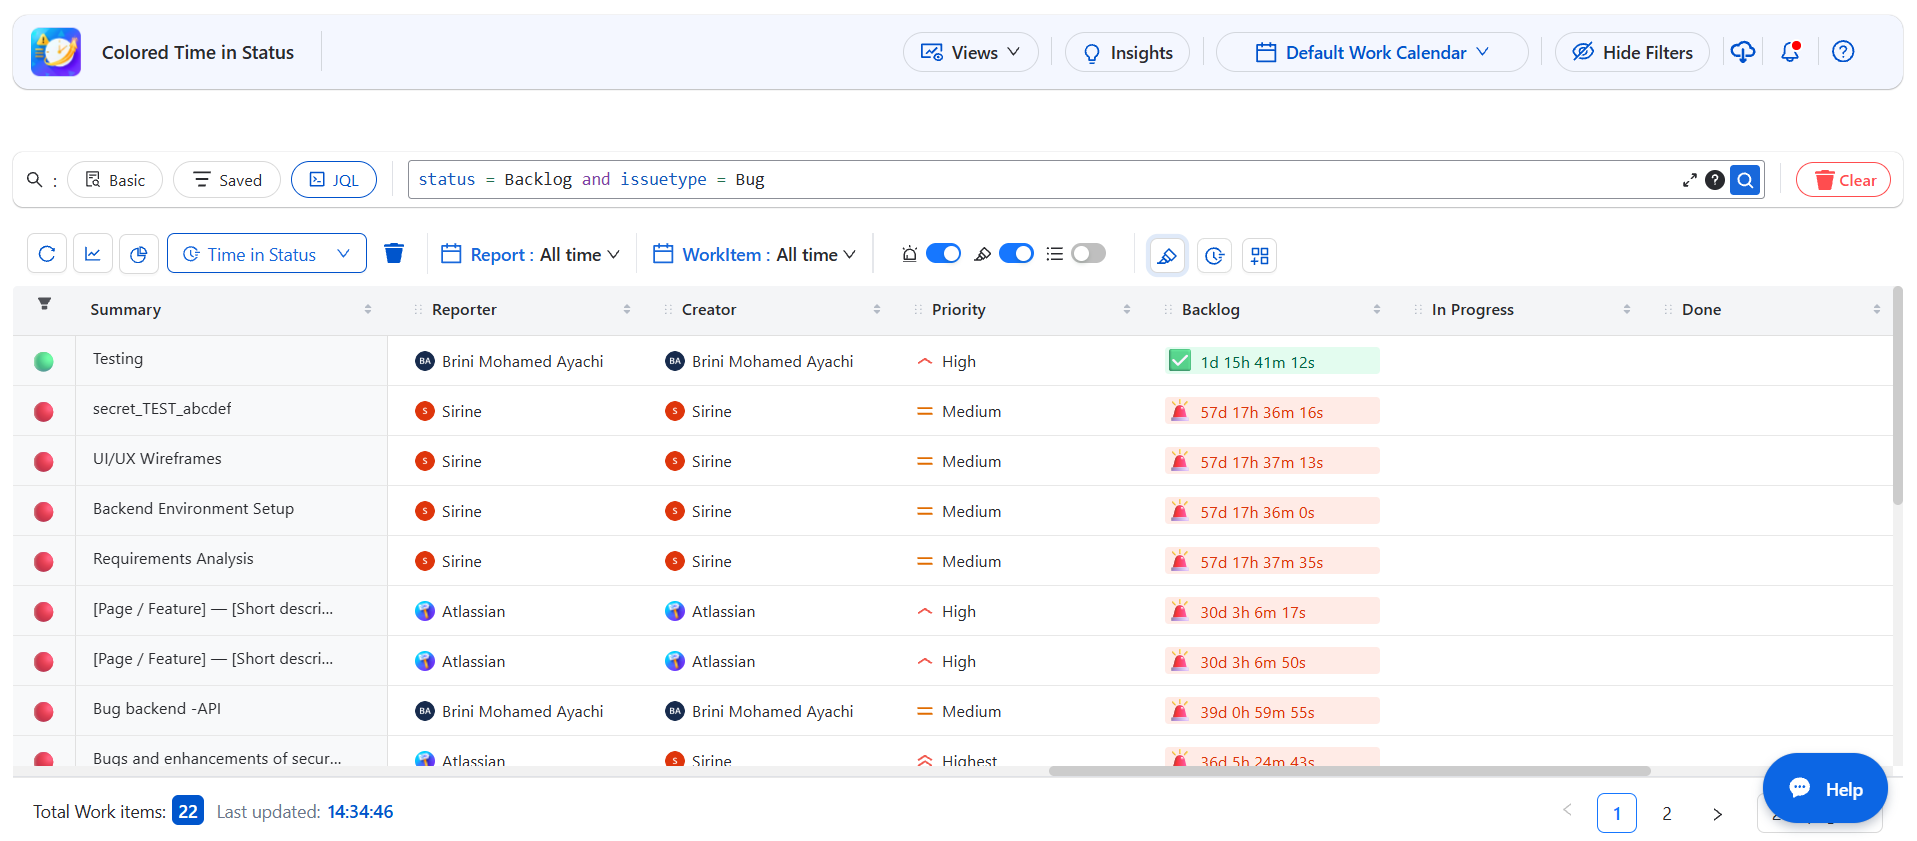
Advanced Search (JQL)
For users, Jira Query Language (JQL) lets you create powerful, custom searches across all work items.
With JQL, you can:
-
Combine multiple conditions for precise results.
-
Search across projects, issue types, statuses, assignees, and more.
-
Save complex queries for reuse or reporting.
This gives you full control over how you find and analyze your data.
Sorting & Table Features
Easily organize your table data to find what matters most.
-
Click a column header once (🠕) → Sort values in ascending order
-
Click again (🠗) → Sort values in descending order
-
Click a third time (🚫) → Reset to the original default order
Why it helps:
-
Spot recent updates quickly
-
Identify top performers or high-priority items
💡Combine sorting with filters to get exactly the view you need in seconds.
Configuration Settings
Manage Alert Columns and Highlights
Time in Status provides flexible controls to customize how alerts and highlights are displayed in your reports.
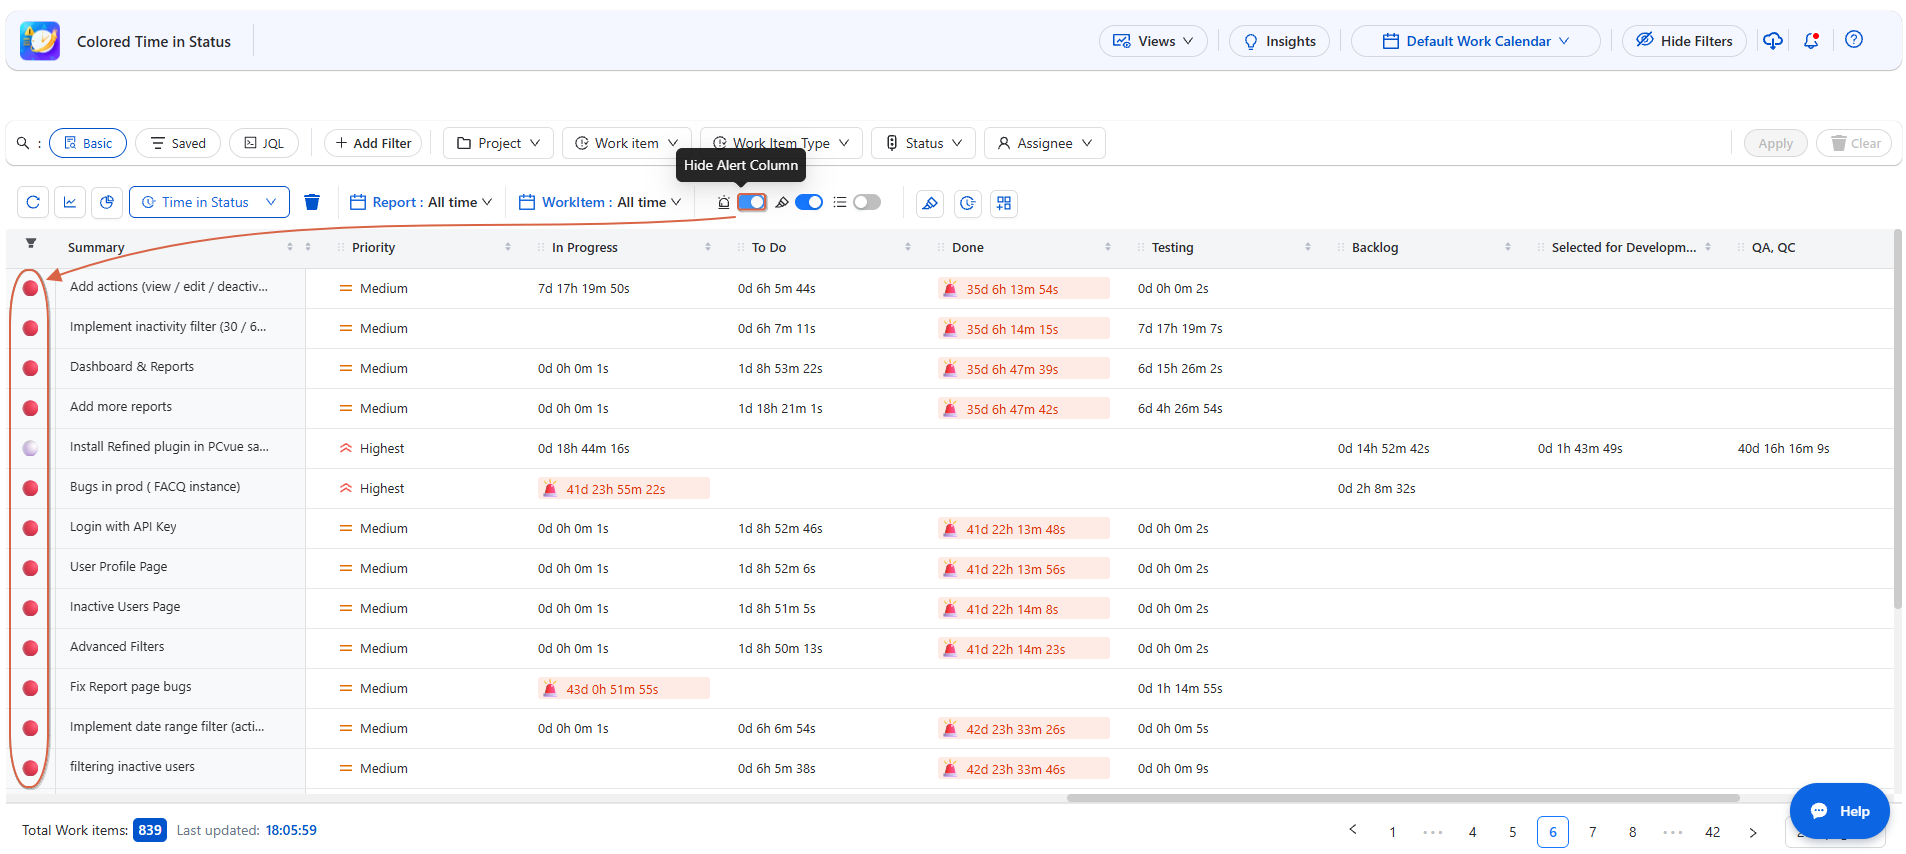
Show or Hide the Alert Column
Use the Alert Column toggle to control whether highlight icons appear in the report table.
-
ON: The Alert column is displayed, and applicable highlight icons appear.
-
OFF: The Alert column is hidden.
Simply switch the toggle ON or OFF according to your needs.
Enable or Disable Highlights
Use the Disable Highlights toggle to control all highlights at once.
-
OFF: Highlights are enabled and displayed according to your configured rules.
-
ON: All highlights are disabled.
You can also disable individual highlights from the Highlights page by turning off the toggle for a specific highlight.
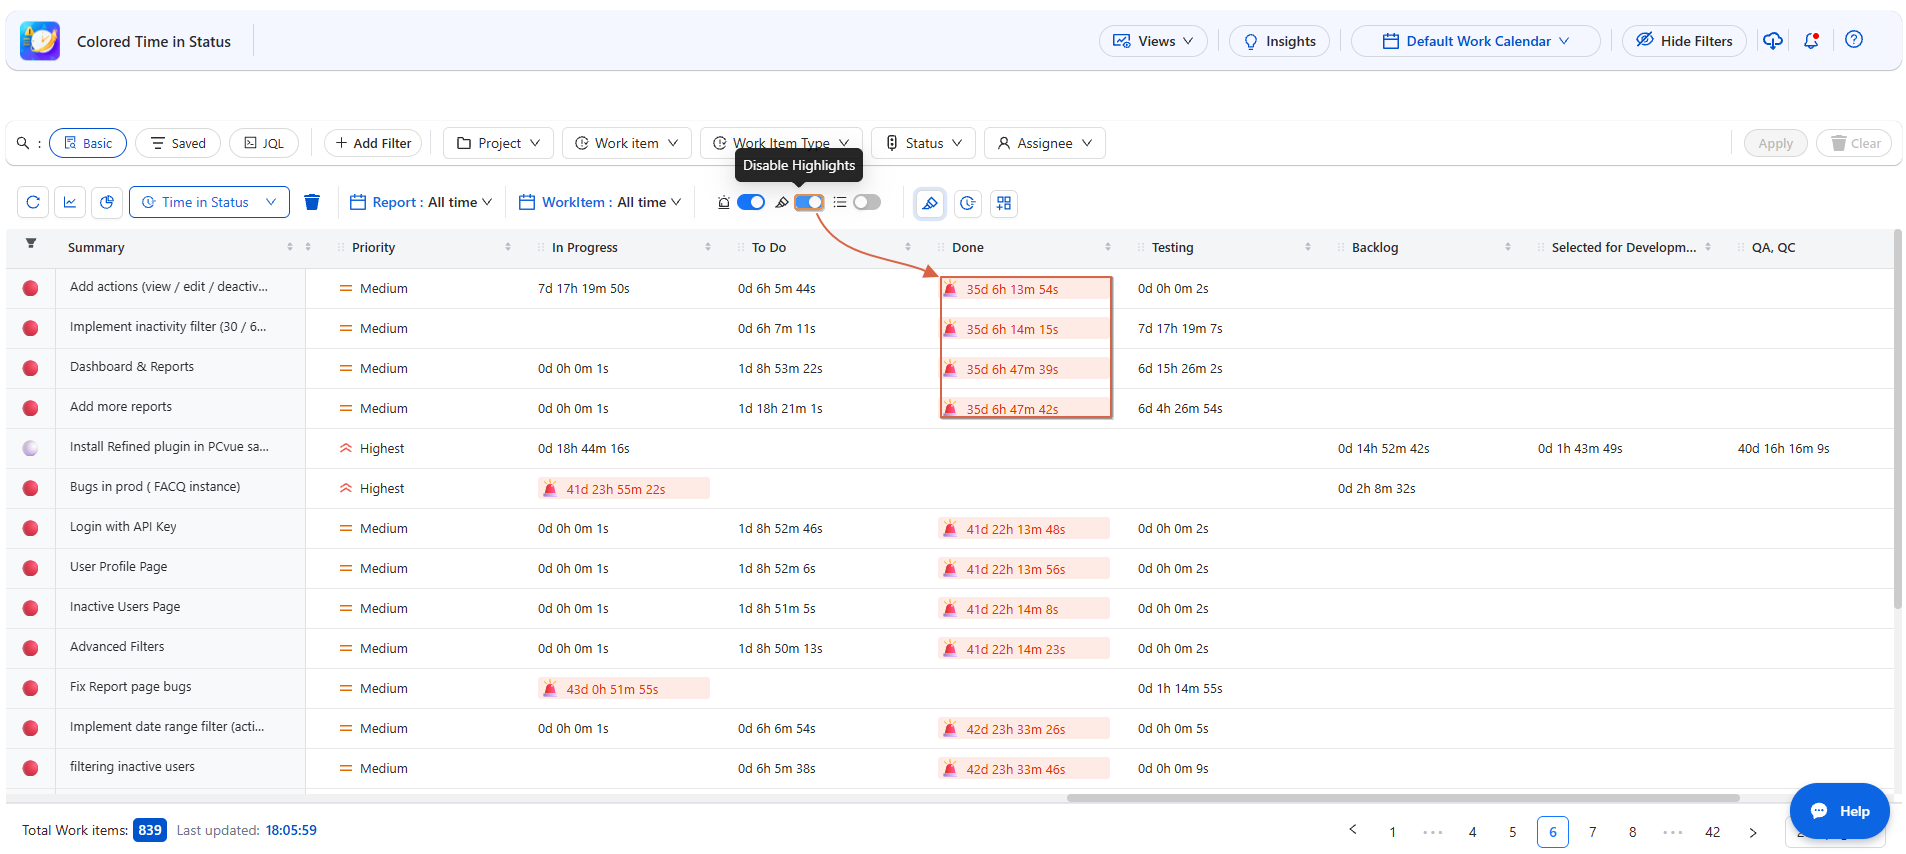
You can’t disable highlights while Group Highlights is enabled. Disable Group Highlights first, then you can disable highlights.
Group Work Items with Highlights
Enable Group Highlights to organize your report based on whether work items have highlights.
When Group Highlights is ON:
-
Work items with highlights are grouped together at the top.
-
Work items without highlights are displayed in a separate group below.
When Group Highlights is OFF, work items are displayed normally without separating highlighted and non-highlighted work items.
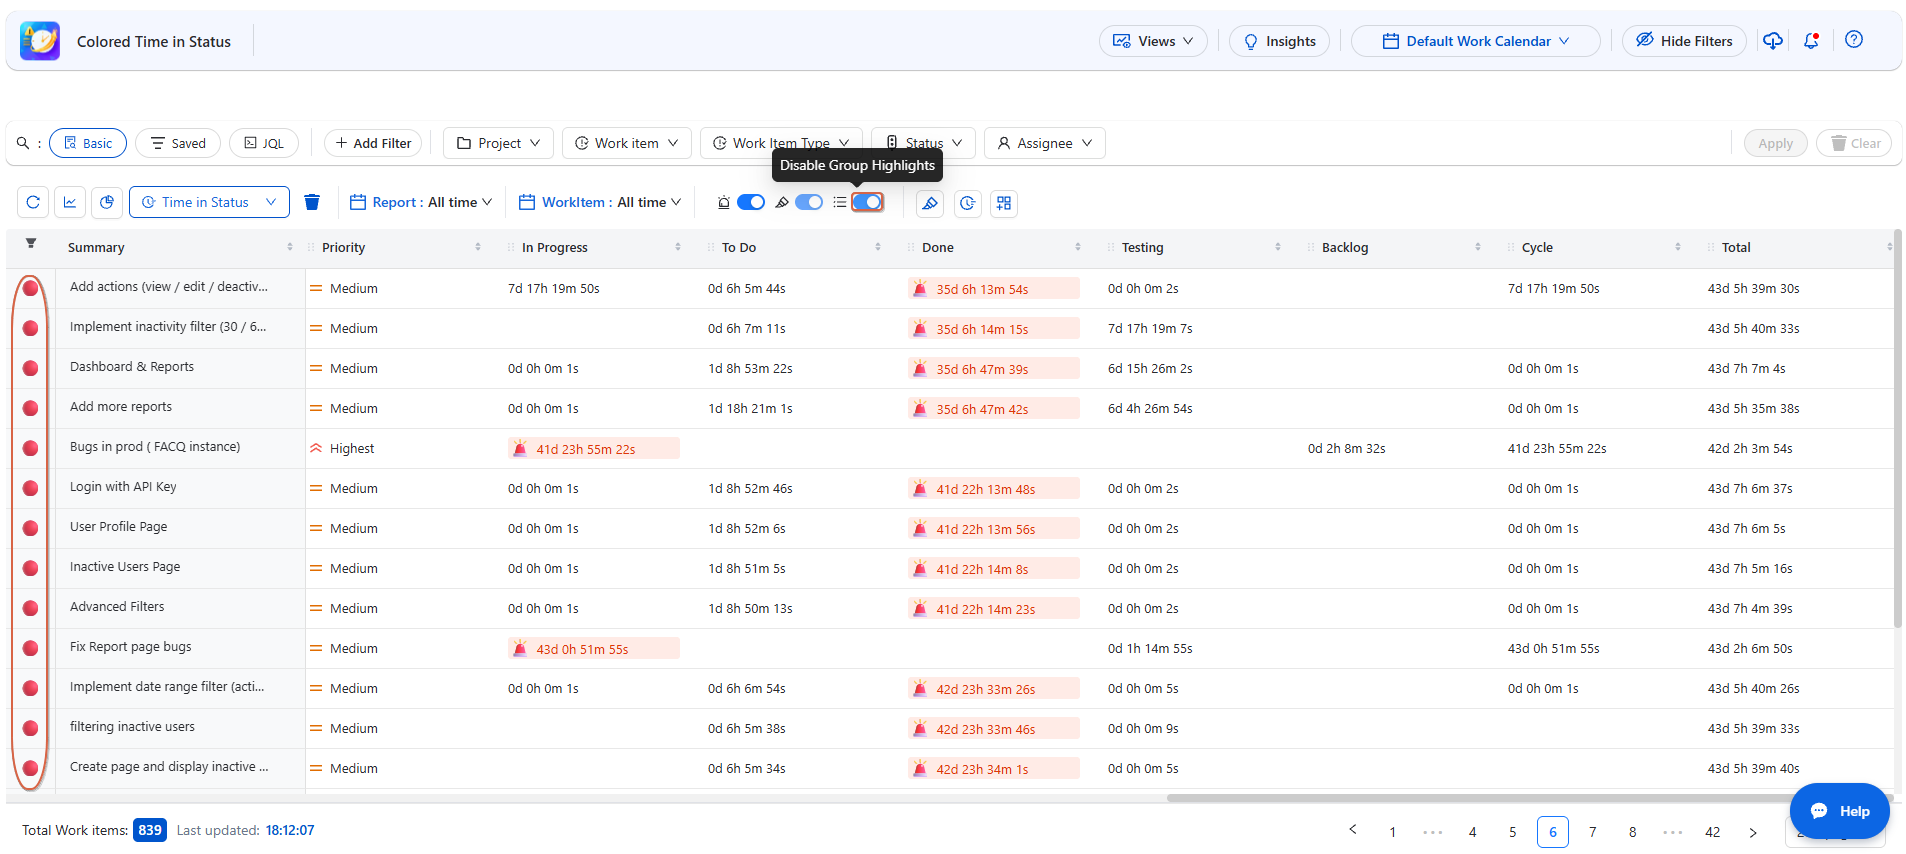
The Group Highlights option can only be used when highlights are enabled.
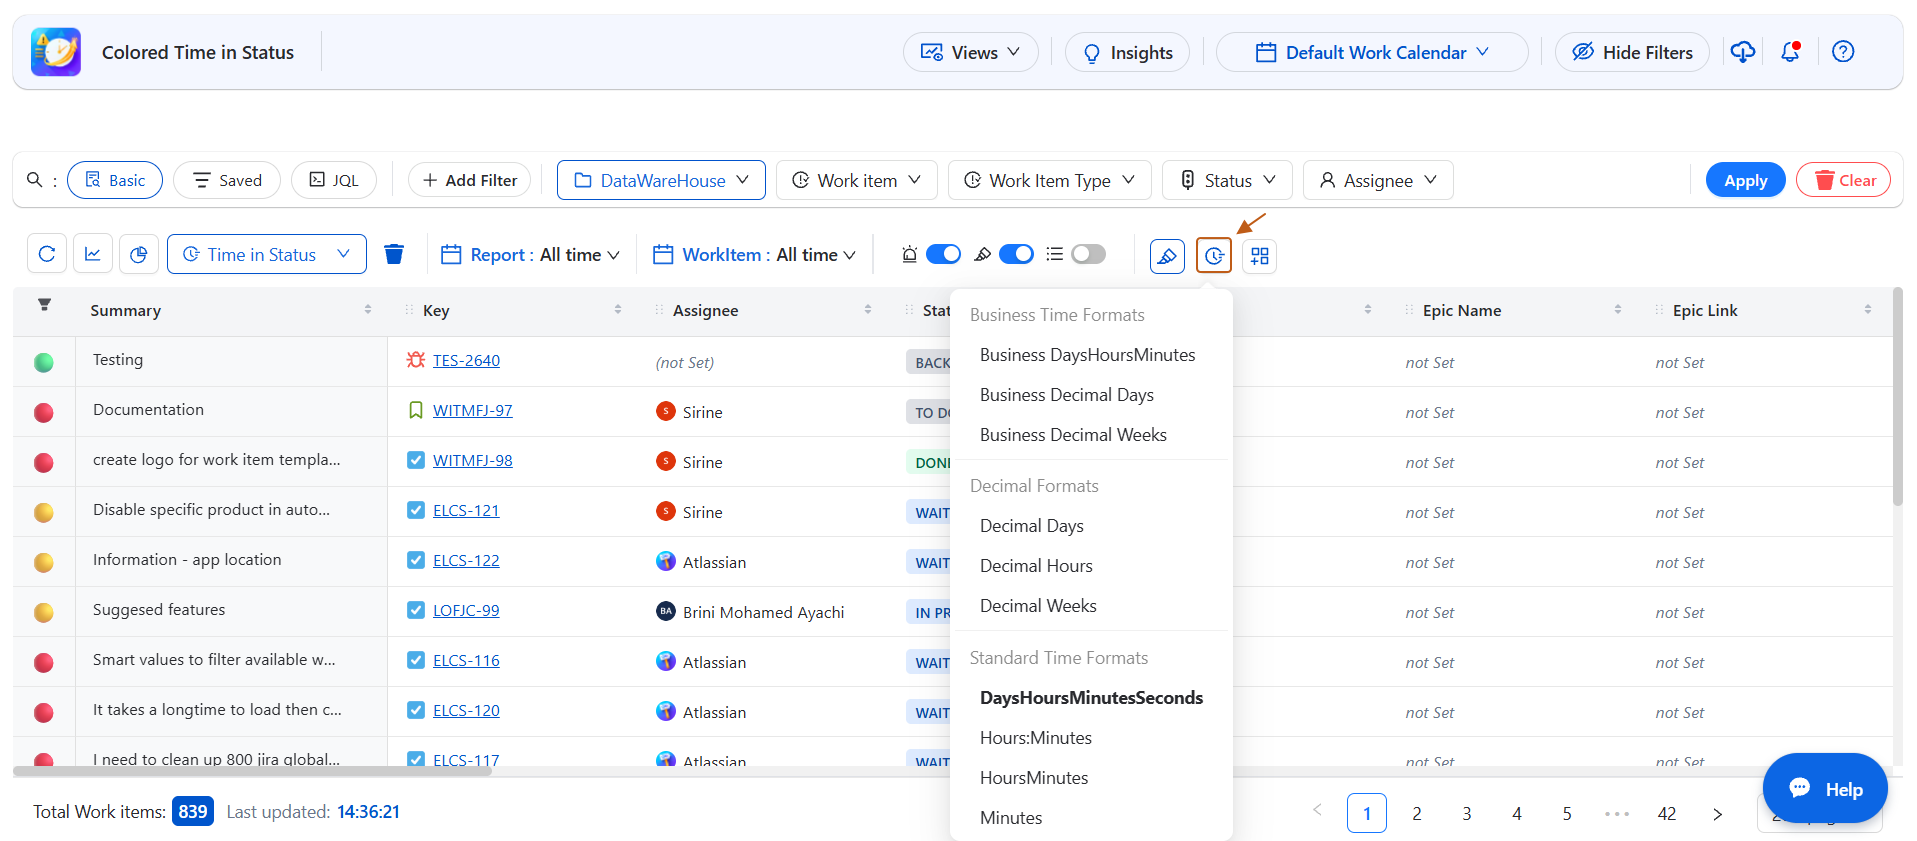
Change time format
Choose how you want time to be shown:
-
Business Time Format → e.g., 2d 4h 30m (days, hours, minutes)
-
Decimal Format → e.g., 2.5h (hours in decimal)
-
Standard Time Format → e.g., 02:30:00 (hours:minutes:seconds)
👉 This lets every team member see time in the format that makes the most sense for their work.
Configure Cycle Time and Lead Time
Time in Status allows you to create custom Cycle Time and Lead Time calculations to measure how long work items spend in specific statuses, categories, or with specific assignees.
Cycle Time
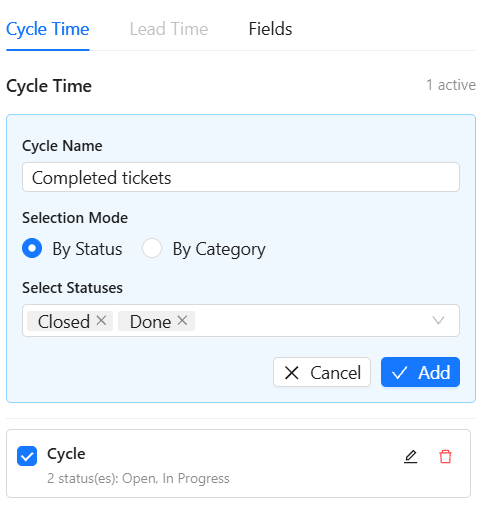
A Cycle Time measures the time work items spend across selected statuses or status categories.
You can create a Cycle Time based on:
-
Status : Select specific statuses to include in the calculation.
-
Category : Select status categories to include in the calculation.
Create a Cycle Time
-
Open the Cycle Time section.
-
Click Create.
-
Enter a Cycle Name.
-
Under Selection Mode, select:
-
By Status
-
By Category
-
-
Select the statuses or categories to include.
-
Click Add.
-
To edit a field, simply click the pencil icon, make your changes, and click Save.
Lead Time
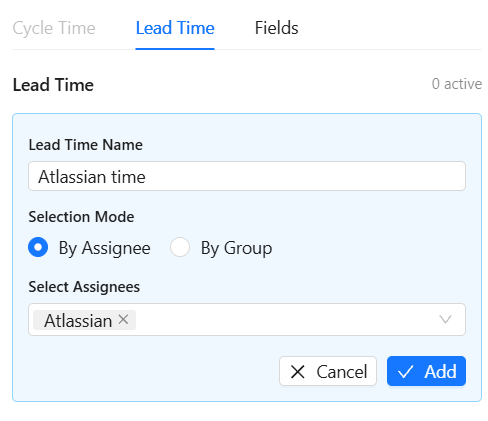
A Lead Time measures the time associated with work items based on their assigned users or groups. It can combine the time spent by different assignees or members of a group.
You can create a Lead Time based on:
-
Assignee : Select specific assignees.
-
Group : Select a group to include its members.
Create a Lead Time
-
Open the Lead Time section.
-
Click Create.
-
Enter a Lead Time Name.
-
Under Selection Mode, select:
-
By Assignee
-
By Group
-
-
Select the assignees or groups to include.
-
Click Add
-
To edit a field, simply click the pencil icon, make your changes, and click Save.
Customize Report Columns
Time in Status allows you to customize your table by adding the fields you want to display as columns.
Add a Custom Field
-
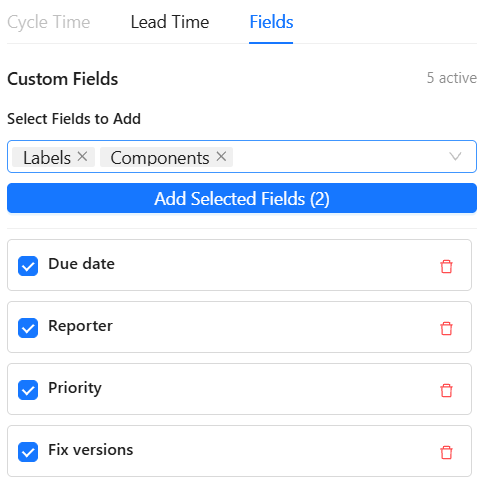
Open the Custom Fields section.
-
Under Select Fields to Add, choose the field you want to display as a column.
-
Click add selected fields
-
The selected field is added to the table.
Remove a Custom Field
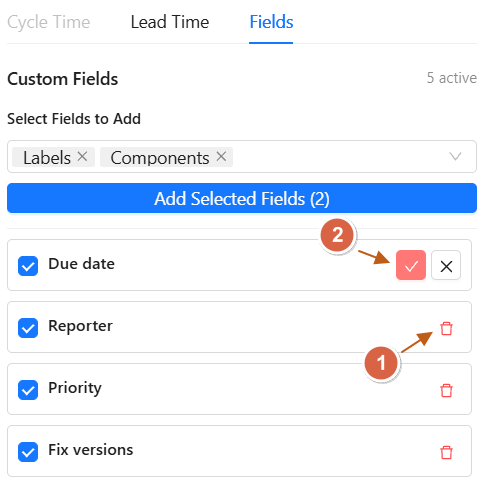
To remove a field from the report:
-
Find the field you want to remove.
-
Click Remove on the right side of the field and than confirm.
The field will no longer be displayed as a column in the report.
Feature Updates Notification
Stay in the loop with every release! The Notification Alert lets you instantly know about new features, improvements, and bug fixes.
With just one click, you can:
-
Read a concise summary of all updates
-
Discover UX improvements and interface changes
-
Access new features right away
-
Keep your team aligned and informed
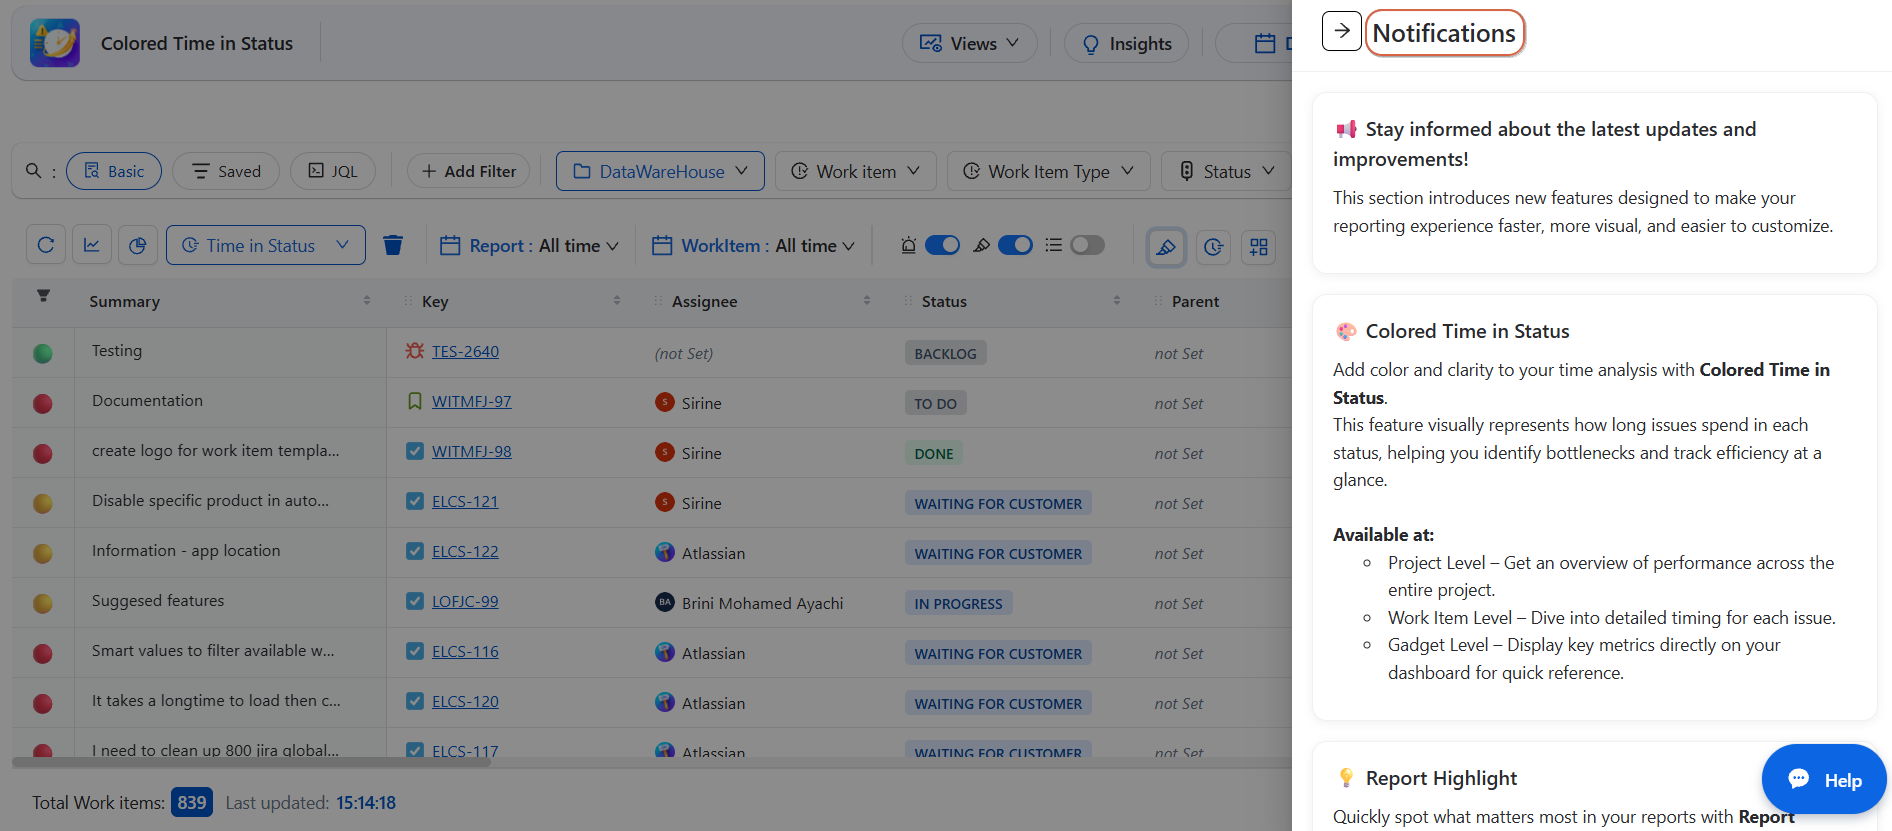
Tip: Check notifications regularly so you never miss enhancements that can boost your workflow.
Help & Support
Don’t worry everything you need is right here! Open the Help (?) menu to:
-
Read the App Documentation
-
Follow the Getting Started Guide
-
Submit Feature Requests
-
Contact Support (usually replies within 4 hours)
Everything is available to help you get the most out of the app.
Conclusion
-
The Global Page is your central hub for tracking, analyzing, and managing work items across projects. With easy search, flexible settings, and instant updates, it gives you a clear view and full control of your data.
✨ Explore, customize your view, and discover insights to keep your projects moving forward!
Need help?
🤝 We're here for you! If you have any questions, suggestions, or feature requests, feel free to reach out — we typically respond within 4 hours