
Colored Label Manager for Jira allows you to manage colored labels directly from the work item view. Without leaving your work item, you can easily add new label items, modify existing selections, or remove labels you no longer need.
This guide explains how to manage colored labels at the work item level.
Editing an Existing Label
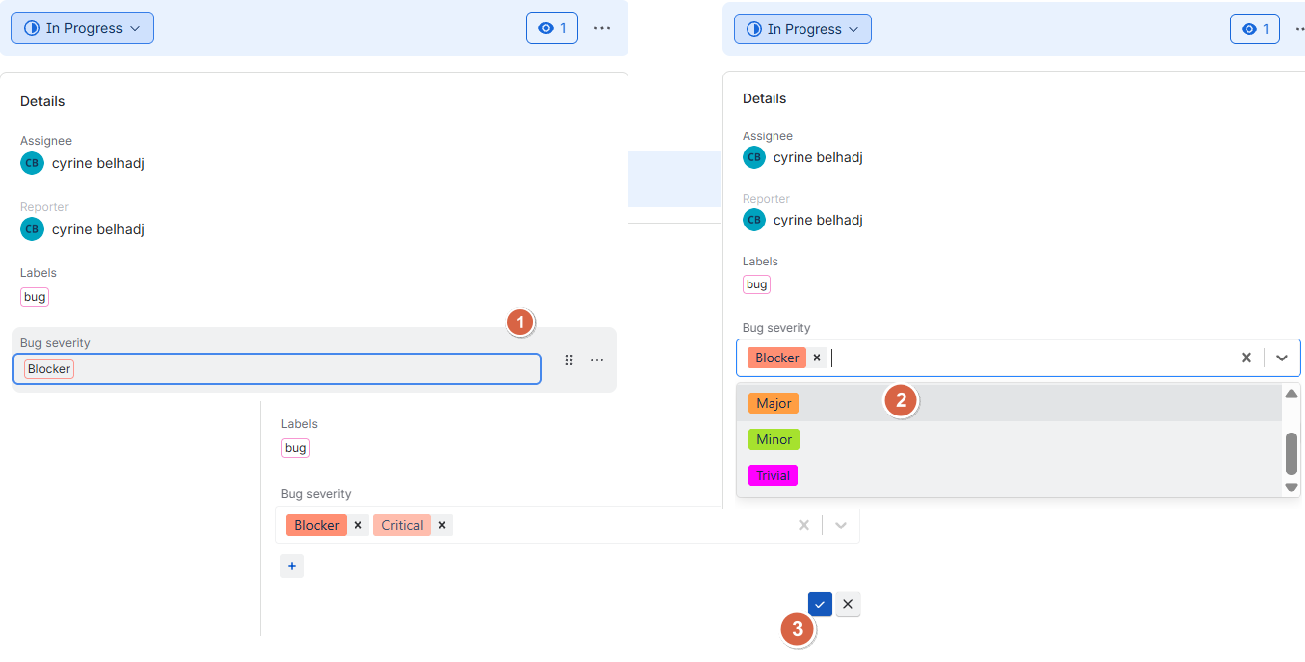
To modify the labels assigned to a work item:
-
Click the Labels field to display the available label options.
-
Select the label options you want to add or update.
-
Click the checkmark (✓) to save your changes.
Removing a Label
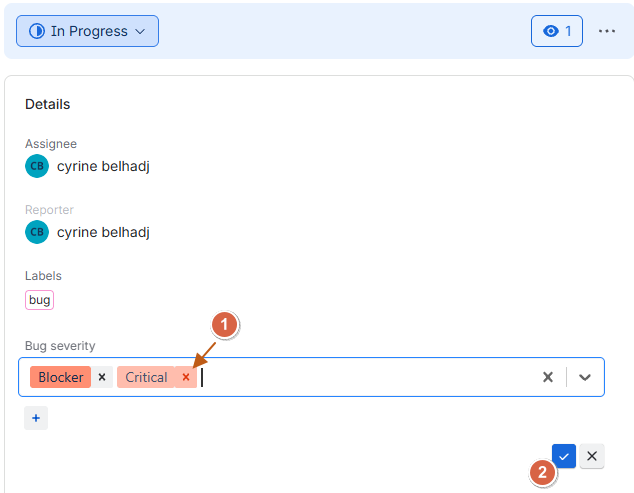
To remove an existing label:
-
Click the Labels field to display the available label items.
-
Locate the label you want to remove.
-
Click the remove (*) icon next to the corresponding label item.
-
Click the checkmark (✓) to save your changes.
Creating a New Label Item
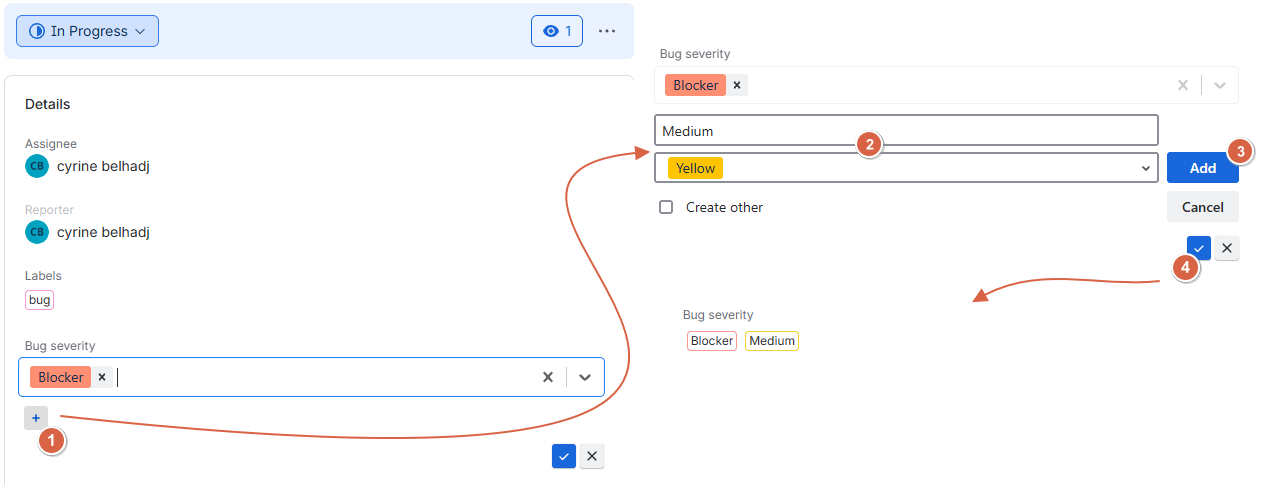
You can also create a new label item directly from the work item view without leaving the page.
-
Click the Labels field.
-
Click the + (Add) icon to open the label creation options.
-
Enter the desired label name.
-
Choose a color for the new label.
-
Click Add to create the label item.
Once created, the new label item is automatically added to the work item and becomes available for future use.
Conclusion
With Colored Label Manager for Jira, managing colored labels at the work item level is quick and straightforward. You can create, edit, and remove label items directly from your work items, making it easier to organize information and maintain consistent visual categorization across your Jira projects.
Need help?
💡 We're here for you! If you have questions or need to report a bug, visit our Help Center and raise a support ticket. Our team is ready to assist you!