
My optimizer is an Atlassian Forge app that gives org admins a single interface to manage users, groups, and product licenses in order to automate the suspension of inactive accounts to keep costs under control.
1-Authentication
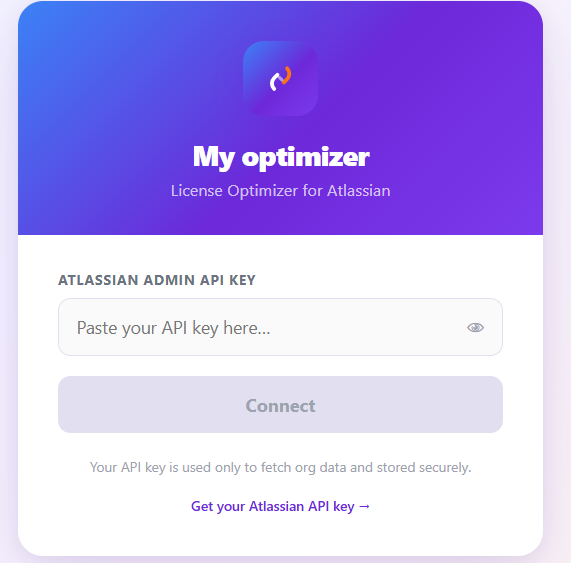
My optimizer connects to your Atlassian organization using an Admin API key. This key is used exclusively to fetch and manage your org data, and is stored securely in Forge's encrypted storage, never shared or exposed.
How to generate your API key:
-
Click the “Get your Atlassian API key button or o to admin.atlassian.com
-
Select your organization
-
Navigate to Settings → API keys
-
Click Create API key, give it a name, and set an expiry date
-
Copy the key and paste it into the field above
Important: Keep your API key in a safe place. It will no longer be displayed after you leave the creation page.
2-Dashboard
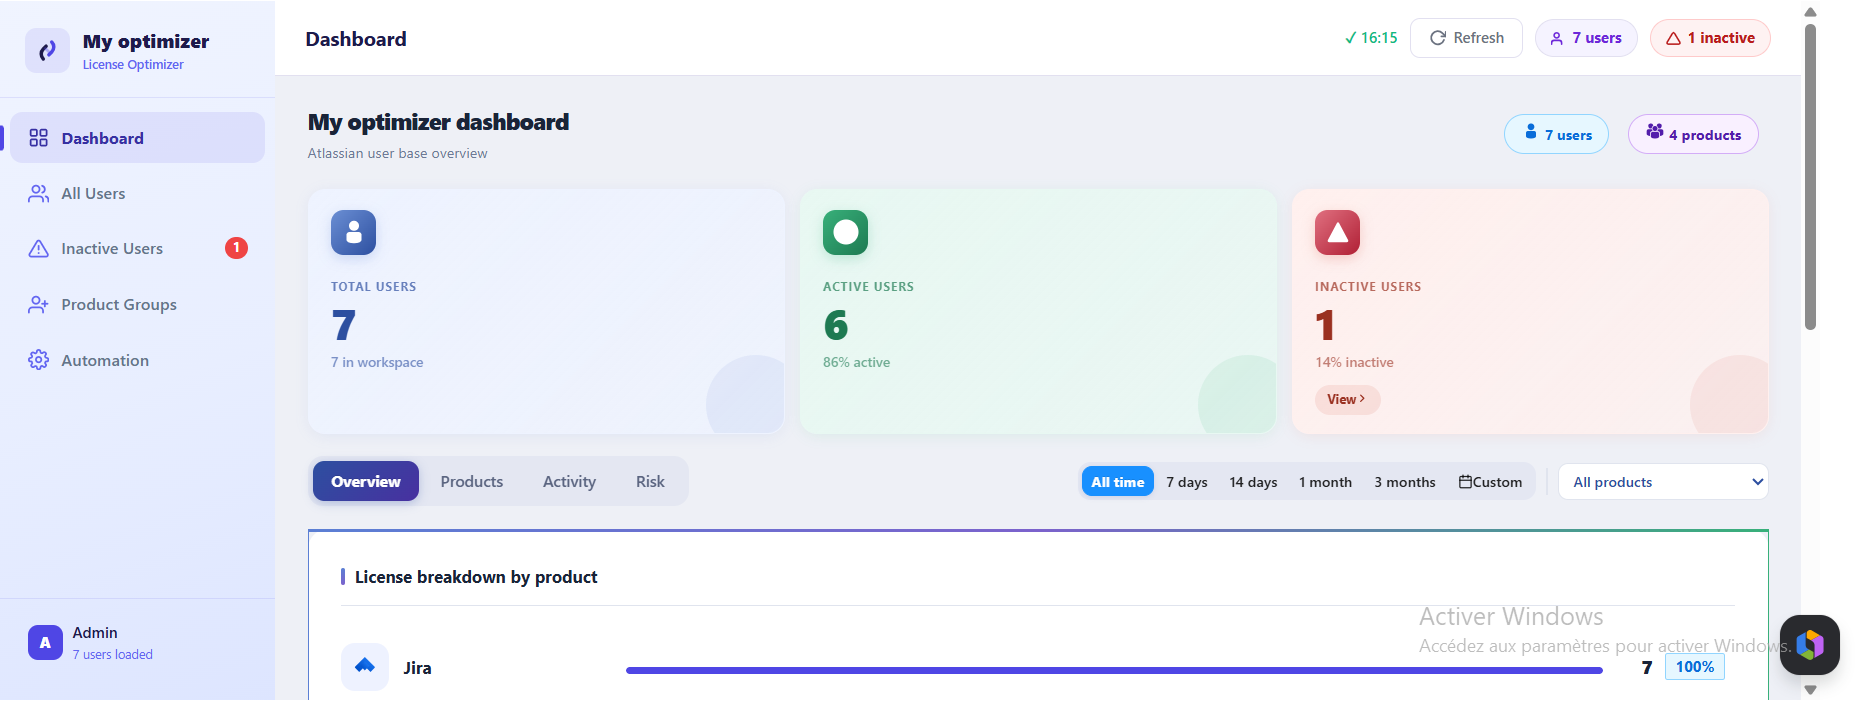
What you see on the Dashboard
At the top of the screen, 3 summary cards display:
-
Total Users : total number of users in your workspace
-
Active Users : currently active users (with activity percentage)
-
Inactive Users : inactive users (with percentage and a View > button to access them directly)
3-Manage users
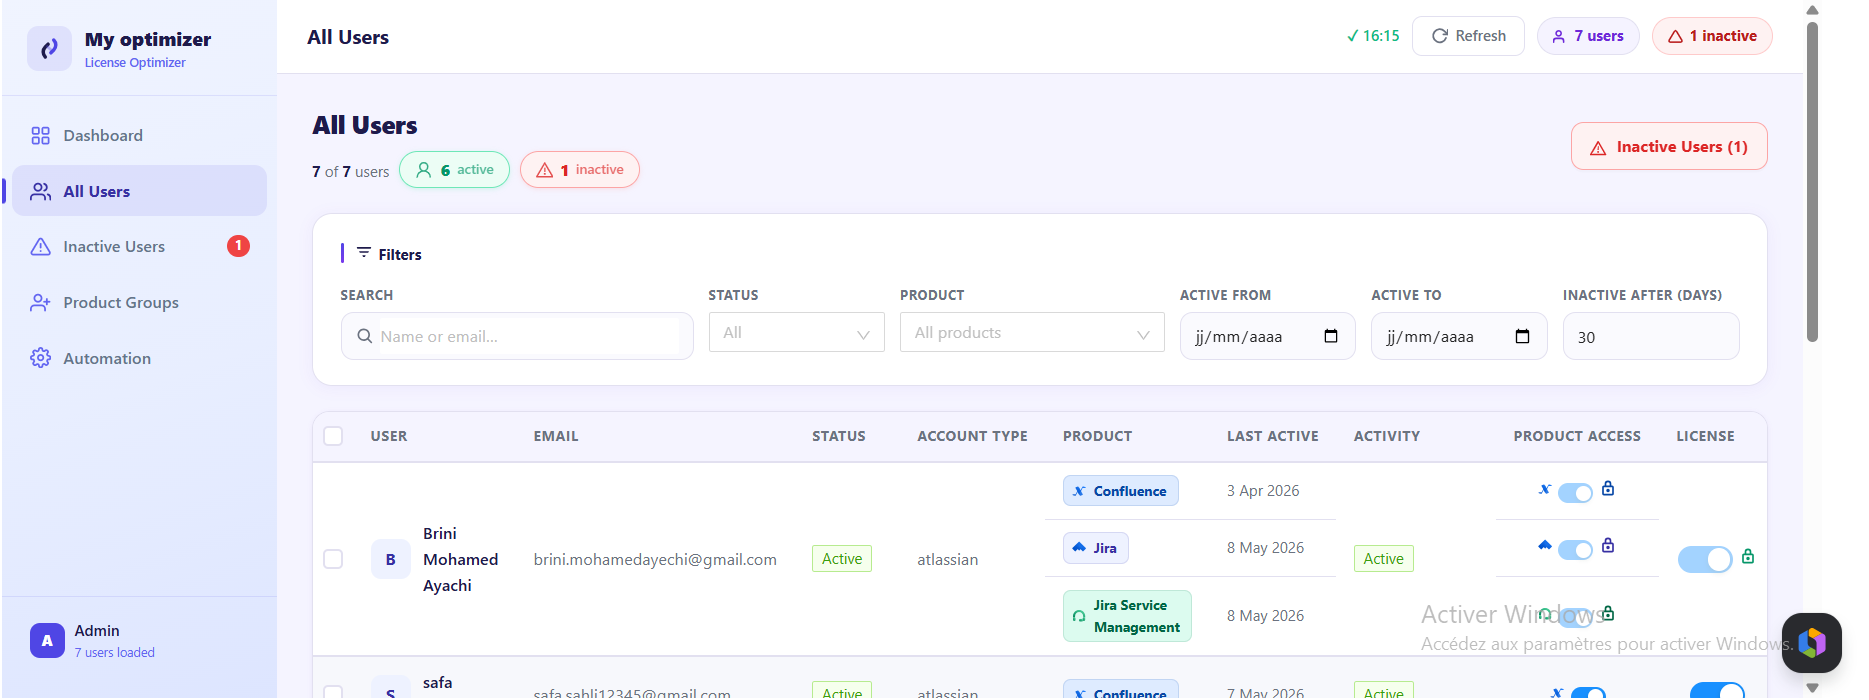
search for users
Use the Filters bar to search for users by name, email, status, product, activity period, or inactivity threshold.

enable/disable license
Use the toggles to revoke a user's access, disable individual products (Confluence, Jira...) or turn off the main toggle to revoke all access at once.

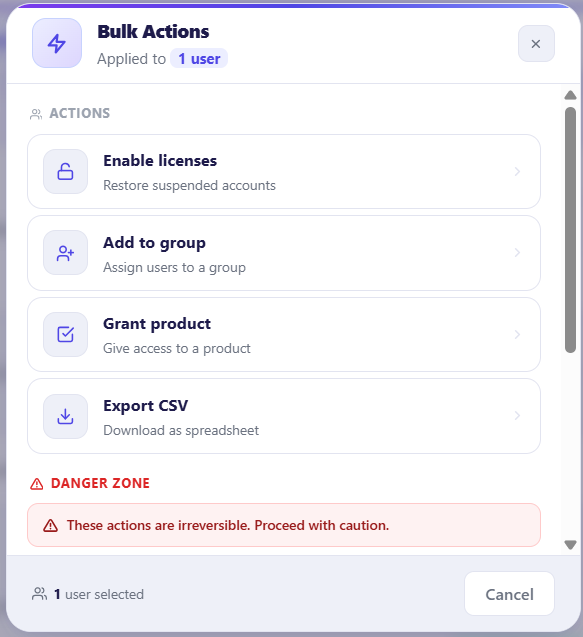
Bulk action
Apply actions to multiple users at once.
Steps:
-
Check the checkbox next to each user you want to select
-
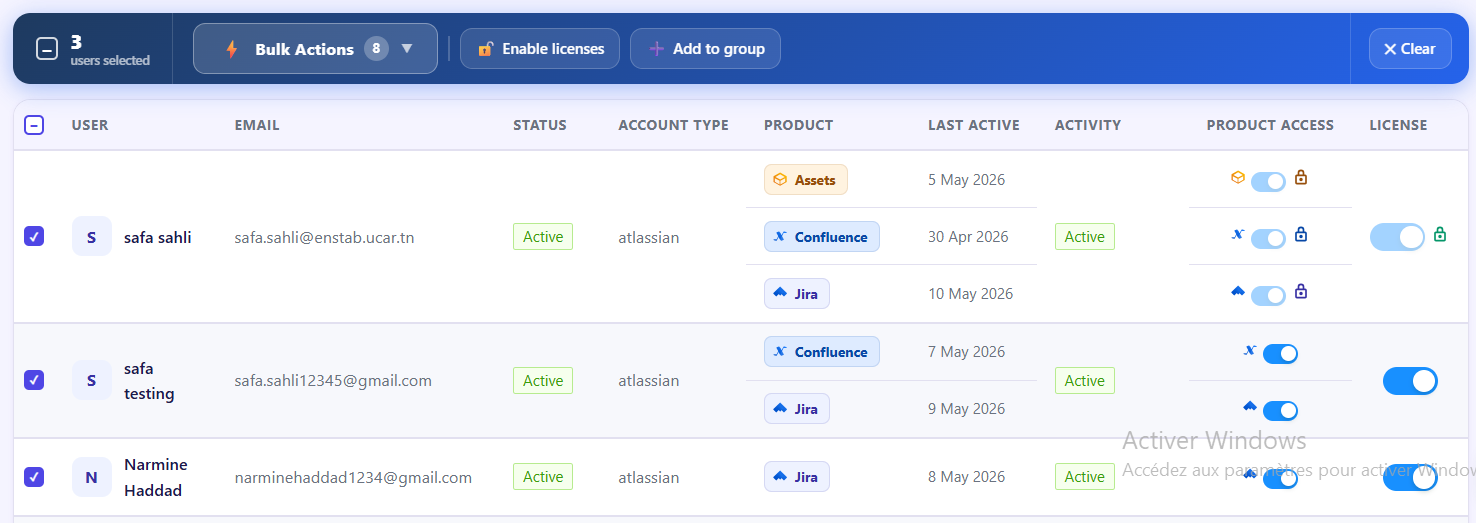
The bulk action bar appears at the top showing the number of selected users
-
Click Bulk Actions to open the full actions panel, or use the quick buttons (Enable licenses / Add to group)
-
Choose an action:
Standard actions:
-
Enable licenses activate licenses for selected users
-
Add to group assign users to a group
-
Grant product give product access
-
Export CSV export selected users data
Danger Zone:
-
Disable licenses deactivate licenses
-
Remove from group remove users from a group
-
Revoke product remove product access
-
Remove all access strip all access at once
-
Click Clear in the top bar to deselect all users
Add a user to groups
The Manage Groups option lets you assign a user to one or more groups directly from the user list.
Steps:
-
In the user row, click the Actions menu
-
Click Manage groups
-
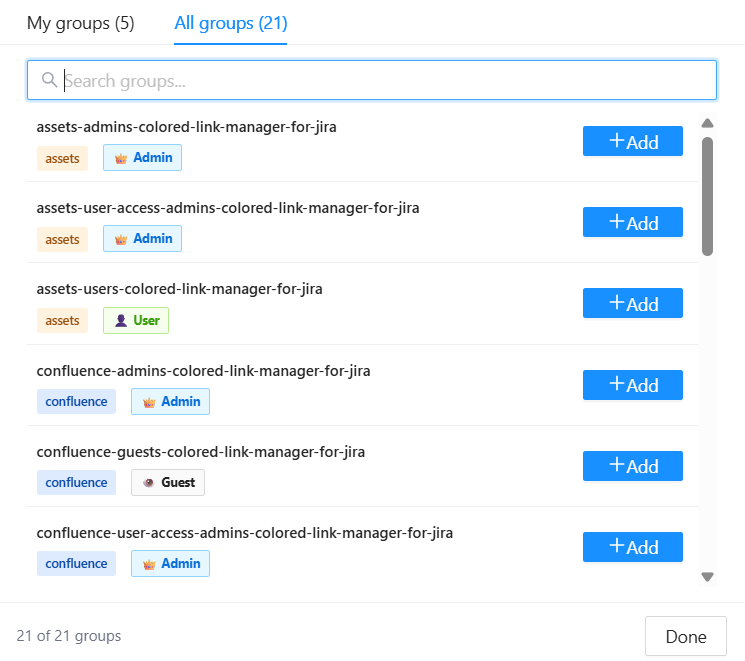
In the group panel, click the All groups tab to see all 21 available groups
-
Use the Search groups... bar to quickly find a specific group
-
Click the + Add button next to the desired group
-
Repeat for any additional groups you want to assign
-
Click Done when finished
The My groups tab shows only the groups the user is already a member of, useful to check current memberships before adding new ones.
Each group displays its product tag (e.g.
assets,confluence) and role badge (Admin, User, Guest) so you can easily pick the right one.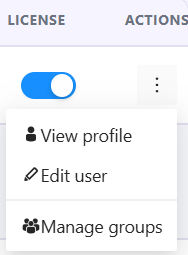
view inactive users
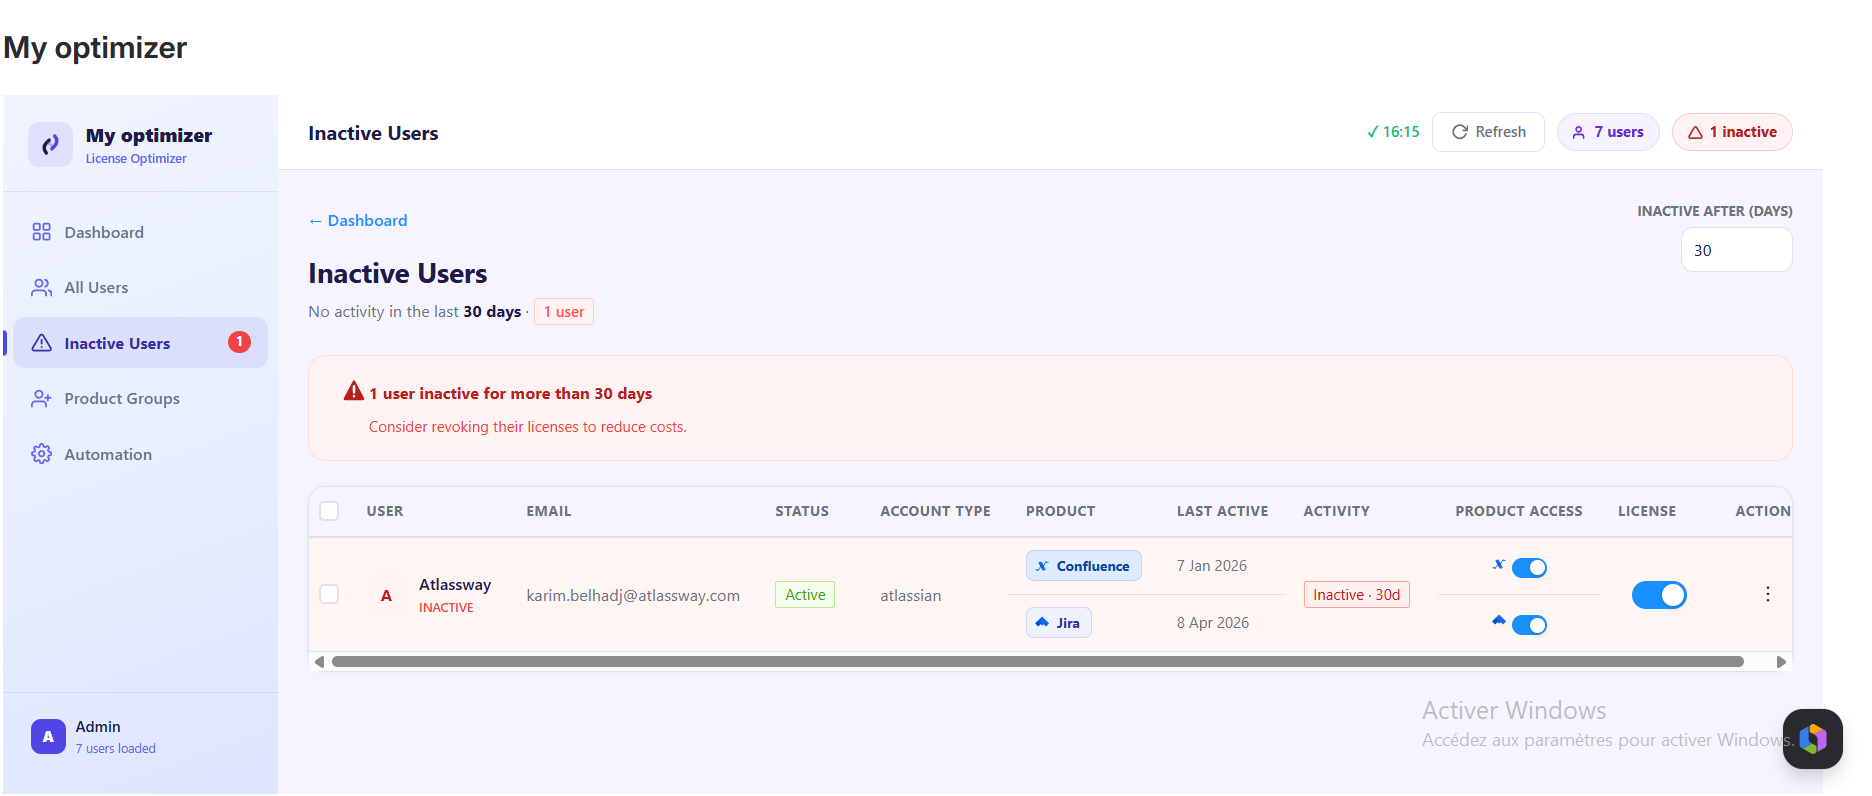
Use the Inactive After (Days) field to filter users who haven't logged in for a specified number of days , the default is set to 30 days.
4-Manage groups
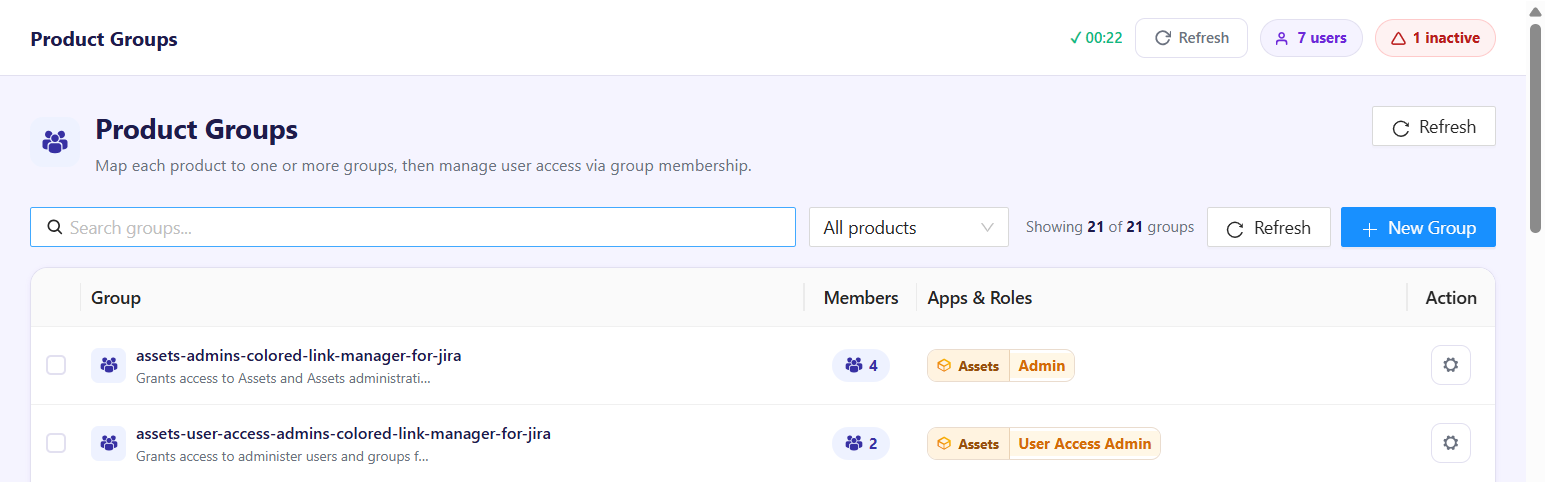
Map products to groups and manage user access via group membership.
Steps:
-
Go to the Product Groups page
-
Use the Search bar or filter by product to find a group
-
Click + New Group to create a new group
-
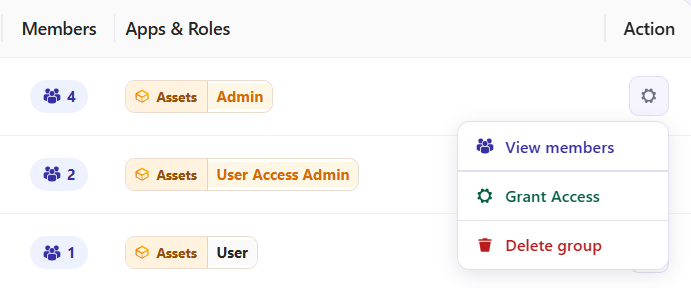
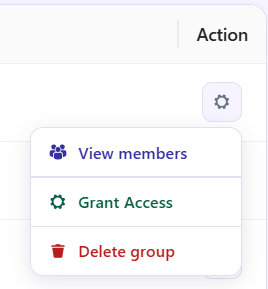
Click the button Actions icon on any group row to:
-
View members see who's in the group
-
Grant Access assign product access to the group
-
Delete group permanently remove the group
-
-
Click Refresh to sync the latest group data
Create a New Group
Steps:
-
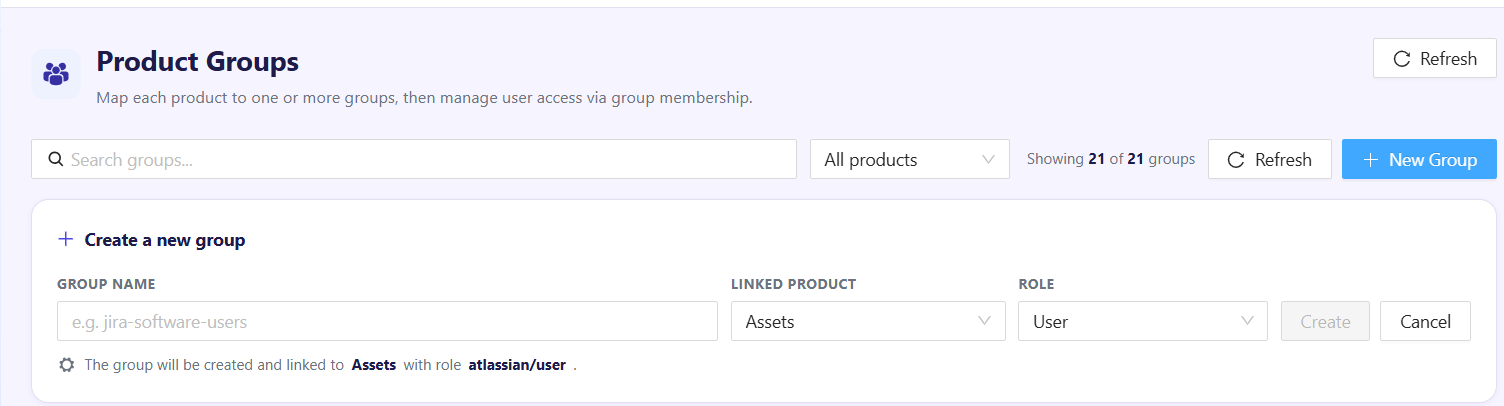
Click + New Group
-
Enter a Group Name (e.g.
jira-software-users) -
Select a Linked Product (e.g. Assets, Confluence, Jira...)
-
Select a Role (e.g. User, Admin, Guest...)
-
Click Create
Grant Access to Group
Assign one or more products to a group, each with its own role.
Steps:
-
Click the button Actions icon on the desired group
-
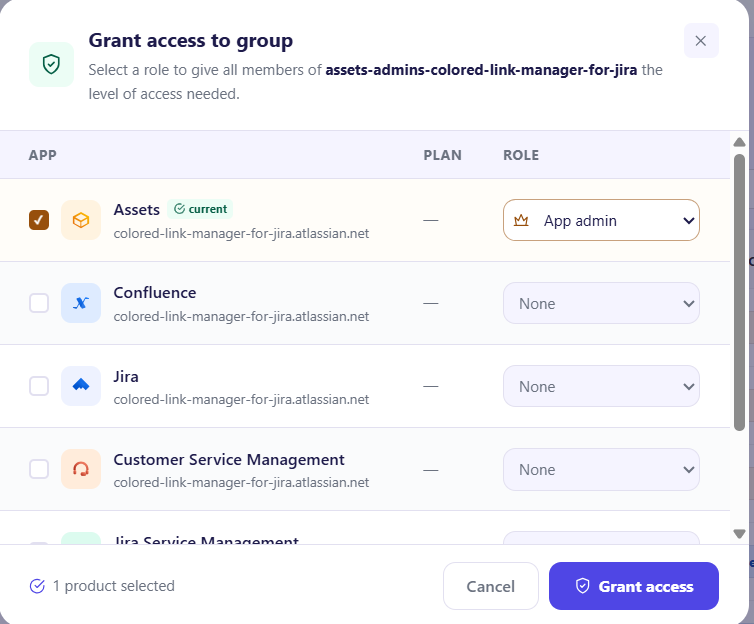
Click Grant Access
-
In the modal, check the products you want to grant access to
-
For each selected product, choose a Role from the dropdown (e.g. App admin, User, None...)
-
Click Grant access to confirm
You can select multiple products at once,each product gets its own independent role within the same group.
The current badge indicates a product already linked to the group.
Add/remove members
Manage who belongs to a group directly from the group panel.
Steps:
-
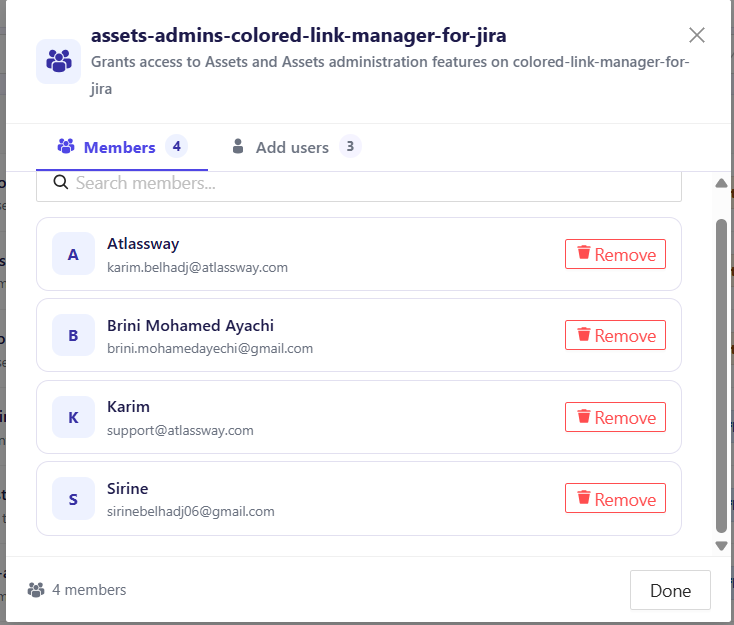
Click ⚙️ Actions → View members
-
Switch to the Add users tab to see users not yet in the group
-
Use the Search bar to find a specific user
-
Click + Add next to the desired user
-
Click Done when finished
The Members tab shows current members, you can remove them from there. The Add users tab shows only users who are not yet in the group.
bulk group actions
Apply actions to multiple groups at once.
Steps:
-
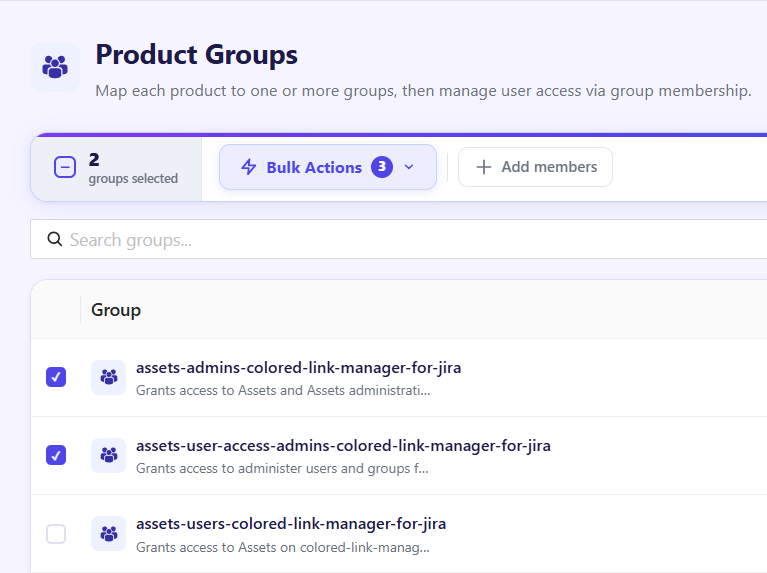
Check the checkbox next to each group you want to select
-
The bulk action bar appears showing the number of selected groups
-
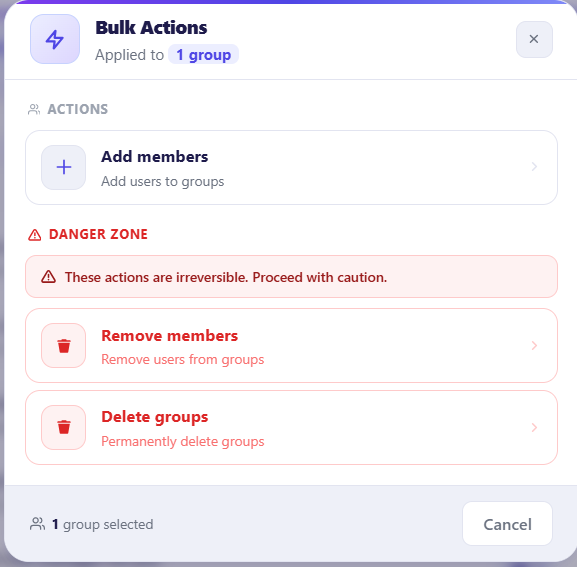
Click Bulk Actions or the quick button + Add members
-
Choose an action:
Standard actions:
-
Add members add users to the selected groups
Danger Zone:
-
Remove members remove users from the selected groups
-
Delete groups permanently delete the selected groups
5-Manage automations
1-Create a New Automation
Automate the suspension of inactive users in 4 steps: Basics → Criteria → Action → Schedule
Step 1 Basics
-
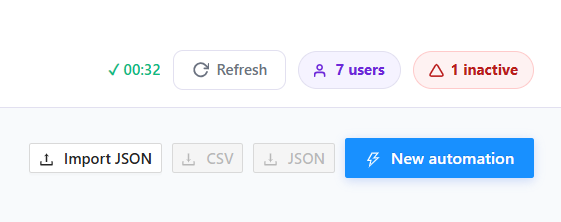
Click : New Automation
-
Enter a Name and optional Description
-
Click Continue →
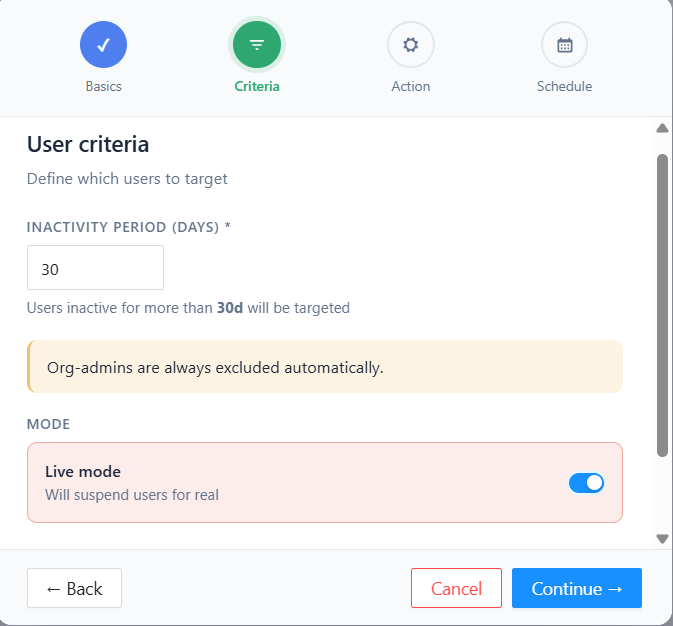
Step 2 Criteria
-
Set the Inactivity Period (days) (default: 30)
-
Choose the Mode:
-
Live mode suspends users for real
-
(toggle off for dry run / test mode)
-
-
Use Exclude Specific Users to protect certain accounts from being suspended
-
Click Continue →
note : Org-admins are always excluded automatically.
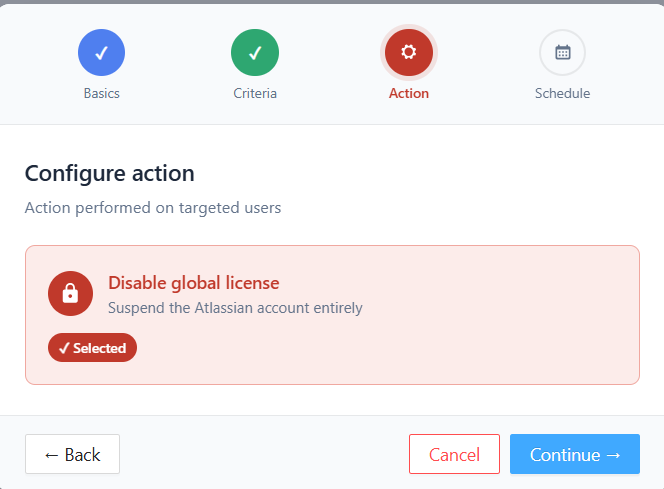
Step 3 : Action
(automatically set to suspend inactive users)
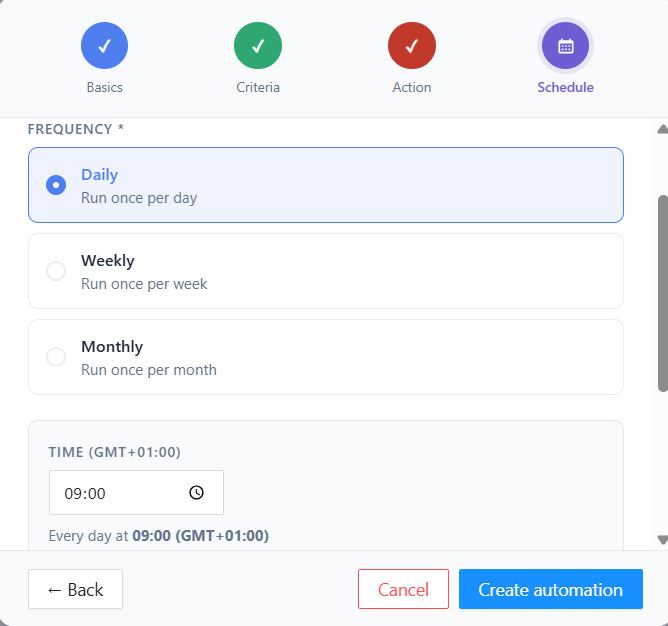
Step 4 Schedule
-
Choose the Frequency: Daily, Weekly, or Monthly
-
Set the Time (based on your timezone GMT+01:00)
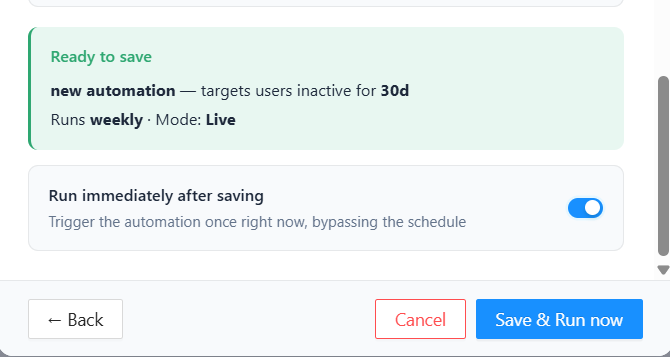
-
Review the summary card — confirms name, target, frequency and mode
-
Toggle Run immediately after saving if you want it to trigger right away
-
Click Save & Run now (or Create automation to save only)
Automation Logs
Track every automation run and see exactly what happened.
Steps:
-
Go to the Automation page and click the Logs tab
-
Each log entry shows: automation name, run date, mode (live), and a summary of suspended and skipped users
-
Click View → on any log to open the detailed report
-
The detail panel shows 3 counters:
-
Suspended : users that were suspended
-
Skipped : users ignored with a reason (e.g.
excluded email,org admin,recently active) -
Errors : any failures during the run
-
-
Click Clear all to delete all logs
💡 Skipped users always show a reason, so you always know why a user was not suspended.
Export Automation Rules
Export your automations as CSV or JSON for backup or sharing.
Steps:
-
Check the checkbox next to the automation(s) you want to export, the selection counter appears (
1 selected) -
Click ↓ CSV or ↓ JSON to download in your preferred format
You can also Import JSON to restore or transfer automations from another instance.
-20260510-105653.png?cb=187ca5a535f93293b6395dd3e69d1abe)